How to Make a Bump in Blender (Smooth, Sharp, Random etc...)
Learn how to quickly create various shaped bumps in Blender with a simple click, drag and scroll. Details below...
Patreon: https://www.patreon.com/MichaelBullo
With an object selected, enter Edit mode via the menu in the upper left corner or by pressing the Tab key.
To add extra vertices, right mouse click and choose Subdivide. Do this as many times as needed.
Enter Vertex Select mode by pressing the icon in the upper left corner or by pressing the number 1 on the keyboard. Select a vertex by clicking on it or select multiple vertices by clicking and dragging.
Pressing the G key enters into Move mode. Move the mouse to move the selected vertex/vertices. Press the left mouse button to commit the change or press the Escape key to abort.
While in move mode, pressing the Z key will restrict movement to the vertical axis. Pressing X or Y will restrict movement to those axes.
Proportional Editing is activated via the button with an icon that has a circle contained within a ring. While in this mode, moving a single selected vertex will also proportionally adjust the surrounding vertices. The amount by which the surrounding vertices move is dictated by the options contained within the drop-down menu to the right of the Proportional Editing button. Shapes include Smooth, Sharp and Random.
Видео How to Make a Bump in Blender (Smooth, Sharp, Random etc...) канала Michael Bullo
Показать
Комментарии отсутствуют
Информация о видео
Другие видео канала
 Easily Create Light or Dark Versions of Colors in Photoshop
 Add Contrast Quickly in Photoshop (With Single Slider)
 How to Round Corners in InDesign (Rounded, Fancy, Bevel, Inset & Inverse Rounded)
 How to Add Film Grain in Photoshop
 How to Move Around InDesign Documents While Editing Text
 How to Disable a Layer Mask in Photoshop
 Temporarily Maximise any Panel in After Effects (Tilde Key)
 How to Create Evenly Spaced Concentric Circles in Illustrator
 How to Update a Graphic Style in Illustrator
 How to Work Non-Destructively in Illustrator
 How to Color Alternate Rows in InDesign Tables (Alternating Fills)
 Create a Mirror Image Effect in Photoshop
 Draw Pac-Man in Illustrator in 13 seconds
 Arrange Tools in Photoshop in Two Columns (Great for Small Screens)
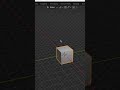 How to Make Blender Background Transparent #Shorts #Blender #Transparent #Background
 Increase Size of Vector Handles in Illustrator
 Add All or Selected Colors to Illustrator Swatches Panel
 Turn Off Video Previews on Photoshop Tools (Hide Rich Tooltips)
 Drag out a copy of anything with the mouse in Photoshop
 Get Back Quality Slider in Export As in Photoshop (Lose Drop Down Menu)
 What Does This Button Do in InDesign? (Split Window)