How to Save Images in Photoshop | Beginner Tutorial
www.TheArtofRetouching.com - Saving Images
When you’re all set and good to go with the changes you’ve made in your image, the most important thing is to know how to save your file properly. You wouldn’t want to lose all that hard work, would you?
Let’s say you want to save your file with all its layers and adjustments as they are, for archiving purposes. When you go to File – Save As, you get a whole bunch of format options to choose from.
Most of these options aren’t really all that useful. Some of the available formats are for video, some are for 3d, and some are even old and outdated. But if you want to save your file for archiving, you can save it as a PSD Photoshop file, or a TIF file. Personally, I prefer saving files under the TIF format because it has more advanced abilities. However, at this point for you, either is fine.
The file type you want to use really depends on your purposes. If you’re saving the file and sending it over as a full size image image, you can flatten your layers and save your file as a TIF. But if you’re saving it for the Web, you should use the smaller JPEG format. It’s great for uploading on websites and sending via email, but it’s not for long-term storage because saving an image as a JPEG damages the file and throws away excess colors and data.
Saving as PSD (Photoshop Document)
When you save a file as PSD, you have the option to “Maximize Compatibility”.
Ticking this box will make your file larger, but it allows older versions of Photoshop and other software to open your file, hence the compatibility.
Saving as TIF
When you save a file as TIF, a dialog box opens with a variety of options.
What’s important is to click the radio button that says “LZW” under Image compression. This makes your image smaller without damaging it. The rest of the options can be ignored.
Unlike JPGs, TIFs will not damage your files, and has the ability to keep all the layers and effects.
Saving as JPEG
There are a number of “JPEG” file options when you save, but you only need to concern yourself with the first one under the dropdown menu.
When the dialog box opens, you’ll notice the slider for Image Quality. The lower this number is, the more similar colors the JPEG throws away, effectively damaging your photo.
For example, if you have Blue Shade 1, 2, and 3, the JPEG format decides that Blue Shade 1 and 2 are similar and will opt to throw Blue Shade 2 away, leaving your image with just Blue Shade 1 and 3. The discarded colors do make your file smaller though, so it’s perfect for Web uploading and sending. Not so good for the framed sunset print, however.
If you want to know more about different file formats and compression, just head on over to www.theartofretouching.com for an extremely informative collection of tutorial videos that will make you a better photo retoucher.
Видео How to Save Images in Photoshop | Beginner Tutorial канала The Art of Retouching Studio
Показать
Комментарии отсутствуют
Информация о видео
5 декабря 2014 г. 23:16:34
00:05:00
Другие видео канала
 Smart Objects and Smart Filters - Photoshop Tutorial
 What is the Bit Depth of an Image? | Image Bit Depth Explained | 8-Bit vs. 16-Bit
 Adjustment Layers - Photoshop Tutorial
 Info Palette | Photoshop Beginner's Tutorial
 Magic Wand - Quick Selection Tool | Photoshop Tutorial
 Color Range for Masking - Photoshop Tutorial
 Smart Objects and Smart Filters for Photoshop
 How to Succeed as a Freelancer – Part 1 | Self Employment for Beginners
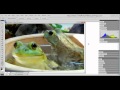 Photoshop Tutorial - Palettes Preview
 Adobe Camera Raw's Output Options - Photoshop Tutorial
 How to Succeed as a Freelancer Part 2 | Self Employment for Beginners
 How to Succeed as a Freelancer Part 3 | Self Employment for Beginners
 Photoshop Tutorial | DIfference among JPG & RAW Files
 Photoshop Tutorial -- What Are JPGs?
 Digital Fundamentals - RAW vs. JPEG
 Photoshop Raw Tutorial | RAW File Format
 Navigator Palette, Hand & Zoom Tools | Photoshop Beginner's Tutorial
 Behind the Retouching | John Ross - Celestial
 Adobe Camera Raw Adjustments - Photoshop Tutorial
 Pictocolor iCorrect EditLab 6 Review
 Digital Fundamentals - Tonal Range, Levels and Curves