Navigator Palette, Hand & Zoom Tools | Photoshop Beginner's Tutorial
Here I will teach you the basic functionality of navigator palette, hand & zoom tools in adobe photoshop. For more videos please visit www.TheArtofRetouching.com
Photoshop Tutorial -- Navigator Palette, Hand Tool, and Zoom Tool
When it comes to navigating around your image, there are two tools and one palette that will come in really handy. This video will walk you through how to use the Navigator Palette, Hand Tool, and Zoom Tool. These are some of the most basic items in Photoshop, and they are really easy to use. Except maybe the Zoom Tool (otherwise known as the Magnifaction Tool). Adobe broke it in back in CS4, but I will show you how to make it work like it used to, in case you find that you hate it as much as I do.
The Zoom Tool
At the bottom part of your tool palette, you will see an icon that looks like a magnifying glass. As you may have guessed, this is referred to as the Zoom tool or the magnification tool. Clicking on it will change your cursor into a small magnifying glass with a plus sign inside, which means that you can now zoom into an image you've opened in Photoshop.
Zooming In -- Notice that on the top bar on the zoom tool's options, there is a checkbox that says "Scrubby Zoom". This means that when you click and hold down on your mouse cursor, Photoshop is going to keep zooming in on your photo until you let go. You can also click and drag on your image to zoom it in and bring the image closer to you until you stop dragging. To me, it feels like I am on some roller coaster. Honestly, I personally like to just uncheck the "Scrubby Zoom" box and turn it off.
What happens now is that when you click and drag on your photo, it's going to create a marquee and zoom in only on that particular part of the image that you want, instead of zooming in forever upon dragging the mouse. Now isn't that much easier to use?
Zooming Out -- If you want to return to the un-zoomed image, you can always hit Ctrl-0 / CMD-0 (PC/Mac) on your keyboard to have the image fit itself to the window size.
Zooming out is just as easy. You can either click on the icon on the options bar that shows a magnifying glass with a minus sign on it, or, with your magnifying glass icon set to the plus sign, you can simply hold down the Alt key. Holding down the alt key while using a plus-signed magnifying glass will change to a minus, and help you zoom out of your picture.
The Hand Tool
Often when we zoom into something, we'd like to get a little bit of a handle on it, so being able to move the image around is a big plus. The hand tool helps you do just that. With the hand tool selected, you can click on a particular part of an image and drag it around, helping you focus on an area that you want to work on.
Another of the most common keyboard sjortcuts would be the SpaceBar, as it changes in to the Hand Tool for easy navigation.
Navigator
If you want to go a step further, you can go to Window -- Navigator. This opens up a palette that shows you the whole image you're working on with a small red rectangle inside, telling you where you are in an image. You can also use the slider in the Navigator to zoom in and out of your image.
Видео Navigator Palette, Hand & Zoom Tools | Photoshop Beginner's Tutorial канала The Art of Retouching Studio
Показать
Комментарии отсутствуют
Информация о видео
25 июля 2014 г. 1:33:36
00:04:05
Другие видео канала
 Smart Objects and Smart Filters - Photoshop Tutorial
 What is the Bit Depth of an Image? | Image Bit Depth Explained | 8-Bit vs. 16-Bit
 Adjustment Layers - Photoshop Tutorial
 Info Palette | Photoshop Beginner's Tutorial
 Magic Wand - Quick Selection Tool | Photoshop Tutorial
 Color Range for Masking - Photoshop Tutorial
 Smart Objects and Smart Filters for Photoshop
 How to Succeed as a Freelancer – Part 1 | Self Employment for Beginners
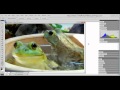 Photoshop Tutorial - Palettes Preview
 Adobe Camera Raw's Output Options - Photoshop Tutorial
 How to Succeed as a Freelancer Part 2 | Self Employment for Beginners
 How to Succeed as a Freelancer Part 3 | Self Employment for Beginners
 Photoshop Tutorial | DIfference among JPG & RAW Files
 Photoshop Tutorial -- What Are JPGs?
 Digital Fundamentals - RAW vs. JPEG
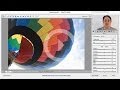 Photoshop Raw Tutorial | RAW File Format
 Behind the Retouching | John Ross - Celestial
 Adobe Camera Raw Adjustments - Photoshop Tutorial
 Pictocolor iCorrect EditLab 6 Review
 Digital Fundamentals - Tonal Range, Levels and Curves