How to Sew an Art Quilt | Leaves & Bindings | WF 6 | Zazu's Stitch Art Tutorials
In this video, we bind our Wall Flowers quilts and carefully free-motion quilt our leaves, including any that stick off the edge of the quilt. But art gets complicated...
0:00 Intro & Understanding how we do the leaves that DON'T stick off of the wall piece. BASIC LEAF: 1) Stitch VEINS; 2) STUFF (not shown yet); 3) Stitch BORDER; 4) STIPPLE flat areas; 5) TRIM
0:48 My leaf is marked in chalk and needs to be at least the width of my binding away from the edge. Four of my leaves don't stick off the edge.
1:40 I've painted around my leaves since last time. Don't forget to HEAT-SET according to manufacturer's instructions as shown in Wall flowers 5 at time stamp 11:20: https://youtu.be/FUsQLy-tYFc?t=678
2:03 CHALK MARKINGS are less problematic than sewing marking pens, which can become permanent if you heat them by accident. Also, it can take a few tries to remove the marks with water as directed.
2:52 I stitch my VEINS with taupe threa dbecasue I plan to paint them brown. You could just end you leaves at the edge of the quilt if this project is a struggle for you and you want to scale back a little.
3:50 Cutting little batting strips and using them to STUFF around the veins with a chopstick. Don't overstuff or your quilt will buckle.
4:48 A buckled edge can be improved a little with slight gathering before you bind the edge.
5:10 Our flowers are another informal TRAPUNTO element.
5:40 I stitch my BORDERS and STIPPLE areas, only stitching up to the stuffing, not up onto it.
6:42 Then I TRIM as usual.
6:59 These techniques are rooted in COLLAGE, so overlapping is assumed, but we need to stop short of damaging our machines. We can reduce layers, alter the order of construction, or use "grading" to relieve stress on our machines. But veer off and make you piece something different if you really want to.
7:45 SPLIT CONSTRUCTION: to construct part of an element before something and the other part afterward. Related to futzing, or fiddling with your leaves until you make them work.
8:36 WASH your quilt with a scrap of batting and you rbacking or leaf fabric. DRY on high heat to shrink. STEAM PRESS from behind. TRIM FRAY including around the edge of the quilt and then re-steam and BLOCK overnight.
9:49 OVERVIEW of FOUR TYPES of BINDINGS: 10:04 DOUBLE BINDING adds 6 layers. 10:53 SINGLE BINDING adds 4 layers. 11:21 RAW-EDGE BINDING adds 3 layers. 11:52 TWO-SIDED RAW-EDGE BINDING adds 2 layers of fabric.
12:17 I recommend that you do not stitch through your binding. Please AVOID STITCHING TOO MANY LAYERS!!!!
13:03 I do a DOUBLE BINDING using FUSIBLE THREAD. Please refer to these videos for more complete instructions: 4 Pin Fusible Thread Quilt Bindings | Binding Art Quilts https://youtu.be/GujI4OimyC4 and Wavy Bindings | Expansion of 4-pin fusible bindings: https://youtu.be/vpYp7H6s21Y
14:43 Understanding how we do the leaves that DO stick off of the wall piece. LEAF - SPLIT CONSTRUCTION looks harder than it is. You could make your leaf tips before sewing the leaves on under the flowers petals if you prefer.
17:11 Leaf layering plan: LEAF FABRIC - BATTING - THICK STABILIZER - BACKING, all with Stitch Witchery between. You have to fuss with this a little.
19:11 Then FUSE IT TOGETHER. I darkly mark the inside edge of the binding as well as the other elements.
19:33 Fold the quilt back out of your way.
19:51 Using tweezers to help grasp the tip of the leaf as needed, free-motion the BORDER right along the edge of the batting of the leaf tip. Stitch on the tip past the line that denotes the inside edge of the binding. Add STIPPLING. These are your "A" stitches. Trim around the leaf tip.
20:03 I stuff part of my leaf tip.
20:55 Fold leaf flat onto the quilt. Without stitching onto the binding. Trim out excess batting.
22:19 Add more stuffing around the vein. Then complete your "B" stitches, switching threads if needed.
23:11 Trim. Brush. Trim some more.
24:09 Hand sew leaf binding. We will do more next time.
Please like. Subscribe. Comment. Ask Questions.
Raw Edge Applique Playlist:https://www.youtube.com/playlist?list=PLaGo_8Zz-f0Zm4f5p9EL-QqhibfjwBta6
To check out my fiber art techniques playlist: https://www.youtube.com/playlist?list=PLaGo_8Zz-f0ZlD3jxlDP_TAN-QbMmwHbt
Art Bag OUT Recycled IN Jeans-lined Tote Series: https://www.youtube.com/playlist?list=PLaGo_8Zz-f0Zm4f5p9EL-QqhibfjwBta6
Homemade to Handmade: https://youtu.be/--npARjukAA
My most popular gift project: https://youtu.be/VEOw8Xu0ncY
Visit my new online course, QUILT A NIGHT TIME LANDSCAPE (USE 20% OFF PROMO CODE: 3NIGHT3V Exp. 12/31/2020) https://coursecraft.net/courses/z925d/splash
Web home page: https://www.zazusstitchart.com/
Curated sewing shop: https://www.zazusstitchart.com/curated-sewing-shop/
My Esty Shop: https://www.etsy.com/shop/ZazusStitchArt
Support the tutorials through Paypal: https://www.paypal.com/cgi-bin/webscr?cmd=_s-xclick&hosted_button_id=WGEUHFN73ERPA&source=url
Видео How to Sew an Art Quilt | Leaves & Bindings | WF 6 | Zazu's Stitch Art Tutorials канала Zazu's Stitch Art
Показать
Комментарии отсутствуют
Информация о видео
Другие видео канала
 How to Sew an Art Quilt | Finishing Up | WF 7 | Zazu's Stitch Art Tutorials
 Using My Scraps to Create New Fabric
 Raw Edge Applique | # 2 Intuitive Sewing Basics | Art Quilting | Advanced Tutorial
 McKenna Explains Her Applique Quilt Method (Fons and Porter)
 Free-Motion Quilt Binding & Fix Flaws | Part 7 Landscape Quilting Tutorial | Fiber Art by Zazu
 Cosmetic Bag #1 | Moderate Gift Project | Zazu's Stitch Art Tutorials
 Art quilts from Photos: Episode 1
 Helen Godden Studio Tour | Celebrating 10 years with Handi Quilter
 Mountain Lake Landscape Fall 2019
 Upcycled: Montana Quilter Sews Old Clothes Into Treasured Keepsakes | Zazu's Stitch Art Presents
 How To Make A Fabric Whimsy Girl For Your Art Quilts
 Fabric Painting Mountains | Part 1 Landscape Quilting Tutorial | Fiber Art by Zazu
 How to Sew an Art Quilt WF 5 | Attach Flowers | Zazu's Stitch Art Tutorials
 How to Sew an Art Quilt WF 1 | Plan & Lay Out Background | Zazu's Tutorials
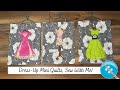 Sew With Me, Mini Dress-Up Quilts
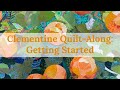 Clementine Collage Quilt: Tutorial no. 1
 Fabric Postcards & Greeting Cards | Use What You Have | Zazu's Stitch Art Tutorials
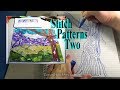 8 More Stitch Patterns for Creative Sewing (SP#2) | Wall Flowers Supplement | Zazu's Tutorials
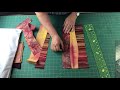 Improv Quilting