- Популярные видео
- Авто
- Видео-блоги
- ДТП, аварии
- Для маленьких
- Еда, напитки
- Животные
- Закон и право
- Знаменитости
- Игры
- Искусство
- Комедии
- Красота, мода
- Кулинария, рецепты
- Люди
- Мото
- Музыка
- Мультфильмы
- Наука, технологии
- Новости
- Образование
- Политика
- Праздники
- Приколы
- Природа
- Происшествия
- Путешествия
- Развлечения
- Ржач
- Семья
- Сериалы
- Спорт
- Стиль жизни
- ТВ передачи
- Танцы
- Технологии
- Товары
- Ужасы
- Фильмы
- Шоу-бизнес
- Юмор
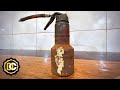
Antique 1960 Broken Table Fan - Restoration - WorkshopDC
#Restoration #WorkshopDC #ASMR #TableFan
Antique 1960 Broken Table Fan - Restoration - WorkshopDC
Hello guys, how are you doing?
In this video i show you how to restore a Antique 1960 Broken Table Fan, this was the biggest restoration that i every made, and a really hard one.
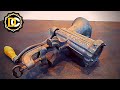
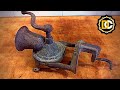
To this restoration i need a help of my wrenchs, screwdrivers, hammer, drill, wood lathe, vise, plier, bench grinder, wire brushes, and of course Mr. Fox.
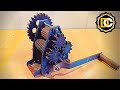
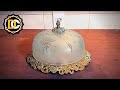
Now i start to disassemble all the Fan, some parts are really hard to take off, but everything goes well.
You can notice that some engine was broken and unfortunately i couldn't find a new one to replace.
Time to clean all the dirt parts, first i begin melting the old grease, the smoke smells like truck smoke and i like it 😂😂😂
After that i wash all parts with a strong degreaser, there was a lot of dirt on all the parts, and brush them to a better clean.
The degreaser was able to remove all the old paint, this paint was not the original one.
With all parts cleaned i begin to debend the case and the grid.
I washed the motor and rotor with penetrating oil, it was very good to clean this stuffs.
After that i start to restore the shovels, i filed some areas and smoothed the surface with sponge steel.
The broken base needs to be restored, so i leveled and make the new part on lathe, it turned out perfect.
To the rusted grid i used hydrochloric acid to remove the rust and glued the some spots with super glue off camera.
I also wire brush some parts to make it even more clean.
The case was with a lot of imperfections so i fill all with filler.
Mr. For remember that is aways need to use protection mask.
I polished the shovels to a nice finish but not a mirror one.
I glued the crack with super glue.
Time to paint the pieces, 2 coats of primer and 3 coats of Sea green.
Some parts i used 2 coats of clear coat to protection.
And for the grid 2 coats of primer and 2 coats of silver.
Now all ready to Assemble.
The assemble took me 3 hours to be perfect cause a use grease and is hard to find the rigth way to assemble all.
I also put a rubber base, the original had one like that.
I make a test on the motor while i assemble to make sure that it was working rigth.
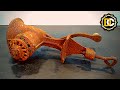
And done, restored!
I make a final test and wow, it was very strong.
Protection Equipments:
- Gloves;
- Goggles;
- Hearing Protection;
- Mask;
Products Used:
- Degreaser;
- Hydrochloric acid;
- Primer;
- Penetrating Oil;
- Spray Primer;
- Spray Sea Green;
- Spray Silver;
- Spray Clear;
Equipmentis used:
- BenchGrinder;
- BenchDriil;
- Plier;
- Wrenchs;
- Screwdriver;
-Wood Lathe;
Thanks for watching!
With Love - DC!
And if you notice some english mistake please tell me in the comments, english is not my main language.
I'm trying my best to make a better content for you, so don't forget to subscribe, comment, share, like and hit the bell notifications, it helps me a lot!
If you want to help the channel with any value, please make a Pix with this key - workshopdcdiy@gmail.com
My Instagram - https://www.instagram.com/workshopdcof/
My Facebook - https://www.facebook.com/workshopdcof
Видео Antique 1960 Broken Table Fan - Restoration - WorkshopDC канала Workshop DC
Antique 1960 Broken Table Fan - Restoration - WorkshopDC
Hello guys, how are you doing?
In this video i show you how to restore a Antique 1960 Broken Table Fan, this was the biggest restoration that i every made, and a really hard one.
To this restoration i need a help of my wrenchs, screwdrivers, hammer, drill, wood lathe, vise, plier, bench grinder, wire brushes, and of course Mr. Fox.
Now i start to disassemble all the Fan, some parts are really hard to take off, but everything goes well.
You can notice that some engine was broken and unfortunately i couldn't find a new one to replace.
Time to clean all the dirt parts, first i begin melting the old grease, the smoke smells like truck smoke and i like it 😂😂😂
After that i wash all parts with a strong degreaser, there was a lot of dirt on all the parts, and brush them to a better clean.
The degreaser was able to remove all the old paint, this paint was not the original one.
With all parts cleaned i begin to debend the case and the grid.
I washed the motor and rotor with penetrating oil, it was very good to clean this stuffs.
After that i start to restore the shovels, i filed some areas and smoothed the surface with sponge steel.
The broken base needs to be restored, so i leveled and make the new part on lathe, it turned out perfect.
To the rusted grid i used hydrochloric acid to remove the rust and glued the some spots with super glue off camera.
I also wire brush some parts to make it even more clean.
The case was with a lot of imperfections so i fill all with filler.
Mr. For remember that is aways need to use protection mask.
I polished the shovels to a nice finish but not a mirror one.
I glued the crack with super glue.
Time to paint the pieces, 2 coats of primer and 3 coats of Sea green.
Some parts i used 2 coats of clear coat to protection.
And for the grid 2 coats of primer and 2 coats of silver.
Now all ready to Assemble.
The assemble took me 3 hours to be perfect cause a use grease and is hard to find the rigth way to assemble all.
I also put a rubber base, the original had one like that.
I make a test on the motor while i assemble to make sure that it was working rigth.
And done, restored!
I make a final test and wow, it was very strong.
Protection Equipments:
- Gloves;
- Goggles;
- Hearing Protection;
- Mask;
Products Used:
- Degreaser;
- Hydrochloric acid;
- Primer;
- Penetrating Oil;
- Spray Primer;
- Spray Sea Green;
- Spray Silver;
- Spray Clear;
Equipmentis used:
- BenchGrinder;
- BenchDriil;
- Plier;
- Wrenchs;
- Screwdriver;
-Wood Lathe;
Thanks for watching!
With Love - DC!
And if you notice some english mistake please tell me in the comments, english is not my main language.
I'm trying my best to make a better content for you, so don't forget to subscribe, comment, share, like and hit the bell notifications, it helps me a lot!
If you want to help the channel with any value, please make a Pix with this key - workshopdcdiy@gmail.com
My Instagram - https://www.instagram.com/workshopdcof/
My Facebook - https://www.facebook.com/workshopdcof
Видео Antique 1960 Broken Table Fan - Restoration - WorkshopDC канала Workshop DC
workshop workshop dc restoration restore restoring workshopdc Restoration rescue restoretion recover workshop dc restoration workshopdc restoration restoration videos videos restoration wDCof Wdc0f asmr asmr restoration satisfying satisfying asmr sanding mirror polish fan table fan antique table fan cleaning brushing paint wood lathe lathe drill benchdrill wire brush bench grinder assemble disassemble how to Antique 1960 Broken Table Fan - Restoration - WorkshopDC
Комментарии отсутствуют
Информация о видео
12 сентября 2021 г. 20:00:03
00:31:35
Другие видео канала