How to install a centrifugal supercharger in a 96-97 4.6L Thunderbird, part 3 (parts installation)
Part 3 of a series from BadShoe Productions on installing a centrifugal supercharger in a 96-97 4.6L Thunderbird. This part shows installing the radiator on the modified lower and upper support and brackets. I verify the proper placement of the upper radiator hose to clear the air intake and bypass tubing. The supercharge is bolted and torqued to the blower bracket along with the new idler pulley. Once I bolt the blower assembly to the engine, I got a surprise. I discover a problem when installing the drive belt that is not mentioned in the instructions. You find this out as I do in the video. However, later, I did find it is possible to get the drive belt on if you remove the 140mm bolt and 2" spacer under the alternator. The belt will fish between the blower and idler (barely). I'll detail that in part four. All components are correctly positioned for final assembly with only the MAF sensor and right coil bracketing to be made. That will all be done in part four along with adding coolant and starting the engine. Although this kit is not intercooled, an air to air intercooler upgrade might be preformed later. Stay tuned for more videos in this series from BadShoe Production.
Видео How to install a centrifugal supercharger in a 96-97 4.6L Thunderbird, part 3 (parts installation) канала BadShoeProductions
Видео How to install a centrifugal supercharger in a 96-97 4.6L Thunderbird, part 3 (parts installation) канала BadShoeProductions
Показать
Комментарии отсутствуют
Информация о видео
Другие видео канала
 How to select the #1 thrust washer on the Ford C4/C5 transmission.
 Welcome to BadShoe Productions
 What's New with BadShoe
 Rotating cycle of RC aircraft ownership.
 Keeping a seal's garter spring from popping out during installation
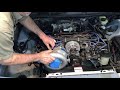 How to install a centrifugal supercharger in a 96-97 4.6L Thunderbird part 2 (test fitting)
 How to install a centrifugal supercharger in a 96-97 4.6L Thunderbird, part 1 (preparation)
 How to install a centrifugal supercharger in a 96-97 4.6L Thunderbird, part 4 (last parts & startup)
 How to set the #1 thrust washer size on the Ford C4/C5 Transmission
 Making air checks on the Ford C4 transmission
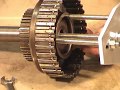 Introduction to BadShoe's Easy Tooling Products
 How to use BadShoe's AODE/4R70W Servo & Accumulator tool
 How to use BadShoe's AOD/4R70W piston sizer tools
 Troubleshooting a no start concern on a EEC 4 car HD
 Making backlash adjustment on the Ford 9" rear.
 Rewiring a Ford EEC IV "speed density" harness to a "mass air" harness
 Easy installation of the Ford 8.8" traction-lok S-spring
 How to use BadShoe's C6 and Fmx sizer tools
 Making end play check on the Ford C4 tranny
 Ford 8.8" rear end Traction-Lok clutch setups