How To Do A Handstand Part 3: Hollow Body
If you’ve ever wanted to learn how to do a Handstand properly, this video series is the place to be. The Handstand tips and drills in these videos will lead you to the strongest Handstand practice you’ve ever had.
With that said, let’s get started!
This 3rd installment is the cure for "banana back"!
It's called Hollow Body and it's a doozy!
Now, if you're serious about learning how to do a handstand, Hollow Body is a must. It's the shape that you see whenever you watch a Gymnast do a Handstand.
Follow Along this video as we go through the 3 main progressions of Hollow. You can think of these progressions as different layers to add to your Handstand arsenal as you get stronger.
Hollow 1: The Tuck
Ok. So this is the introductory and most basic Hollow position of the body. This position starts with you lying on your back, tucking your tailbone up and lifting your shoulders off the ground.
We deliberately don't bring the arms or legs into the equation yet, since we're only focused the shape of the spine. Remember, this is the OPPOSITE OF BANANA BACK...so think of it like that.
Whereas banana back has a slight arch, Hollow Body is creating the bend in the other direction. Lift tail bone. Lift shoulders. Easy enough :)
Hollow 2: Straight Legs
The next step in creating Hollow Body for your Handstand is to straighten out your legs. The tendency here to leave the legs lift in the air at around 45-degrees....Please do not do this. Train your body to lower your legs as close to the floor as you can without pulling your low back off the ground.
When you get upside down, this will be the difference between a long flat back and a banana back. Train the good habits while you're on the ground and they will translate when you go vertical. I promise :)
Hollow 3: Full Hollow
While keeping everything you've already built: low back on the mat and legs straight out ahead of you, now raise your biceps past your ears like you're mimicking the shape of Handstand on the ground.
Keep your shoulder blades off the ground and shrug your Deltoids (shoulder muscles) up near your ears. This is the full form of Hollow!
Once you get comfortable with this shape, you are on your way to a very strong Handstand practice!
Easy.
Kyle
FLASH SALE: 56% OFF your full 6 Weeks To Handstand Training Course! Sale ends soon so grab yours now!
⟹ ⟹ ⟹ ⟹ ⟹ https://kyleweiger.com/6-weeks-to-handstand-course-v5/ ⟸ ⟸ ⟸
This Handstand workout routine is ideal for anyone looking to get a stronger Handstand by skipping all the drills that don't work and only focusing on the ones that do. This routine is the epitome of efficiency.
Subscribe: https://www.youtube.com/c/kyleweiger
CONNECT WITH ME
➜ FACEBOOK: https://www.facebook.com/kyleweigerhandstandcoach
➜ TWITTER: https://twitter.com/kyleweiger
➜ TIKTOK: https://www.tiktok.com/@handstandhelp
➜ INSTAGRAM: https://www.instagram.com/kyleweiger
VISIT THE WEBSITE:
➜ http://kyleweiger.com/
SEND ME AN EMAIL:
➜ kyle@kyleweiger.com
Share this video:
➜ https://youtu.be/RxlyixbnEhU
Видео How To Do A Handstand Part 3: Hollow Body канала KyleWeiger
Показать
Комментарии отсутствуют
Информация о видео
Другие видео канала
 How To Do A Handstand Part 4: Hips
 Handstand Hollow Body Drills
 Learn this before Handstand! (Shoulder stand step-by-step!)
 Breathing in a Handstand
 How To Do A Handstand Part 1: Hands & Wrists
 Why Your Handstand Isn't Straight (And How To Fix It!)
 7 Impressive Bodyweight Moves Anyone Can Learn (For Beginners)
 How To Do A Handstand Part 5: Kicking
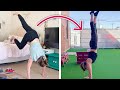 Women Learn To Handstand In 7 Days
 Why You Can’t Handstand Straight | Top 5 Exercises Ft. FitnessFAQs
 My Handstand Progression - 5 Months
 WRIST PAIN during Handstand/Planche/Pushups? | DO THIS
 How to Tuck Up: Hard Yoga Poses Made Easy
 Handstand lernen & lange halten Tipps- Turnen
 PRESS HANDSTAND TIPS & DRILLS
 How to do a hollowback handstand Hollow Back Tutorial by Simonster
 How To Do A Handstand Part 2: Shoulders
 Press To Handstand - How To Do A Straddle Press Handstand For Beginners
 5 Handstand Drills for Mobility and Strength
 How to Bail out of a Handstand(long version)