90W Laser Cutter From Scratch | Smoke Eater v2.0
I've decided to try a different version of the smoke eater. My goals were to make it easier to maintain, increase airflow by using larger diameter vent pipes and making it cheaper. If you haven't watched the original smoke eater video, I suggest watching that first, as this video will make more sense!
I want to make it clear that the first version WAS working great! The smoke eater cleared the laser's smoke, and I could not detect any odor in the room. I tested the airflow (with the lid open) before and after the version two update to get some baseline numbers.
First, I disassembled the old smoke eater. I removed all of the four-inch ventilation ducting. I dismounted the small fan from the wall and capped the entry hole with two 3D printed caps.
Next, using a pencil, I marked the carbon filter location to pass through the exterior wall. I found the center of the circle and drilled a pilot hole. Using a hole cutting jig, I cut out the approximately six-inch hole for the carbon filter.
I cut the frame for the new air filter on the Shapeoko XL from 3/4" MDF and assembled it using wood glue, some metal braces, and a couple of air nails. I found some eyelet hooks and a bungee cord to use to secure the filter to the frame.
I had initially intended the frame to screw into the 3D printed corner brackets I made, but the filter frame was a tight enough fit that I didn't need them. I used some duct tape to seal the edges, even though this is probably not necessary.
After installing the six-inch ducting on the carbon filter and new eight-inch fan, I sealed the smoke eater chamber back up and moved on to the last step.
I needed to make a new quick-release set for the acrylic window I'm using for ventilation, and doing so, I needed to cut a larger opening. I just put the whole window onto the Shapeoko XL and ran a quick job to cut the slot. The quick-release set was 3D printed, and I inserted magnets during the print. I attached these prints to the window using some bolts.
After the window was back in place, I gave it a quick test. As you can see, I have almost doubled the airflow with this new version!
🎬 SMOKE EATER V1: https://youtu.be/FNaEf3nQoiA
🍺 SUPPORT MY CHANNEL: https://paypal.me/acwrightdesign
--------------------------------
🚀 FOLLOW ME OR GET IN TOUCH
Instagram: https://instagram.com/acwrightdesign
Twitter: https://twitter.com/acwrightdesign
Pinterest: https://www.pinterest.com/acwrightdesign
Github: https://github.com/acwright
📜 PLANS AND DOCS
Further Fabrication: https://www.youtube.com/channel/UCZ72zDm2feverqV7qAbNH7Q
🤖 3D PRINTED PARTS AND FILES
Thingiverse: https://www.thingiverse.com/thing:4750178
📦 ITEMS I USED IN THIS VIDEO
As an Amazon Associate, I earn from qualifying purchases. I get commissions for purchases made through links in this post. They help me to be able to create more content for you. Thank you for your support!
8-Inch Inline Fan: https://amzn.to/3b6XtyK
Dryer Hose: https://amzn.to/37gc3mr
Duct Clamps: https://amzn.to/3rUFli5
Air Filter: https://amzn.to/3tWqYfj
Carbon Filter: https://amzn.to/3dfueMF
Anemometer: https://amzn.to/3ppewRs
Видео 90W Laser Cutter From Scratch | Smoke Eater v2.0 канала A.C. Wright
Показать
Комментарии отсутствуют
Информация о видео
Другие видео канала
![Laser Fume Extractor update [Activated Carbon]](https://i.ytimg.com/vi/E1zXqY-Z0s0/default.jpg) Laser Fume Extractor update [Activated Carbon]
Laser Fume Extractor update [Activated Carbon] 90W Laser Cutter From Scratch | Fine-Tuning & Testing
 Glowforge Air Filter - A Closer Look
 90W Laser Cutter From Scratch | Ultimate Air Assist
 I regret that I did not do it earlier! Very useful thing!
![Laser Air Filtration DIY [Home HVAC filters]](https://i.ytimg.com/vi/GQHXRIHA72U/default.jpg) Laser Air Filtration DIY [Home HVAC filters]
Laser Air Filtration DIY [Home HVAC filters] DIY Laser Cutter Air Filter
 Shop Talk - Fume Evacuation From Lasers and 3D Printers!
 10 Workholding Ideas For Laser Cutters
![90W Laser Cutter From Scratch | Y-400 [Part 1]](https://i.ytimg.com/vi/v75h6Dl_n_U/default.jpg) 90W Laser Cutter From Scratch | Y-400 [Part 1]
90W Laser Cutter From Scratch | Y-400 [Part 1] GlowForge Air Filter vs. Cloudline T6 - Cancel the Shrill Noise!
 90W Laser Cutter From Scratch | Smoke Eater
 Ep4: Starting the Electronics. The DIY CO2 Laser Cutter / Engraver Build Series
 How to Install Roof Ventilation for Laser Cutter Exhaust
![90W Laser Cutter From Scratch | Y-400 [Part 4]](https://i.ytimg.com/vi/P1Y3od-tom4/default.jpg) 90W Laser Cutter From Scratch | Y-400 [Part 4]
90W Laser Cutter From Scratch | Y-400 [Part 4] EXHAUST BLOWER VS FILTRATION SYSTEMS
 My co2 laser is here!!!! Omtech 55w delivery /setup/ and test burns
 3D Printing A Magnetic Chess Set
 OMTech 100w Red Black Laser Venting
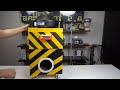 Affordable DIY Fume Laser Fume Extractor that actually WORKS!