BMW E30 Wiring Loom Restoration | BMW E30 325i Sport Restoration E9 S1
For a 30-day free trial and one free audiobook go to http://audible.com/restoreit or text restoreit to 500 500. Thanks to Audible for sponsoring today video.
This week I focus on the mess that is the E30's wiring loom. It was taken from the car a long time ago and has sat in a box ever since. It was really overwhelming at first. But once I had it all laid out everything became clear. Enjoy!
Like, comment and subscribe, for restoration videos every week.
If you would like to send me something to restore, tools to use or anything to support Restore It, please email:
Restoreitchannel@gmail.com
Tools & equpitment used:
Quartz Lacquer - https://goo.gl/8PTVKM
Base Coat Paint - https://goo.gl/mWhufG
Rust Remover - https://goo.gl/13gopW
Moldex Full Face Mask - https://goo.gl/NNYGrv
FGL 5 Spray gun - https://goo.gl/Acg5rd
A.N.I. R150-T Mini Spray gun - https://goo.gl/cHTJS2
Colad Washable Overalls - https://goo.gl/3Css9E
Colad Mixing Cups - https://goo.gl/8DYmE8
Colad TurboMix Sticks - https://goo.gl/cYZfks
Colad Synthetic Paint Strainers - https://goo.gl/H79ZgL
Steel wire bits - http://geni.us/keyaD
Rotary Tool - http://geni.us/HGed
Concentrate Degreaser - http://geni.us/yUn9
Mannesmann Socket Set - http://geni.us/HCDZ
PROCESS:
Firstly, I unraveled the loom. It had been sat in a box for about a year. After it was laid out, I could make more sense of it. I started by stripping everything and anything off the loom. All of the old loom and electrical tape came off. Whilst I was stripping the loom, I used cable ties to keep groups of wires together and to make sure junctions were obvious.
Once all the old stuff was off, I cleaned up the wired, clean a few peripherals with the rotary tool and degreaser. I also re-labeled the entire loom as the old labels were getting hard to understand.
Once all that was done, it was time to rewrap the loom. This took the best part of three days and hurt like hell after a while. My legs and hands were aching at the end of each day like crazy.
Once every single wire was wrapped and the loomed had been sorted, I found the lid for the fuse box, cleaned it up and the restoration was complete. Not a crazy one, just something to keep me going whilst I'm inbetween workshops.
Thanks for watching.
- Disclaimer: I am no professional. Especially when it comes to electrics. It's certainly an area I am looking to improve in. I am completely self-taught and have no previous trade experience. I would appreciate any feedback, advice or constructive criticism.
I don't add music to these videos so that you can choose to listen to what you like if you would like to.
I am doing YouTube full time, 7 days a week, so any support is really appreciated.
Become a patron to win the Items featured in these videos!
Patreon - https://www.patreon.com/RestoreIt
Follow me on Social media to keep up to date with videos and giveaways.
Twitter - https://twitter.com/Restore__It
Facebook- https://www.facebook.com/RestoreItCha...
Instagram - @RestoreItChannel
Patreon - https://www.patreon.com/RestoreIt
Discord - I now also have a discord server if you want to chill with like-minded people and maybe learn something new. - https://discord.gg/vNmCBk9
Видео BMW E30 Wiring Loom Restoration | BMW E30 325i Sport Restoration E9 S1 канала Restore It
Показать
Комментарии отсутствуют
Информация о видео
Другие видео канала
 BMW E30 Chassis Shot Blasting Time-lapse Restoration | BMW E30 325i Sport Restoration S1E10
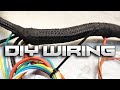 How To Restore Your Wiring Harness DIY
 Project E30 / Ep. 16 / Final Mechanical & Electrical Fixes
 BMW E30 M20B25 Engine Rebuild Restoration - | Part 9 | Putting It Back Together Again
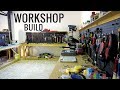 Workshop Restoration | Car Garage Build From Scratch | BMW E30 325i Sport Restoration S2 E1
![4x BMW E30 Brake Caliper [Restoration] - Gold Zinc Finish | BMW E30 325i Sport Restoration S2 E3](https://i.ytimg.com/vi/o0LryVHRY-g/default.jpg) 4x BMW E30 Brake Caliper [Restoration] - Gold Zinc Finish | BMW E30 325i Sport Restoration S2 E3
4x BMW E30 Brake Caliper [Restoration] - Gold Zinc Finish | BMW E30 325i Sport Restoration S2 E3 BMW E30 Output Shaft - Full Restoration | BMW E30 325i Sport Restoration S2 E4
 Heavily Curbed BMW E30 BBS Wheels - Full Restoration | BMW E30 325i Sport Restoration S2 E5
 BMW E30 M20B25 Engine Rebuild Restoration - Time-Lapse | Part 2
 How To Restore Any Wiring Harness
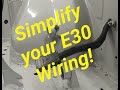 E30 Wire tucking and clean up
 BMW E30 Heater/Air Con Unit Restoration
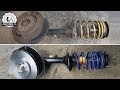 BMW E30 Front Struts Restoration | BMW E30 325i Sport Restoration S1 E1
 E30 Fix 12 | Aftermarket M-Tech 2 Fiberglass Body Kit Install
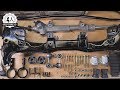 BMW E30 Front Subframe & Steering Rack Restoration | BMW E30 325i Sport Restoration S1 E2
 BMW E30 Rear Subframe Assembly RESTORATION | BMW E30 325i Sport Restoration E4 S1
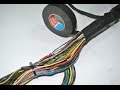 How to DIY - wiring harness restoration
 BMW E30 Headlight Restoration | BMW E30 325i Sport Restoration E6 S1
 BMW E30 Starter Motor RESTORATION | BMW E30 325i Sport Restoration E7 S1