Universal Joints - Part 6: Proper U-Joint Installation
Weber State University (WSU) - Automotive Technology Department - Transmission Lab. This is the sixth in a series of videos on universal joints, constant velocity joints, and driveshafts. In this episode, we learn how to properly install universal joints.
Timeline:
0:00 Start
2:45 the contents of a new GM universal joint
7:00 Instructions to center the universal joint and set the axial endplay
7:22 Yoke inspection
9:55 Line bore inspection
13:47 Precautions to take when removing driveshaft from vehicle
15:55 Direction of grease Zerk installation
23:45 Preparing to install the universal joint into the slip yoke
24:14 Three tools needed to install a universal joint bearing cap
25:30 Why using a Vise can cause universal joint damage
27:15 Setup the Yoke and universal joint cross for installation
28:24 Pressing the first bearing cap
29:10 Orientation of bearing cup during installation
29:21 Setup the yoke for the second bearing cup installation
30:55 Axial end play example
31:25 Preparing to install a snap ring
34:45 installing one copper-colored snap ring
35:55 preparing to install the opposide snap ring
37:45 Copper-colored snap ring not fitting
38:58 Adjusting the cross and bearing cup positions to remove endplay
42:00 Why selectable thickness snap rings are needed
44:00 Installing thinner snap rings
47:47 Removed universal joint to inspect again
48:28 Measuring cross-width variation
50:42 Cleaning the yoke again
52:00 Universal joint reinstalled in the yoke
54:35 installing the universal joint into the aluminum driveshaft
This video series helps partially cover the following NATEF Master Tasks:
3.D.1. Diagnose constant-velocity (CV) joint noise and vibration concerns; determine necessary action.
3.D.2. Diagnose universal joint noise and vibration concerns; perform necessary action.
3.D.4. Inspect, service, and replace shafts, yokes, boots, and universal/CV joints.
3.D.5. Check shaft balance and phasing; measure shaft runout; measure and adjust driveline angles.
3.E.4. Measure drive axle flange runout and shaft end play; determine necessary action.
Questions for teachers:
1. How many different thicknesses of snap rings came in the GM universal joint kit?
2. Why would someone want to perform a yoke line bore inspection?
3. In which direction should a grease Zerk face when installing a universal joint?
4. What three tools are needed to install a universal joint bearing cap
5. In which direction should a bearing cap always face when handling and installing it?
6. Look at timeframe 30:55. Describe axial endplay in your own words
7. Why did the second copper snap ring not fit in the slip yoke snap ring groove?
8. What thickness of snap rings finally fit in the grooves of the slip yoke?
9. How much cross width variation did the universal joint in this video have?
10. What color of snap rings were installed on the driveshaft side of the universal joint?
Subscribe to the weberauto Youtube channel for more great videos. www.youtube.com/weberauto
Visit the following website for information on how to attend our school and obtain an associate's degree or bachelor's degree in Automotive Technology.
http://www.weber.edu/automotive
This video was created and edited by Professor John D. Kelly at WSU. For a full biography, see http://www.weber.edu/automotive/J_Kelly.html
Видео Universal Joints - Part 6: Proper U-Joint Installation канала WeberAuto
Показать
Комментарии отсутствуют
Информация о видео
Другие видео канала
 Universal Joints - Part 5: U-Joint Tools and Removal
 Universal Joints - Part 7: Centering and Adjusting Axial Play
 20 Tips to Replace U joints Like a Pro from a Professional Mechanic
 Tesla Model 3 and Y Modular Motors
 1996 Toyota 4runner double cardan joint
 Service U-joints in minutes using the Tiger Tool 10105 U Joint Puller & 10202 Bearing Cup Installer
 How to use a Torque Wrench
 U-Joint Replacement
 Universal Joints - Part 1: Introduction
 Driveshaft Repair | Spicer Garage
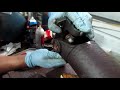 Super Duty F250 F350 Driveshaft U Joint Carrier Bearing Replacement
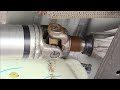 Universal Joints - Part 4: U-joint and Driveline Inspection
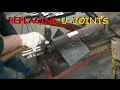 How To Replace U-Joints (ULTIMATE Guide Using BFH)
 Understanding the Honda Hybrid E-Drive
 Understanding the Bolt EV
 How to Diagnose and Replace Universal Joints (ULTIMATE Guide)
 Torque Converter Operation and Components - AUSV 2520
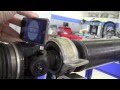 Driveshaft U-Joint Phasing
 Tiger Tool 10102 Heavy Duty U-joint Puller
 Driveline removal