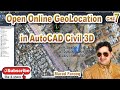
Geolocation Civil 3D 2020
If you have any questions, email me at rami@tamimi.biz
For more information about me, visit my website at http://tamimi.biz/
The purpose of this video is to highlight the key steps needed to enable the geolocation feature in AutoCAD Civil 3D.
Step One: Create an AutoDesk 360 Account
Begin by selecting the "Sign In" button in the upper right-hand corner, and select "Sign in to Autodesk account". You will be prompted to sign in with an email if you already have an account. If you do not have an account, select the "Create Account" button. Type in your name, your email, confirm your email and create a new password for your account. Accept the terms and conditions and select "Create Account". You may opt in to Autodesk's emails, but this is not required, then select "Done" and your new account will have been successfully created.
Step Two: Set Coordinate System
Under the Home Tab, turn on the Toolspace panel, and enable the Settings Tab. At the top of the settings tab, right-click on the drawing name, and select "Edit Drawing Settings". Select the correct datum or projection for your Country and/or State. Then, find the proper coordinate system for your datum. You may also edit your scale and units in this menu and then select "Ok".
Step Three: Select Online Map
A new tab called "Geolocation" should appear in the ribbon up above. Select this tab and go over to the "Online Map" tab. Select the map view you prefer, and it should display it underneath your project.
Intro: (0:00)
Create an AutoDesk 360 Account: (0:20)
Set Coordinate Systemn: (2:23)
Select Online Map: (4:12)
Outro: (5:08)
#Civil3D #Geolocation #Autodesk360
Видео Geolocation Civil 3D 2020 канала Rami Tamimi
Показать
Комментарии отсутствуют
Информация о видео
Другие видео канала
 Geolocation in AutoCAD Civil 3D | Google Map overlay in AutoCAD | Online Satellite Map Autodesk Map.
 Resection Method in Surveying
 Point Groups, Breaklines, & Surface Creation | AutoCAD Civil 3D
 How to Set Geo Location in AutoCad?
 How to run a Level Loop using a Differential Level
 HOW TO READ GRADE STAKES || How to read grade stakes for roads - Grade stakes cut and fill
 20 More Civil 3D Tips and Tricks in 20 Minutes!
 Topographic Surveying for Beginners
 Description Keys and Importing Points from File | AutoCAD Civil 3D
 Setting up a Survey Total Station
 Survey Scanning with the iPhone 12 Pro LiDAR Sensor
 Surveying Stake Out for Beginners
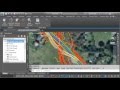 Civil 3D Bing Maps & Google Earth Integration
 Online Map Geolocation Problem (Civil 3D)2015-2018
 HOW TO MAKE A GEOLOCATION USING CIVIL 3D
 All about using maps in AutoCAD
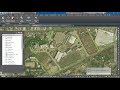 Como hacer la Geolocation en Civil 3D
 Lines, Polylines, 3D Polylines, & Feature Lines | AutoCAD Civil 3D
 INSERTING GOOGLE EARTH IMAGE TO AUTOCAD | MAKE SITE PLAN IN AUTOCAD USING GOOGLE EARTH
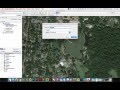 Inserting and Scaling Aerial Images in AutoCAD