HowTo: PS4 JoyPad Sticks & Battery Upgrade
Where I bought the sticks:
http://www.aliexpress.com/item/Aluminum-Metal-Joystick-Cap-Thumbsticks-Chrome-Joystick-Caps-thumb-stick-for-PS4-Controller-2pcs-lot-1/32218412802.html
Where I bought the battery:
http://www.aliexpress.com/item/Free-Shipping-2000mah-Power-Pack-Controllers-Rechargeable-Battery-Ps4-battery-ps4-controller-battery/1942492754.html
This is quite a simple little project but one that has been very satisfying. If you own a PS4 then you'll know just how fragile those analogue sticks really are. Mine had some light wear on one side, not as bad as many others I've seen but They had become quite slippery and an upgrade was definitely in order.
I decided to go with aluminium sticks with knurled edges, as this would give me the maximum longevity and good grip. The sticks themselves are really cheap and you can choose from anodized metal sticks, standard rubber sticks, or as many have done, go with Xbox One sticks instead. All the above are a direct replacement and don't require any modification.
One of the things I liked most about the aluminium sticks was the height increase over the standard ones. This made the actual potentiometers feel lighter and more responsive, since I was getting slightly better leverage on them.
Since I was intending to split the controller and replace the sticks, I decided to go ahead and fit an upgraded battery back while I had the old one out. The standard battery is only 1000mAh and direct replacements can be bought quite cheaply. I got a 2000mAh shipped from china for less than €10 and the improvement is immediately apparent. Typically, the controller would last around 4 hours on its standard battery but with the upgraded battery I am getting upwards of 9 hours playtime before needing a charge! Defo a worthwhile mod.
Anyway, feel free to ask any questions and I'll do my best to answer them. Don't forget to drop a Like & Subscribe for more of my random fixie stuff. Thanks for watching. :D
Видео HowTo: PS4 JoyPad Sticks & Battery Upgrade канала Cpt MishMash VonRandom
Показать
Комментарии отсутствуют
Информация о видео
Другие видео канала
 DSLR Flash External Battery Mod: SB600
 eScooter Wheel Bearing Fix - M365 Xiaomi
 AAP-01 Safety Fix - Airsoft
 AUG M4 mag mod - Airsoft STANAG conversion
 EP3 Civic Hood Lever / Bonnet Puller Fix
 DE Airsoft UTR-45 Disassembly
 Honda Airbag Fix & Reset - EP3 Seats
 BMW E60/M5 Cluster Test Mode - Diagnostic Mode
 Boiler Broke Down - Fan Fixed for only €2
 Locking Blade Mod - Xiaomi NexTool Huo Hou
 KEYBOARD Mod & BATT CHECK FIX - ThinkPad BIOS
 3D Printed Extending MP9 Stock - Airsoft
 BMW E39/M5 Cluster Test Mode - Diagnostic Mode
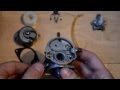 Fix your Mini bike Carb - bogging, cutting out etc
 Dual 249's - Wolverine HPA - ROF/Fire Control Test
 HowTo: Build Seat Occupancy Bypass BMW Cheap
 Make Your Own PS4 Chat Cable - Turtle Beach etc
 G&G Tracer Unit / Surpressor - Look Inside
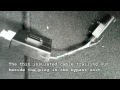 HowTo: Install Airbag Bypass - BMW Occupancy seat sensor
 BMW iDrive Hidden Secret Menu howto: