How to Build a Curbless Shower (Part 1: VIM Shower Pan Install) -- by Home Repair Tutor
Learn how to build a curbless shower in this Part 1 video.
We use the VIM curbless shower pan.
Bathroom Repair Tutor -- https://bathroomrepairtutor.com/video-library
Mention Home Repair Tutor when purchasing the VIM curbless shower pan and get a free VIM corner trowel
Visit https://vimproducts.com/
These supplies make the installation a lot easier
Circular Saw -- http://amzn.to/1RFZorv
Utility Knife -- http://amzn.to/1RWUS7f
Reciprocating Saw -- http://amzn.to/221isW7
Diablo Demo Blade (for Reciprocating Saw) -- http://amzn.to/238rpzt
Hammer -- http://amzn.to/1RFZAHm
Super Bar -- http://amzn.to/231mrHY
Pry Bar -- http://amzn.to/1RWVpGf
4 Foot Level -- http://amzn.to/1qoC5vE
Liquid Nail -- http://amzn.to/1qoC76V
Caulking Gun -- http://amzn.to/1RFZUG2
Framing Nailer (optional) -- http://amzn.to/231nqbo
Impact Driver -- http://amzn.to/1qoCgHs
Deck Screws -- http://amzn.to/1ZVvB3v
Measuring Tape -- http://amzn.to/1RG068a
Spade Bit -- http://amzn.to/1qoCiz1
Jigsaw -- http://amzn.to/1RWWCNK
Mixing Paddle -- http://amzn.to/1RWXimo
1/2" Mixing Drill -- http://amzn.to/1RG0Jyx
1/4" by 1/4" Trowel-- http://amzn.to/1RG0Muf
__________________________________________________________________
Today we'll show you how to install the VIM curbless shower pan. This makes building a curbless shower way easier.
Our written tutorial can be found here
https://www.homerepairtutor.com/curbless-shower-pan
You can cut the VIM pan to any size you want.
Once you have the pan you'll have to cut out the existing subfloor.
If the subfloor is 3/4" plywood you're in for a treat. If you remove the section where the VIM pan is going you'll be able to install the pan in one day.
Add 2x4 nailers to the joists and make them 3/4" below the the top of the joist.
Apply Liquid Nail to the nailers and nail or screw them to the joists. Then apply Liquid Nail to the top of the nailer and add 3/4" plywood to the joist gap.
What you're doing is creating a subfloor that's 3/4 of an inch lower than the adjacent subfloor.
Dry fit the VIM curbless shower pan then position the drain pipe. Mix up latex modified thin-set and back fill the VIM shower pan. Apply the same thin-set to the subfloor and embed the VIM shower pan into the thin-set.
BOOM, it's that easy.
Of course there are a ton of details and they're all in our step-by-step video tutorial...we love geeking out over this stuff.
Check out the video here
https://youtu.be/vhr7eB9fBI4
If you want the complete written tutorial you can see that over on Home Repair Tutor
http://www.homerepairtutor.com/curbless-shower-pan
Learn how to simplify the craft of building custom bathrooms with our online video library over on Bathroom Repair Tutor
https://bathroomrepairtutor.com/brt-platinum/
Видео How to Build a Curbless Shower (Part 1: VIM Shower Pan Install) -- by Home Repair Tutor канала Home Repair Tutor
Показать
Комментарии отсутствуют
Информация о видео
Другие видео канала
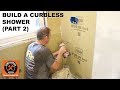 How to Build a Curbless Shower (Part 2: Waterproof Shower Walls) -- by Home Repair Tutor
 How to Recess a Floor for a Curbless Shower with the Schluter®-Shower System
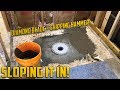 Installing a Curbless Shower on a Concrete Slab
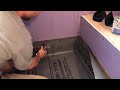 Easy Shower Pan Liner: Tile Coach Episode 9
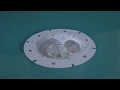 VIM Products, Inc Level Entry Shower System™ Installation
 DIY Giant Shower Makeover
 Curbless Shower Pan Planning: Schluter Curbless Shower (Part 1)
 How to Slope a Shower Pan: Tile Coach Episode 18
 How to Make a Shower Pan
 How To Build A Curbless Shower
 2 DAY BATHROOM REMODEL - Bath tub into a shower
 He TRIED to TILE his own SHOWER!!!--- WHY it would HAVE FAILED
 4 Types of Shower Waterproofing Systems for Your Bathroom
 Building a Curbless Shower - Framing and Plumbing ---Grandpa Bath Episode 3
 How to pre slope a shower pan on slab - Bathroom Remodel Day 13
 Curbless shower entry
 How to install Schluter®-KERDI-SHOWER Trays
 Curbless Shower Installation Wood Subfloor | Part 1
 How to Build a Curbless Shower (Part 3: Waterproofing Shower Pan) -- by Home Repair Tutor
 CURBLESS SHOWER TRANSITION --- HOW TO TAPER TILE TO DRAIN