How To Make A Beaded Stretch Ring
In “How To Make A Beaded Stretch Ring" we'll show you how to use a beading needle to string the beads onto the stretch elastic. We'll share how to make the ring more secure by double threading it. Then we'll show you how to tie a secure knot. Follow along then use the steps below to make your own Beaded Stretch Ring!
You can see the complete step by step written instructions for this project on our blog ► https://runningwithsisters.com/How-To-Make-A-Beaded-Stretch-Ring/
Please subscribe to our YouTube Channel ► https://www.youtube.com/user/oneilsisters
Check out our blog. It has all the how-tos. ► https://runningwithsisters.com/
Subscribe to our newsletter ► https://runningwithsisters.com/subscribe-to-our-newsletter/
See our kits for sale ► https://runningwithsisters.com/welcome-to-our-shop/
Let’s connect!
Facebook ► https://www.facebook.com/TheONeilSisters
Instagram ► https://www.instagram.com/oneilsisters/
Pinterest ► https://www.pinterest.com/oneilsisters/
Chapters:
0:00 Title
0:09 Tools & Materials
1:06 Beading The Ring
1:09 Determining Ring Size
2:02 Threading The Beading Needle
2:30 Feeding On the Beads
6:09 Finishing The Ring
7:30 Feeding Elastic Through A Second Time
9:20 Tying The Secure Knot
11:03 Adding Dab Of Glue To Knot
11:25 Hiding Knot Inside Bead
How To Make A Beaded Stretch Ring
by Jennifer and Kitty O'Neil
Running With Sisters
Materials
30-40 Delica seed beads, gold-plated, size 11/0 ► https://amzn.to/3njlHvd
1 Faceted coin bead, black spinel, 6mm
2 Faceted rondelle beads, teal crystal, 2mmx3mm ► https://amzn.to/3dETX10
2 Faceted rondelle beads, 2mm, garnet ► https://amzn.to/2QPEYbm
Elastic beading cord, .5mm width ► https://amzn.to/32E3GhH
Big-eye beading needle (optional) ► https://amzn.to/3xkQixg
Scissors ► https://amzn.to/3en3Qzn
Masking tape ► https://amzn.to/3a8n376
Strip of paper
Clear nail polish ► https://amzn.to/3gE5kb8
Steps
1. Determine your ring size by wrapping a thin strip of paper around your finger. Trim it so it fits end to end exactly around your finger. Lay the strip of paper out flat to use as a guide.
2. Cut a 10" piece of the elastic beading cord and fold a piece of masking tape over one end. This will keep the beads from sliding off.
3. Feed the other end of the elastic cord into the eye of the beading needle to thread it. (We love using a beading needle for a project like this, but you can actually make it without a beading needle because the elastic cording has a good amount of body to it.)
4. Feed a garnet bead, a teal bead, the spinel bead, a teal bead and a garnet onto the cording. Then feed on most of the gold beads.
5. Hold the beaded strand up to the strip of paper to see if it’s long enough. Add or subtract gold beads until the beaded section of the cord is the same length as the strip of paper.
6. Remove the masking tape and remove the garnet and teal beads from one end of the cord. Replace the masking tape. Add the garnet and teal bead to the other end of the beaded cord. This will make sure the knot is tied next to the largest bead, the spinel coin, so we can hide it.
7. Circle the beaded elastic strand around to form a ring shape. Then use the beading needle to feed the elastic through all of the beads a second time. Keep a 2" tail unbeaded at the tape end to use for the knot later.
8. After you have gone through all the beads with the elastic cord a second time, remove the tape. Gently pull the elastic ends to tighten the ring and remove any gaps between the beads. Tie the two ends of the elastic together.
9. To make the knot more secure, tie the ends together again. But this time wrap one end around and through the loop a second time. Gently pull the ends tight.
10. Finally, tie the ends together one more time. Gently pull the ends tight to finish the knot. Trim the ends to ¼".
11. Add a dab of clear nail polish or jeweler’s glue to the knot. Slide the spinel coin bead over the knot to hide it. Let the glue dry before wearing the ring.
To wear the Beaded Stretch Ring, roll it, rather than stretching it, onto your finger. We think this would be a fun design to make in different gemstones and then wear as a stacking set of rings. If you have any questions about this or any jewelry project, post a comment and we’ll reply. We love helping you!
Happy Crafting,
Jennifer & Kitty
If you like this video, you may also like these jewelry making how-to videos:
Easy Beaded Rings ► https://youtu.be/ouuY3Av_VTA
Delicate Charm Ring ► https://youtu.be/6xu69QVZ6xg
Pearl Spiral Wrap Ring ► https://youtu.be/ID9azTzhIAw
Hammered Copper Wrap Ring ► https://youtu.be/-A8ZpxojZL0
Rosette Filigree Ring ► https://youtu.be/YOIXKPF1weQ
Easy Resin Ring ► https://youtu.be/TK41mx90c7U
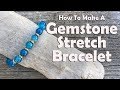
Polished Gemstone Stretch Bracelet ► https://youtu.be/UdwuGmpEWiA
Gemstone Stretch Bracelet ► https://youtu.be/9UHLkU4vUcg
Beaded Leaf Drop Earrings ► https://youtu.be/9NBZHjQHZRU
#oneilsisters #jewelrymaking #makearing
Видео How To Make A Beaded Stretch Ring канала The O'Neil Sisters
You can see the complete step by step written instructions for this project on our blog ► https://runningwithsisters.com/How-To-Make-A-Beaded-Stretch-Ring/
Please subscribe to our YouTube Channel ► https://www.youtube.com/user/oneilsisters
Check out our blog. It has all the how-tos. ► https://runningwithsisters.com/
Subscribe to our newsletter ► https://runningwithsisters.com/subscribe-to-our-newsletter/
See our kits for sale ► https://runningwithsisters.com/welcome-to-our-shop/
Let’s connect!
Facebook ► https://www.facebook.com/TheONeilSisters
Instagram ► https://www.instagram.com/oneilsisters/
Pinterest ► https://www.pinterest.com/oneilsisters/
Chapters:
0:00 Title
0:09 Tools & Materials
1:06 Beading The Ring
1:09 Determining Ring Size
2:02 Threading The Beading Needle
2:30 Feeding On the Beads
6:09 Finishing The Ring
7:30 Feeding Elastic Through A Second Time
9:20 Tying The Secure Knot
11:03 Adding Dab Of Glue To Knot
11:25 Hiding Knot Inside Bead
How To Make A Beaded Stretch Ring
by Jennifer and Kitty O'Neil
Running With Sisters
Materials
30-40 Delica seed beads, gold-plated, size 11/0 ► https://amzn.to/3njlHvd
1 Faceted coin bead, black spinel, 6mm
2 Faceted rondelle beads, teal crystal, 2mmx3mm ► https://amzn.to/3dETX10
2 Faceted rondelle beads, 2mm, garnet ► https://amzn.to/2QPEYbm
Elastic beading cord, .5mm width ► https://amzn.to/32E3GhH
Big-eye beading needle (optional) ► https://amzn.to/3xkQixg
Scissors ► https://amzn.to/3en3Qzn
Masking tape ► https://amzn.to/3a8n376
Strip of paper
Clear nail polish ► https://amzn.to/3gE5kb8
Steps
1. Determine your ring size by wrapping a thin strip of paper around your finger. Trim it so it fits end to end exactly around your finger. Lay the strip of paper out flat to use as a guide.
2. Cut a 10" piece of the elastic beading cord and fold a piece of masking tape over one end. This will keep the beads from sliding off.
3. Feed the other end of the elastic cord into the eye of the beading needle to thread it. (We love using a beading needle for a project like this, but you can actually make it without a beading needle because the elastic cording has a good amount of body to it.)
4. Feed a garnet bead, a teal bead, the spinel bead, a teal bead and a garnet onto the cording. Then feed on most of the gold beads.
5. Hold the beaded strand up to the strip of paper to see if it’s long enough. Add or subtract gold beads until the beaded section of the cord is the same length as the strip of paper.
6. Remove the masking tape and remove the garnet and teal beads from one end of the cord. Replace the masking tape. Add the garnet and teal bead to the other end of the beaded cord. This will make sure the knot is tied next to the largest bead, the spinel coin, so we can hide it.
7. Circle the beaded elastic strand around to form a ring shape. Then use the beading needle to feed the elastic through all of the beads a second time. Keep a 2" tail unbeaded at the tape end to use for the knot later.
8. After you have gone through all the beads with the elastic cord a second time, remove the tape. Gently pull the elastic ends to tighten the ring and remove any gaps between the beads. Tie the two ends of the elastic together.
9. To make the knot more secure, tie the ends together again. But this time wrap one end around and through the loop a second time. Gently pull the ends tight.
10. Finally, tie the ends together one more time. Gently pull the ends tight to finish the knot. Trim the ends to ¼".
11. Add a dab of clear nail polish or jeweler’s glue to the knot. Slide the spinel coin bead over the knot to hide it. Let the glue dry before wearing the ring.
To wear the Beaded Stretch Ring, roll it, rather than stretching it, onto your finger. We think this would be a fun design to make in different gemstones and then wear as a stacking set of rings. If you have any questions about this or any jewelry project, post a comment and we’ll reply. We love helping you!
Happy Crafting,
Jennifer & Kitty
If you like this video, you may also like these jewelry making how-to videos:
Easy Beaded Rings ► https://youtu.be/ouuY3Av_VTA
Delicate Charm Ring ► https://youtu.be/6xu69QVZ6xg
Pearl Spiral Wrap Ring ► https://youtu.be/ID9azTzhIAw
Hammered Copper Wrap Ring ► https://youtu.be/-A8ZpxojZL0
Rosette Filigree Ring ► https://youtu.be/YOIXKPF1weQ
Easy Resin Ring ► https://youtu.be/TK41mx90c7U
Polished Gemstone Stretch Bracelet ► https://youtu.be/UdwuGmpEWiA
Gemstone Stretch Bracelet ► https://youtu.be/9UHLkU4vUcg
Beaded Leaf Drop Earrings ► https://youtu.be/9NBZHjQHZRU
#oneilsisters #jewelrymaking #makearing
Видео How To Make A Beaded Stretch Ring канала The O'Neil Sisters
Показать
Комментарии отсутствуют
Информация о видео
Другие видео канала
 How To Make A Gemstone Stretch Bracelet: Easy Jewelry Making Tutorial
 Water Drop cage pendant with large spherical stone without holes 471
 How to Make Simple Bypass Rings | Jewelry 101
 How To Make Jewelry: How To Make A Pandora Ribbon Bracelet
 10 minutes beaded ring. DIY 3 rings with 1 pattern
 How to Secure a Stretch Cord Bracelet
 How to Make the Classic Daisy Chain Stitch - Jewelry-Making Technique
 How to Make an Adjustable Beaded Ring Using the Artistic Wire Adjustable Ring Jig
 How to make GOLD FILLED JEWELRY - stacking rings tutorial | Gold Fill
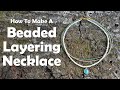 How To Make A Beaded Layering Necklace
 Beading Made Easy! Stretchy Gemstone Rings
 How To Make A Polished Gemstone Stretch Bracelet
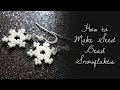 How to Make Seed Bead Snowflakes
 How to make rings. beaded rings tutorial. DIY 5 minutes rings
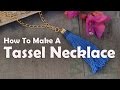 How To Make Jewelry: How To Make A Tassel Necklace
 Super Easy Stretch Ring
 "Margaret" Bracelet | How To Tutorial
 How To Turn A Bead Strand Into A Bracelet
 How To Make Jewelry: How To Make A Memory Wire Bracelet
 How To Make Jewelry: How To Make Boho Chic Ribbon Wrapped Bangle Bracelets