How to knit fingerless gloves for beginners - Really easy pattern you can knit flat
A step by step tutorial on how to knit fingerless gloves the easy way
►►► ACCESS THE FREE PATTERN HERE: https://nimble-needles.com/tutorials/how-to-knit-fingerless-gloves-for-beginners/
Materials you will need:
- Circular knitting needles size 4.0mm: https://amzn.to/39aENOO
- 1-2 skeins of the Pascuali Alpaca Fino yarn: https://bit.ly/3pd86pj
(or around 100-110 meters of any other light worsted yarn)
- Scissors: https://amzn.to/3pxAS3I
- Tapestry needle: https://amzn.to/3pwFszf
*Note: As an Amazon Associate I earn from qualifying purchases.
In this video, I will show you a very easy fingerless glove knitting pattern perfectly suitable for beginners as it is knit flat and later on seamed together. It will probably take about 3-4 hours to finish these gloves.
You need to know:
- the knit stitch: https://nimble-needles.com/stitches/how-to-knit-the-knit-stitch/
- the purl stitch: https://nimble-needles.com/stitches/how-to-purl-stitch-for-beginners/
- a cast on: https://nimble-needles.com/stitches/how-to-cast-on-knitting-stitches-for-beginners/
- and a bind off: https://nimble-needles.com/stitches/how-to-cast-off-knitting-for-beginners/
You will also need to know the mattress stitch (https://nimble-needles.com/stitches/how-to-do-a-mattress-stitch-in-knitting/) and the backward loop increase, but I'll show you how to do that step by step in this video.
First, you need to knit a little swatch. This will give you the opportunity to practice the 2x2 rib stitch and find out your exact size.
So, simply cast on 24 stitches. And then knit 12 rows in a 2x2 rib stitch. So always, knit 2, purl 2 across all rows. And then bind off and don’t cut the yarn.
Then, stretch out the fabric a bit so the ribs are visible but you are not overstretching either. Measure out 5 centimeters or 4 inches in the middle of your little swatch and count how many stitches you needed to cover these 5 centimeters. Also, measure the circumference of your hand at its widest point.
Then you need to do calculate four steps:
1) Divide the number of stitches you needed for 5 cm by 5 (e.g. 11/5=2.2)
2) Multiply that number times the circumference of your hand (e.g. 2.2*23=50.6)
3) Subtract 10% to account for the negative ease (e.g. 50.6*0.9 =45.6)
4) Round down to the next number dividable by 4 (eg. 44)
Now, you can unravel your little swatch again.
Start by casting on however many stitches your calculation said you need and add 3 selvage stitches. (e.g. 44+3= 47). Leave a sizeable tail of 20 inches for seaming.
The repeat for the first section is:
• Right side 1: k1, *k2, p2*, k2
• Wrong Site: p2, *k2, p2*, p1
After you knit about 14 rows of the 2x2 rib stitch it’s time to check if your fingerless gloves fit around your arm.
And then, once you are fine, you need to knit a total of 10 centimeters or 4 inches in the 2x2 rib. For me, that’s 30 rows.
And then switch to 6 rows in stockinette stitch. Typically your wrist is the narrowest part of your hand and we want to account for that.
The important part is that you stop with the ribbing in a row where you purl those last 3 stitches.
Repeat for Stockinette Stitch:
- Right side: knit
- Wrong side: purl
And once you are done with the 6 rows in st st, you need to continue in 2x2 rib stitch (+3 selvage stitches) for 4 more centimeters.
For the left glove you need to continue knitting the repeat but stop knitting 6 stitches BEFORE the middle right after you finished two knit stitches. For me, that’s 15 stitches. For the right side, you need to stop after the middle, right after 2 knit stitches.
And now, you need to bind off 6 stitches. If you have really big thumbs you might have to bind off 8 stitches. Tighten up the last stitch quite a lot and knit the next stitch with high tension as well. Tug on the tail quite a bit, and then you continue with the 2x2 rib pattern.
And on the return row, you knit across until you reach the position where you stopped your bind off. And then, cast on 6 stitches with a backward loop increase: https://nimble-needles.com/stitches/backward-loop-increase-m1bl/
In the return row, simply knit across those 6 stitches and stick to the standard 2x2 rib stitch repeat. And then knit 4 more centimeters of ribbing.
And then simply bind off all stitches. Make sure you don’t bind off too tightly. Just knit those stitches very loosely. And then, you can cut the working yarn leaving a long tail of around 6 inches.
Close the seam using mattress stitch. Make sure you are seaming together the glove with the correct side ending up on the outside. And then your gloves are ready to wear!
Feel free to comment in case you got any questions concerning this free fingerless glove knitting pattern.
►Visit my blog for a free knitting school: https://nimble-needles.com/learn-to-knit-for-beginners/
►Subscribe my newsletter for free patterns: https://nimble-needles.com/newsletter/
► View my projects on Instagram https://www.instagram.com/nimbleneedlez/
Видео How to knit fingerless gloves for beginners - Really easy pattern you can knit flat канала NimbleNeedles
Показать
Комментарии отсутствуют
Информация о видео
Другие видео канала
 Easy! Fingerless Mitts Flat Knitting on Straight Needles | Beginner Knitting
 How to purl faster | Continental purling the easy way (+2 special tips)
 The 15 best gifts for knitters - Ideas for every budget
 Knit Perfect Thumb Gussets for Fingerless Mitts / Mittens / Gloves
 How to fix knitting mistakes - 8 essential techniques every knitter needs to know
 How to knit neat edges - The 10 best edge stitches in knitting
 How to Knit Fingerless Mitts Without a Pattern // Technique Tuesday
 FINGERLESS GLOVES Knitting Pattern Tutorial (Step-by-Step)
 Double Pointed Needles for Beginners
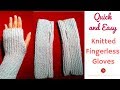 Knitted Fingerless Gloves | A Quick and Easy Knitted Project | Fingerless Mitts
 20 things I wish I knew when I started knitting - sharing my tips from over 30 years as a knitter
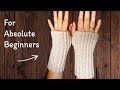 How to Crochet Fingerless Gloves tutorial - Crochet wrist warmers - Crochet gloves
 Rice Stitch Fingerless Gloves or Mittens - From Start to Finish Knitting
 How to join knitting in the round on double pointed or circular needles - without a gap!
 How to knit faster - 10 actionable speed knitting tips & techniques
 How to knit in the round on double-pointed needles for beginners (step by step)
 How to do double knitting - Getting started, changing colors, the best selvage, etc
 How to join yarn in knitting - 10 techniques from easy to invisible
 Fingerless Mittens Knit Flat | Step-By-Step Knitting Tutorial | Knitting House Square