- Популярные видео
- Авто
- Видео-блоги
- ДТП, аварии
- Для маленьких
- Еда, напитки
- Животные
- Закон и право
- Знаменитости
- Игры
- Искусство
- Комедии
- Красота, мода
- Кулинария, рецепты
- Люди
- Мото
- Музыка
- Мультфильмы
- Наука, технологии
- Новости
- Образование
- Политика
- Праздники
- Приколы
- Природа
- Происшествия
- Путешествия
- Развлечения
- Ржач
- Семья
- Сериалы
- Спорт
- Стиль жизни
- ТВ передачи
- Танцы
- Технологии
- Товары
- Ужасы
- Фильмы
- Шоу-бизнес
- Юмор
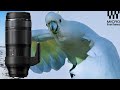
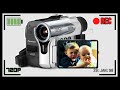
Digital Camera inside a Film Camera. Raspberry Pi 4 Project HQ Camera
Don't laugh... It was all Jerry's idea...
How to build a digital camera for insertion into an old retro film camera
Raspberry Pi 4 https://amzn.to/46ZOpY1
Waveshare 3.5inch https://amzn.to/3QnGPj2
HI Quality Camera https://amzn.to/3QKwbnP
PiSugar Battery https://amzn.to/3MtPKOt
CCTV Lens https://amzn.to/3QJMDEN
Fuji X100v https://amzn.to/47C7uj9
Key Moments
00:00 Items needed
03:15 Raspberry Pi Install
07:00 Setup LCD Screen
08:00 Connect Camera
09:28 Create Shutter Buttons Icons
17:00 Attach LCD Screen
20:00 Test Camera
21:00 Fit sensor inside Film Camera
23:26 Montage Music Camera Build
26:00 Finish product
27:00 Test out Photo walk with Jerry
Instructions:
Step 1 Install the 32bit OS
https://www.raspberrypi.com/software/
Step 2 - Setup the LCD Screen
https://www.waveshare.com/wiki/3.5inch_HDMI_LCD
Edit the config.txt file in the root folder. Paste this to the bottom
hdmi_group=2
hdmi_mode=87
#Display with 800*480 resolution
hdmi_cvt 800 480 60 6 0 0 0
#Use 480*320 resolution display, you need to add the following 3 lines of code
#hdmi_pixel_freq_limit=20000000
#hdmi_cvt 480 320 60 6 0 0 0
#hdmi_drive=1
dtoverlay=ads7846,cs=1,penirq=25,penirq_pull=2,speed=50000,keep_vref_on=0,swapxy=0,pmax=255,xohms=150,xmin=200,xmax=3900,ymin=200,ymax=3900
Step 3 Install the Calibrator
sudo apt-get install xserver-xorg-input-evdev xinput-calibrator
Step 4 Copy this file
sudo cp -rf /usr/share/X11/xorg.conf.d/10-evdev.conf /usr/share/X11/xorg.conf.d/45-evdev.conf
Step 5 Edit this file and paste in the script
sudo nano /usr/share/X11/xorg.conf.d/99-calibration.conf
Section "InputClass"
Identifier "calibration"
MatchProduct "ADS7846 Touchscreen"
Option "Calibration" "190 3991 243 3895"
Option "SwapAxes" "0"
Option "EmulateThirdButton" "1"
Option "EmulateThirdButtonTimeout" "1000"
Option "EmulateThirdButtonMoveThreshold" "300"
EndSection
Setup the Camera and create the shell scripts
Short Cut Template
[Desktop Entry]
Type=Application
Name=XXXXX
Terminal=false
Exec=/home/xxx/Templates/xxxxx.sh
Icon=/home/xxx/Templates/xxxxx.png
focus.sh
#!/bin/bash
libcamera-hello -f -t 20000
photo.sh
#!/bin/bash
libcamera-still -f --datetime
Rob and Jerry
https://www.robdido.com
https://instagram.com/robdido
https://tiktok.com/@robdidonato
Jerry Socks: https://ebay.us/Gd59Z6
Jerry Accepts DogeCoin Tips
DOGE: DEkJ23uGs6EEdVWkRmesT1JKKkNjoqWnCw
Jerry Loves Puppachinos Full Cream Milk
https://buymeacoffee.com/robdido
Видео Digital Camera inside a Film Camera. Raspberry Pi 4 Project HQ Camera канала Roberto Di Donato
digital camera how to build digital film conversion digitial camera install raspberry pi camera hi quality camera DIY camera film camera conversion im back digital sensor diy digital camera diy build a camera how to build a camera retro digital cameras fujifilm x100v get the film look CCD sensor CCD film look CCTV lens polaroid retro camera
Комментарии отсутствуют
Информация о видео
5 ноября 2023 г. 6:54:30
00:29:05
Другие видео канала