How to bleed Formula and Avid brakes - reupload
Bleed procedure for the Formula disc brakes.
You will need Formula or Avid bleed kit, T10 torx and a Dot4 brake fluid.
Start with unbolting the brake lever from the handlebar.
It needs to be vertical with the bleeding port on top.
Then position the bike that the bleeding port on the caliper is in upper most position. Make sure the brake lever is higher than the brake caliper.
Fill one syringe one half full of dot4 brake fluid and the other syringe one quarter full.
Hold each syringe with the tip pointed up and slowly push the air bubbles out. Close each hose clamp and pull on the plunger. Bubbles will appear to form and enlarge. Continue to pull on the plunger to release all the bubbles so they can rise to the top of the fluid. Release the plunger, open the clamp and carefully push the air out. Repeat this process several times.
Use a T10 torx to remove the caliper bleed port screw. Be careful not to contaminate brake pads and brake rotor. You can remove the wheel and brake pads and use the appropriate bleed block.
Carefully remove the rubber o-ring.
Use the one half full syringe and tread it all the way into the caliper body and open the clamp.
Use a T10 torx to remove the lever bleed port screw. Tread the other syringe in the brake lever and open the clamp.
Bleed the hose
Gently push on the caliper syringe plunger to move fluid up through the system and into the lever syringe. Push until the caliper syringe is left less than one quarter full.
Bleed the caliper
Close the clamp on the lever syringe. Pull the brake lever in and fasten it with a zip tie. Pull out on the caliper syringe plunger to create a vacuum then gently push back to pressurize the system. Repeat the procedure several times until large bubbles stop coming out of the caliper. Do not pull too hard.
Remove a zip tie from the brake lever but keep the lever pulled in with your finger. Apply the pressure on the caliper syringe plunger and allow the brake lever to slowly release to the fully extended position.
Remove the syringe from the caliper and reinstall the bleed port screw. Don't forget the rubber o-ring.
Bleed the lever
Open a clamp on the lever syringe. Pull on the plunger to create a vacuum then gently push on the plunger to pressurize the system. Squeeze and release the brake lever several times to release all the bubbles in the system. At the end push and release the plunger one last time.
Remove the syringe and reinstall the bleed port screw.
Use isopropyl alcohol or water and wipe off any excess brake fluid from the brake lever and the caliper.
Видео How to bleed Formula and Avid brakes - reupload канала bikebook
Показать
Комментарии отсутствуют
Информация о видео
Другие видео канала
 Drivetrain 5/6
 World cup Maribor 2010 - 4x Friday qualifying
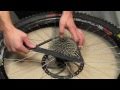 Čiščenje in mazanje raglje
 Replacing internally routed cable
 Menjava hidravlične zavorne cevi Hayes HFX-9
 Basic Tools for Bike Maintenance
 Marzocchi 888 RCV - oil change
 Replace bearings on a bicycle frame - Liteville 301
 Pedal Maintenance - Kona Jackshit Primo
 Bikepark MB - red line - May 2011
 How to adjust rear derailleur
 S07E04 - How to remove the rubber handlebar grips
 How to patch an inner tube - flat tire
 S07E03 - Replace the Broken Pedal Pin - Quick Tip
 S07E02 - RockShox Lyrik Inner Cartridges Service
 How to replace a Bottom Bracket - Square Taper
 How to clean and lube a head tube
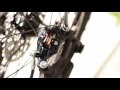 Nicolai ION 16 - bike assembly (re-upload)
 How to replace metal eyelet bushings - Fox Float RP2
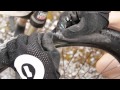 Emergency Tire Repair: Sidewall cut
 Wheels 4/6