Sprinter Van Strut Install Step by Step | Winnebago View Navion
Subscribe to my channel below if you haven't already:
RV Life DIY:
https://www.youtube.com/channel/UCSfMK9m7PqeA-jfeivcUp5g? sub_confirmation=1
This video shows a detailed process of removing the factory OEM front struts and installing aftermarket Koni adjustable front struts on my Winnebago View with the Sprinter van VS30 3500 (cab chassis) aka cut away chassis . This process should be the same on the regular van as well. I show some steps that may help you on your install as well. Be careful around the 2 sensors that are on the hub. I have my Koni strut adjusted to max firmness. It may be too firm for you, but unfortunately you won't know the setting unless you play around with it. I will be adjusting mine down 1/2 a turn.
After trying the struts only, I reinstalled the front Sumo spring and like the handling characteristics with Sumo spring better in windy conditions as well as passing semis.
There are several different aftermarket choices for the front struts, so you will have to do your own research on which one is the best fit for you.
Time stamps:
1:40 Koni part number
4:15 Tips with Boeshield Spray
4:40 Removing sensors-passenger side
6:00 Adjusting the strut. I have mine set to max, but you may want yours a little softer
8:10 Remove Sumo Spring
9:30 Tools used. An additional socket is required at the next time stamp.
10:36 Removing passenger floor board
12:35 Removing top strut nut
16:00 Removing the strut-passenger side
18:26 Strut comparison
20:46 Installing strut-passenger side
27:38 Driver's side Boeshield
28:56 Driver's side floor board removal
31:00 Driver's side Strut top nut removal
31:28 Tip to pound down strut from floor board
32:12 Driver's side Strut removal
32:30 Driver's side sensor removal and strut removal
36:00 Driver's side strut install
43:00 Transverse spring
My Amazon store: https://www.amazon.com/shop/rvlifediy
I bought the strut from Europarts.
Amazon Links:
Front Sumo Springs: https://amzn.to/3FwBylr
Видео Sprinter Van Strut Install Step by Step | Winnebago View Navion канала rv life diy
Показать
Комментарии отсутствуют
Информация о видео
Другие видео канала
 I Had to Fix My Drawers in my Winnebago View
 STARLINK and STAR WARS #shorts
 360 Sewer Vent Mod | Winnebago View and Navion
 STARLINK Speed Test while Driving in my Winnebago
 4 Simple Repairs in my Winnebago-RV Repair Series
 Hey Mercedes Commands and Mods (Part 4)
 My Most Difficult Repair on My Winnebago
 New RV PROBLEMS and Repair DIY on My 2023 Dynamax
 HOW to REPAIR holes your RV wall Winnebago View Navion
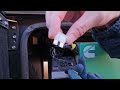 Onan Diesel Generator Cold Start Problems
 Fixing my door in my Winnebago Part 2-RV Repair series
 BADLANDS National Park #starlink #shorts
 CREEPY REST STOPS in the Desert #shorts
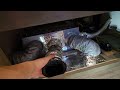 RV Propane HEATER is too cold and too hot explained.
 Winnebago View Navion More MODS | Packing and Organizing
 PLASTI DIP PAINT your RV SKYLIGHTS and ROOF VENTS | Great Results
 How to Fix Your RV Fan Squeaking and Green Light of Death | Maxxair
 Portable Solar Panel vs Factory Mounted RV Solar Panels
 "BOESHIELD" RV Exterior Maintenance Series | Winnebago View Navion
 Soft Close Hinges on my Winnebago View Navion