Back-saving monitor stand(riser) DIY, scrap wood.
I made a desktop monitor stand (riser) to save space, and my back. In this video see the whole process of how I made it out of scrap wood.
Thanks for watching if you have any questions leave them in the comments below.
00:00 - Cheesy Intro
00:50 - Layout, material prep
01:44 - Assembly- Dowels
04:38 - Assembly- side bracing
07:56 - The Grand Reveal
09:21 - Wrap Up, Thanks
Notes (from production just threw these in here in case I missed something):
use on desk, table, or entertainment center to give more functional space
figure out what you want
pick out pieces, good candidates
tables, duh
bed frames
entertainment centers
shelves
keep in mind where each piece could be used
i picked out, cut, and arranged each piece such that it would, when assembled, present the cleanest look
painted ends on front
beveled leg tips on front
measure where or what you might want to use it for
i wanted to put stuff for my computer under it, firstly this old boombox i use for speakers
also raise monitors for better posture
want to be able to mount things to side, maybe clamp a mount for lights or microphone
measure twice, cut once, i might mock it up (upsidedown?) or something like i showed
fastening method?
I picked a combo of surface gluing, dowels, and screws
the dowels are a nice way to keep the top in place without screws potentially poking through
you could screw strait down if don't care about top of screw showing, recommend countersink
stuff for each method varies, for dowels it helps to have a doweling jig, dowel centers, and dowels lol
also helps to have drill bit stop, but tape works too
assemble
sand especially the painted areas for gluing
err on the side of extra depth for dowels, its a mess to find out after gluing that it's too short
press / bonk things in good
leave force on it, clamps or weight, until glue cures
Видео Back-saving monitor stand(riser) DIY, scrap wood. канала The Tinker
Показать
Комментарии отсутствуют
Информация о видео
Другие видео канала
 The Tinker's Cable Cradle cable/cord organizer. My First Product! Put your cable woes to rest.
 Woodputer mk1 2012 Sept 07 part2of2
 Woodputer mk1 2012 Sept 07 part1of2
 Engineering Club's Wind Turbine
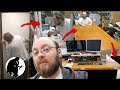 DIY Desk or Workbench/Table made from an old Door
 Aurora(Northern Lights) in MN 2024-05-10 Long Exposure Timelapses, No Enhancement, Natural Colors
 Free Style Speed Origami "Zoo Turtle"
 Behind the scenes Sherline Minimill
 Why many DIY vehicle builds kind of suck. Tips for Fowler about the Home Depot Hovercraft
 New (Leaked?) Tesla Cell and how I made one (sort of... out of paper) -Battery Day 2020
 LED LCD projector experiment version 2
 New Tesla 4680 Battery Cell (I Was Right!), New Mockup - Battery Day 2020 & New Channel Announcement
 LED LCD projector experiment version 1
 Christmas Eve at the Smiths
 Solar Boat Regatta 2008 - Part 1 - Construction
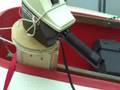 Solar Boat Regatta 2008 - Part 3 - Boat Summary
 Solar Boat Regatta 2008 - Part 2 - Events
 Origami CD Case
 Generators - Intro to Eng - Design Project Fall '08 - Fablab