Elegoo starter kit easy tutorial. Quick installation guide.
Hi, today I bought a starter kit from #Elegoo.
It's a very complete kit and it's perfect for who is starting to look into the #Arduino world.
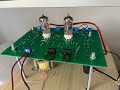
When you receive the kit and you unbox it, it looks great! And has a lot of components. The kit allows us to make several number of projects in an easy way.
All the components are listed in a paper that covers the plastic case, and the Arduino inside is a #Mega 2560!
In this tutorial I would like to show how to setup the kit starting from zero! First thing to do is to identify the Arduino and the USB port cable. In my case, I am using an Apple Macbook Air.
Then the next step is to install the Arduino IDE software.
It's quite easy!
Search for the Arduino IDE download.
Go to the Arduino page and select the download for your type of computer. In my case the version I need is the one for Apple Mac!
You can also decide to download and donate a fee. I recommend to do so! In this case however, I chose the "just download" option!
At the end of the download, you will need to double-click on the downloaded file! It may happen, just like in this case, that the Mac does not allow you to run a file that is downloaded. To do so, I suggest to open the Mac finder and select the file while pressing the "ctrl" key! Then select "open" just like you see in the video.
The next step is now to connect the Arduino to the computer using the USB cable. This will also power the Arduino for the first time. If you see an orange light blinking on the Arduino board! it means that the board is working fine!
Let's now load a simple project and try to compile it. Follow the video and load the example project called BLINK.
After the project is loaded, try to compile it and, if there are no errors, you are sure that the installation is OK.
Now you need to configure the Arduino board, and the USB port connection. Look at the movie how to do it.
At the end of the configuration, try to compile again the BLINK example and then try to load it by clicking on the arrow. Follow the video. If no errors are showed on the bottom of the application, then you are ready for the next step.
Now unplug the Arduino from the USB port and take a yellow LED from the Elegoo starter kit. Plug the long lead on PIN 12 of Arduino and the short lead on GND.
Plug again the Arduino on the USB port and see that the yellow LED is not blinking.
At this point we go back to the BLINK sketch and we modify it like showed in the video. What we want to do is to program Arduino to make the external yellow LED blink instead of the internal orange one. To do that, you need to change the code just like in the video.
Compile again the code and then load it in the Arduino board.
If all goes well, the yellow external LED will start to blink.
If you enjoy this video, please put a thumbs up and subscribe to my channel. My purpose is for all to have fun and to enjoy the Elegoo starting kit!
#arduino #arduinoproject #arduinomega #arduinouno #arduinonano #arduinoprojects #embedded #embeddedsystems #electronics #aktu #delhi #benglore #iit #technology #sensors #gujrat #btech #technology #students #science #scienceprojects #robotics #soldering #iot #irsensor
Видео Elegoo starter kit easy tutorial. Quick installation guide. канала Carlo Stramaglia
It's a very complete kit and it's perfect for who is starting to look into the #Arduino world.
When you receive the kit and you unbox it, it looks great! And has a lot of components. The kit allows us to make several number of projects in an easy way.
All the components are listed in a paper that covers the plastic case, and the Arduino inside is a #Mega 2560!
In this tutorial I would like to show how to setup the kit starting from zero! First thing to do is to identify the Arduino and the USB port cable. In my case, I am using an Apple Macbook Air.
Then the next step is to install the Arduino IDE software.
It's quite easy!
Search for the Arduino IDE download.
Go to the Arduino page and select the download for your type of computer. In my case the version I need is the one for Apple Mac!
You can also decide to download and donate a fee. I recommend to do so! In this case however, I chose the "just download" option!
At the end of the download, you will need to double-click on the downloaded file! It may happen, just like in this case, that the Mac does not allow you to run a file that is downloaded. To do so, I suggest to open the Mac finder and select the file while pressing the "ctrl" key! Then select "open" just like you see in the video.
The next step is now to connect the Arduino to the computer using the USB cable. This will also power the Arduino for the first time. If you see an orange light blinking on the Arduino board! it means that the board is working fine!
Let's now load a simple project and try to compile it. Follow the video and load the example project called BLINK.
After the project is loaded, try to compile it and, if there are no errors, you are sure that the installation is OK.
Now you need to configure the Arduino board, and the USB port connection. Look at the movie how to do it.
At the end of the configuration, try to compile again the BLINK example and then try to load it by clicking on the arrow. Follow the video. If no errors are showed on the bottom of the application, then you are ready for the next step.
Now unplug the Arduino from the USB port and take a yellow LED from the Elegoo starter kit. Plug the long lead on PIN 12 of Arduino and the short lead on GND.
Plug again the Arduino on the USB port and see that the yellow LED is not blinking.
At this point we go back to the BLINK sketch and we modify it like showed in the video. What we want to do is to program Arduino to make the external yellow LED blink instead of the internal orange one. To do that, you need to change the code just like in the video.
Compile again the code and then load it in the Arduino board.
If all goes well, the yellow external LED will start to blink.
If you enjoy this video, please put a thumbs up and subscribe to my channel. My purpose is for all to have fun and to enjoy the Elegoo starting kit!
#arduino #arduinoproject #arduinomega #arduinouno #arduinonano #arduinoprojects #embedded #embeddedsystems #electronics #aktu #delhi #benglore #iit #technology #sensors #gujrat #btech #technology #students #science #scienceprojects #robotics #soldering #iot #irsensor
Видео Elegoo starter kit easy tutorial. Quick installation guide. канала Carlo Stramaglia
Показать
Комментарии отсутствуют
Информация о видео
Другие видео канала
 NextPCB Hi-Fi Phono Pre Amplifier #nextpcb #hifi #phono
 Fantastic IOT dashboard with ESP32 and TagoIO @TagoIO
 Car Garage Detection System
 Pioneer CD Player lens focus fix (PD-6700)
 Send Encrypted LoRa messages using Reyax RYLR998
 Seeed LoRa E5 Tutorial with ST programmer
 LoRa E5 mini tutorial
![LoRa e Arduino Cloud IOT [ITA]](https://i.ytimg.com/vi/nbRPRY1xNRQ/default.jpg) LoRa e Arduino Cloud IOT [ITA]
LoRa e Arduino Cloud IOT [ITA] Two way LoRa mobile transmitters
 LoRaNow Gateway and Node
 DFRobot Transparent Display Clock
 Arduino TV Audience Measurement
 CAM WiFi pilotata da Alexa usando Arduino Nano 33 IOT. Si può cambiare canale con Alexa
 Bluetooth VU Meter Receiver
 Arduino TTN LoRa node device using PCB Way
 Arduino Tea Bag Timer
 APAN Arduino
 Arduino RC interface for helicopters
 Subscribe Carlo Stramaglia
 Smart Timer with #Arduino #DFRobot Gravity DFR0760 Speech Synthesis module