DFRobot Transparent Display Clock
I bought a very nice transparent display from DFRobot, and I will use it to build my new project.
The idea is to mount the display on plexiglass.
So I cut two pieces. The first to use it as a base, while the second to squeeze the display inside.
Then I had to model with hot air the base part of the plexiglass. I used a heater at 165 degrees. You can also go higher and melt the plastic quicker, but the risk is that it breaks. So take your time and go slow.
The video will show you how I heated the plexiglass. You need to heat it all over the side that you want to melt. It takes time but at the end, the plastic start to bend in the correct way.
At the end, you can see the result. It's not perfect, but it's OK for the project needs. Remember, this is just for fun.
After, I mounted the display with two screws and I tested that the display was working. I had to connect all the wiring on my Arduino. Please look at the diagram if you wish to make your own version.
At the end, I loaded the software version I coded for the project. It's a clock that shows: Date. Day of Week. Time of the day. Seconds remaining before the end of year. Seconds remaining before the end of the month. Seconds remaining before the end of the day.
The project requires an #Arduino Nano 33 IOT and a #DFRobot transparent display
Видео DFRobot Transparent Display Clock канала Carlo Stramaglia
Показать
Комментарии отсутствуют
Информация о видео
Другие видео канала
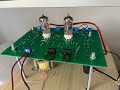 NextPCB Hi-Fi Phono Pre Amplifier #nextpcb #hifi #phono
 Fantastic IOT dashboard with ESP32 and TagoIO @TagoIO
 Car Garage Detection System
 Pioneer CD Player lens focus fix (PD-6700)
 Send Encrypted LoRa messages using Reyax RYLR998
 Seeed LoRa E5 Tutorial with ST programmer
 LoRa E5 mini tutorial
![LoRa e Arduino Cloud IOT [ITA]](https://i.ytimg.com/vi/nbRPRY1xNRQ/default.jpg) LoRa e Arduino Cloud IOT [ITA]
LoRa e Arduino Cloud IOT [ITA] Two way LoRa mobile transmitters
 LoRaNow Gateway and Node
 Arduino TV Audience Measurement
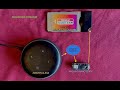 CAM WiFi pilotata da Alexa usando Arduino Nano 33 IOT. Si può cambiare canale con Alexa
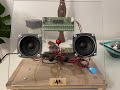 Bluetooth VU Meter Receiver
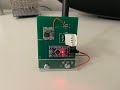 Arduino TTN LoRa node device using PCB Way
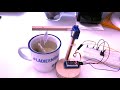 Arduino Tea Bag Timer
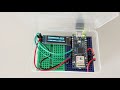 APAN Arduino
 Arduino RC interface for helicopters
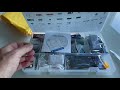 Elegoo starter kit easy tutorial. Quick installation guide.
 Subscribe Carlo Stramaglia
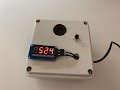 Smart Timer with #Arduino #DFRobot Gravity DFR0760 Speech Synthesis module