Understanding Layers & Masks in Capture One Pro
Layered editing has long been a non-destructive editing technique in Photoshop. Capture One adds the concept of layered editing to RAW editing, allowing advanced masking abilities and a more controlled editing workflow from within the RAW editor.
The video gives an overview of the how to create layers, and add masks to the RAW image so as to do localized editing. It describes the Brush, Magic Brish, Ai Brush, Gradient and Radial tools, as well as the various eraser tools available in Capture One Pro.
The video does not look at Healing and Cloning which I will deal with in a separate future video. Importantly, this is an overview, with a brief explanation of the tools; not an exhaustive tutorial on how to use each of the tools. I'll create future video 'tutorials' and add them to this block.
You can also join the Nature's Light team on workshops with
http://www.natureslight.co.za
Timeline:
00:00 Introduction - What are layers?
02:48 Advantages of using layers while editing
04:08 Adding keyboard shortcuts
04:37 How to create a new layers
06:58 Making selections
07:45 The Brush selection tool
09:24 The Gradiant selection tool
10:26 The Radial selection tool
12:11 The Ai Brush selection tool
14:22 The Select Subject tool
15:07 The Ai Mask tool
16:04 How to refine masks
18:03 How to add edits to a new layer
18:57 Conclusion
Видео Understanding Layers & Masks in Capture One Pro канала Emil von Maltitz
Показать
Комментарии отсутствуют
Информация о видео
Другие видео канала
 A Look at the Leofoto Gabriel Tripod
 Basic Stitching in Lightroom.
 Photographing Giant's - A Kubu Island Film
 Introducing the Nisi True Colour Vario ND Filter
 Obliterating Dust - How to remove sensor dust and other crud using Capture One Pro
 BioWatch - A celebration of seed
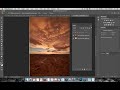 Basic Blending of Layers in Photoshop.
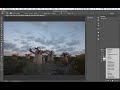 Basic Landscape Workflow One - Madagascar.
 Blending Images for Exposure Blend with Sun.
 Speed Editing Keys with Capture One Pro 23
 Is this THE last seascape tripod you'll own? | Introducing the Leofoto Agulhas Tripod
 Hillcrest Camera Club - Landscape Images and the Stories Behind Them
 Chasing Snow
 Protec Interview - Sthokozile Shangase
 Understanding Curves Video Tutorial.
 Luphathana Waves
 Parc d' Anja and the Lemurs.
 Wandering The Wild Coast - the highlights
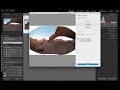 Creating a Panoramic in Lightroom.
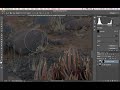 How to focus stack images manually in Photoshop
 Stars & Trees at Andavadoaka.