- Популярные видео
- Авто
- Видео-блоги
- ДТП, аварии
- Для маленьких
- Еда, напитки
- Животные
- Закон и право
- Знаменитости
- Игры
- Искусство
- Комедии
- Красота, мода
- Кулинария, рецепты
- Люди
- Мото
- Музыка
- Мультфильмы
- Наука, технологии
- Новости
- Образование
- Политика
- Праздники
- Приколы
- Природа
- Происшествия
- Путешествия
- Развлечения
- Ржач
- Семья
- Сериалы
- Спорт
- Стиль жизни
- ТВ передачи
- Танцы
- Технологии
- Товары
- Ужасы
- Фильмы
- Шоу-бизнес
- Юмор
Easy Cherry Shrimp Jar Setup Tutorial - No Filter, No Heater, No CO2, No Ferts, No Water Change!
Get 5% Discount Plus Free Shipping On The Nano Light And All Other Hygger Aquarium Gear With The Code "glassboxdiaries" at checkout (USA only) - https://www.hygger-online.com/product/aquarium-mini-clip-on-light/?ref=glassboxdiaries
Jar - https://glassboxdiaries.com/shrimpjar
Light - https://glassboxdiaries.com/hyggerusblight
Substrate - https://glassboxdiaries.com/fluvalstratum
Dr Tims Ammonia Solution - https://glassboxdiaries.com/drtimsammonia
Tap Water Conditioner - https://glassboxdiaries.com/tapwaterconditioner
Bug Bites Food - https://glassboxdiaries.com/bugbites
PLANT LIST
🌿 Limnophila Sessiliflora
🌿 Rotala Rotundifolia
🌿 Ludwigia Palustris Green
🌿 Staurogyne Repens
🌿 Eleocharis Parvula
Easy Cherry Shrimp Jar Setup Tutorial - No Filter, No Heater, No CO2, No Ferts, No Water Change!
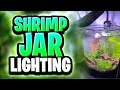
In this video, I’m introducing my new room-temperature, filterless cherry shrimp jar. This setup features an aquasoil substrate, dragon stone hardscape, and various plants for natural filtration. Surprisingly simple to create, this jar offers a low-maintenance way to keep shrimp and enjoy a small, lush aquascape.
Starting with a large piece of dragon stone, I broke it down to fit the jar, giving me several smaller pieces to choose from. After rinsing the stone to remove clay residue, I set it aside while prepping the substrate. I’m using Fluval Stratum for this setup; it’s an affordable, ready-to-use option, which makes it ideal for shrimp and planted setups. Unlike the Walstad Method, which involves layering substrates, Fluval Stratum is ready out of the bag. I used about 2 inches, tilting the jar slightly to create depth for a natural look. Once in place, I arranged the dragon stone pieces to create a simple foreground, midground, and background.
For lighting, I’m using the Hygger clip-on light, which provides ideal lighting without excessive heat. I’ll share more about my lighting choices for shrimp jars in an upcoming video, but for now, I’ve linked the Hygger light and included a discount code for U.S. viewers.
Before planting, I cycled the jar using Dr. Tim’s ammonia solution and a water conditioner to establish beneficial bacteria. This process breaks down ammonia into less harmful compounds, creating a safe environment for shrimp. Cycling took about 36 days, after which the water parameters were stable.
To finish the setup, I planted Ludwigia palustris, Staurogyne repens, Eleocharis parvula, Rotala rotundifolia, Limnophila sessiliflora, and water lettuce. Each plant serves a purpose: Ludwigia and Limnophila add height, Staurogyne repens fills in the midground, and Eleocharis creates a grazing area for shrimp. These plants not only help filter the water but also provide surfaces for biofilm, which shrimp love.
At day 43, with water parameters stable, I added cherry shrimp from one of my other tanks. They quickly settled in and began exploring. I’ve been feeding them sparingly with Fluval Bug Bites to encourage breeding, adding only one granule per feeding day. Since the plants are cuttings from other tanks, they already have biofilm for the shrimp to graze on.
Fast forward to day 55, and the shrimp are thriving! The jar is receiving six hours of light per day, which should be enough for plant growth while avoiding excessive algae. I’m monitoring the water, especially pH, since Fluval Stratum slightly lowers it over time. A quick water change and a little shrimp salt keep the water stable.
Overall, I’m excited to see how this colony develops. I’ll keep this setup low-maintenance, only removing plant overgrowth and topping off water due to evaporation. I’ll share updates in my monthly fish room video and do a more in-depth update every few months.
Shrimp jars like this are an excellent way to get into the hobby, and they’re not as complex as you might think! I hope this video provides a helpful overview. Links to the products used, plus a Hygger discount code for U.S. residents, are in the description. Thanks for watching, and happy fish-keeping!
IMAGE CREDIT
RedAndr, Public domain, via Wikimedia Commons Image of the gulf stream currents - Creative Commons 4.0
Some of the links in this video description may be affiliate links meaning I earn a small commission from any purchases made.
Видео Easy Cherry Shrimp Jar Setup Tutorial - No Filter, No Heater, No CO2, No Ferts, No Water Change! канала Glass Box Diaries
Jar - https://glassboxdiaries.com/shrimpjar
Light - https://glassboxdiaries.com/hyggerusblight
Substrate - https://glassboxdiaries.com/fluvalstratum
Dr Tims Ammonia Solution - https://glassboxdiaries.com/drtimsammonia
Tap Water Conditioner - https://glassboxdiaries.com/tapwaterconditioner
Bug Bites Food - https://glassboxdiaries.com/bugbites
PLANT LIST
🌿 Limnophila Sessiliflora
🌿 Rotala Rotundifolia
🌿 Ludwigia Palustris Green
🌿 Staurogyne Repens
🌿 Eleocharis Parvula
Easy Cherry Shrimp Jar Setup Tutorial - No Filter, No Heater, No CO2, No Ferts, No Water Change!
In this video, I’m introducing my new room-temperature, filterless cherry shrimp jar. This setup features an aquasoil substrate, dragon stone hardscape, and various plants for natural filtration. Surprisingly simple to create, this jar offers a low-maintenance way to keep shrimp and enjoy a small, lush aquascape.
Starting with a large piece of dragon stone, I broke it down to fit the jar, giving me several smaller pieces to choose from. After rinsing the stone to remove clay residue, I set it aside while prepping the substrate. I’m using Fluval Stratum for this setup; it’s an affordable, ready-to-use option, which makes it ideal for shrimp and planted setups. Unlike the Walstad Method, which involves layering substrates, Fluval Stratum is ready out of the bag. I used about 2 inches, tilting the jar slightly to create depth for a natural look. Once in place, I arranged the dragon stone pieces to create a simple foreground, midground, and background.
For lighting, I’m using the Hygger clip-on light, which provides ideal lighting without excessive heat. I’ll share more about my lighting choices for shrimp jars in an upcoming video, but for now, I’ve linked the Hygger light and included a discount code for U.S. viewers.
Before planting, I cycled the jar using Dr. Tim’s ammonia solution and a water conditioner to establish beneficial bacteria. This process breaks down ammonia into less harmful compounds, creating a safe environment for shrimp. Cycling took about 36 days, after which the water parameters were stable.
To finish the setup, I planted Ludwigia palustris, Staurogyne repens, Eleocharis parvula, Rotala rotundifolia, Limnophila sessiliflora, and water lettuce. Each plant serves a purpose: Ludwigia and Limnophila add height, Staurogyne repens fills in the midground, and Eleocharis creates a grazing area for shrimp. These plants not only help filter the water but also provide surfaces for biofilm, which shrimp love.
At day 43, with water parameters stable, I added cherry shrimp from one of my other tanks. They quickly settled in and began exploring. I’ve been feeding them sparingly with Fluval Bug Bites to encourage breeding, adding only one granule per feeding day. Since the plants are cuttings from other tanks, they already have biofilm for the shrimp to graze on.
Fast forward to day 55, and the shrimp are thriving! The jar is receiving six hours of light per day, which should be enough for plant growth while avoiding excessive algae. I’m monitoring the water, especially pH, since Fluval Stratum slightly lowers it over time. A quick water change and a little shrimp salt keep the water stable.
Overall, I’m excited to see how this colony develops. I’ll keep this setup low-maintenance, only removing plant overgrowth and topping off water due to evaporation. I’ll share updates in my monthly fish room video and do a more in-depth update every few months.
Shrimp jars like this are an excellent way to get into the hobby, and they’re not as complex as you might think! I hope this video provides a helpful overview. Links to the products used, plus a Hygger discount code for U.S. residents, are in the description. Thanks for watching, and happy fish-keeping!
IMAGE CREDIT
RedAndr, Public domain, via Wikimedia Commons Image of the gulf stream currents - Creative Commons 4.0
Some of the links in this video description may be affiliate links meaning I earn a small commission from any purchases made.
Видео Easy Cherry Shrimp Jar Setup Tutorial - No Filter, No Heater, No CO2, No Ferts, No Water Change! канала Glass Box Diaries
Комментарии отсутствуют
Информация о видео
3 ноября 2024 г. 20:49:43
00:10:45
Другие видео канала