How to Forearmstand: Hard Yoga Poses Made Easy
Forearmstand is extremely versatile and creates the perfect balance between inverting and arm balancing.
In the ‘Hard Yoga Poses Made Easy’ series, we focus on a particular yoga pose or skill that seems (or is) very difficult and we make it a lot easier by breaking it down into actionable, realistic, and sequential steps.
In this tutorial, we focus on the forearmstand, also known as pincha mayurasana (which translates to feathered peacock pose).
Full disclosure: this is my favorite arm balance. Here’s why…
First, it requires a respect for technique that many poses don’t really require. To stand on your forearms the technique isn’t very complicated, but if you’re unaware or don’t pay attention to it, the pose completely crumbles. (The first part of the tutorial gives you a detailed understanding of alignment and technique for forearmstand)
Also, the process towards the full pose requires a respect for process. You need to take your time as you create more strength and range of motion in the shoulders and also the hamstrings (to enter the pose smoothly and without momentum). You also need to give yourself time to develop the body awareness to balance with a lower center of gravity (which this tutorial will show you how to do) before straightening the legs into the full pose.
Also, once you start to get comfortable being upside down, you’ll notice that you can spend longer and longer periods of time holding the pose and you build strength and refine your alignment. With a refined understanding of how to make the pose lighter and more effortless, you get the benefit of an extended inversion (like headstand) and an extended arm balance (like handstand).
Headstand and handstand are both great poses, but headstand tends to be less physically engaging while handstand is often difficult to hold for very long. Forearmstand is the perfect middle ground between the two.
Finally, once you’ve got the pose down cold, it becomes a versatile starting point for interesting leg variations, backbends, and transitions. I cover these options in another tutorial, but just know that the party doesn’t end once you’ve gotten into the pose. There’s always more to explore.
To give you a well-planned program to work towards the pose, here’s how this tutorial breaks out the different skills you’ll need to make it happen:
1) Plank: Shoulder and Core strengthening
2) Dolphin: Every benefit of plank plus beginning to get used to the inversion aspect of the pose
3) Dolphin Leg Lift: Dolphin with a little more intensity and inversion
4) Wall: Balance on your forearms with alignment, a low center of gravity, and a safety net
5) Full Pose: Move away from the wall and work towards straightening the legs overhead
As always, respect the process, take your time, and pay attention to the little wins along the way. There’s no sense in rushing, you’re going to be practicing yoga for a while. Just do your practice and everything will work out.
Start using yoga to live athletically: https://www.IcewaterYoga.com
Read the blog post: https://icewateryoga.com/how-to-forearmstand-hard-yoga-poses-made-easy/
Subscribe to this channel: https://www.youtube.com/channel/UCrYJjZrj-5QfZi86NhvK-5A
Видео How to Forearmstand: Hard Yoga Poses Made Easy канала Icewater Yoga
Показать
Комментарии отсутствуют
Информация о видео
Другие видео канала
 Why You Can't Handstand | 3 Big Mistakes
 How to do FOREARM STAND // the way I learned - 6 tips
 Learn To Headstand & Elbow Stand Easily | Beginner Level To Impressive Yoga Variations
 Top 5 Yoga Poses to Improve Strength
 How to Flying Crow: Hard Yoga Poses Made Easy
 TRYING V HARD YOGA POSES
 HOW TO DO A FOREARM STAND FOR BEGINNERS - Tips and Tricks for Pincha Mayurasana
 How to do an elbow stand in 5 minutes
 How to Tuck Up: Hard Yoga Poses Made Easy
 How to Handstand (Before You Can Handstand)
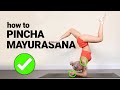 How To Do a Forearm Stand for Beginners - Pincha Mayurasana Tutorial
 Top 3 Beginner Yoga Mistakes
 Headstand & Forearm Stand Tutorial | Arm Balances - PART II
 Top 5 Stretches for the Inflexible!
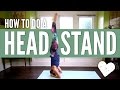 Head Stand Yoga Pose - How To Do a Headstand for Beginners
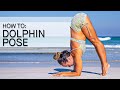 How to Do Dolphin Pose Pinchamayurasana Prep — Yoga Drills Challenge Pose Tutorial — Day 8
 #1 Secret to Overcoming Handstand Fear
 Yoga Flow for Peace ✌🏽✌🏿✌🏻✌🏾✌🏼 Full Power Yoga Class!
 What Nobody Realizes About Handstand
 How to Pike: Hard Yoga Poses Made Easy