how to make enamel pins at home
what up!! oh what up. So today guys I'm going to show you how to make this enamel pin. pin. pin...
So the game plan is to make little molds of plastic to cast the metal in. I made two, The base plate that the metal is going to sit in and then one that you're going to stamp in the metal
so to make these what I did was I took some clear acrylic plastic and I printed out the images that I wanted and and taped them to the back of [the plastic]
That way, I could see it and i could scratch into it. so you scratch it out first. (or draw it out) these scratches are going to make the lines that stick out on your enamel pin.
what you do next is you want to get those [lines] nice and deep. I took a Dremel and i drilled out the lines.
You don't have to use a Dremel, just so long as you get them nice and deep.
If you follow me on Snapchat you'll know that I cheated and I went and got these laser engraved, just because it was going to be quicker and easier.
It still wasn't deep enough so I took it and I dremeled it again.
Go ahead and clean it out a little bit. I put a piece of tape on the back [of the stamp one] just so i could hold it [better].
The metal i used was just solder. (Come to find out even lead free solder has bad fumes.. so use super good ventilation and mask or try a different metal) what you use on any electrical repair and a little tiny blow torch. heat it till its liquid. and your going to pour it on the little base. and push it in with the stamp and pull it off.
so I mean that didn't work so I tried it again. lets try that one more time. Nope lets try again. liquid it up. and push it in.
Guys this took so many tries
But eventually I got one I was okay with. Then go ahead and cut off the excess. It looks good so lets run with that one. cut it off more. get it to where you want it. file it to get the nice little details on the edges.
next were going to glue on the pin. I took the epoxy and mixed it. put it on the back of the [metal pin] it takes about 4 to 8 hours to set.
but once its set you can go ahead and paint it. I started with a black paint but you could just leave it silver.
now time for the enamel. you can get this at any craft store - its what people use to paint their model cars and what not. I mixed up the colors to what i wanted and with a paint brush i just painted it.
with the small parts I used a tooth pick. tiny little detail in the eye right their. looks good
I like to mix the colors on the same little pallet so they marry each other and have the same feel.
again with the small little detail in the eye and... done. let that dry.
all you have to do it put the backing of the pin on there and there you have it. DOOOPE.
(UPDATE: that JB weld didn't hold too well.. so I recommend using super glue...)
As far as a home made (hand made) pin I was pretty pumped on it. A little enamel pin. I hadn't seen one done.
So guys I'm going to be giving away this one, or a different one that i made, on my Instagram. Go ahead and check out [my Instagram] . Just like the post with this pin on it... and... ya ¯\_(ツ)_/¯
Instagram: https://www.instagram.com/shmoxd/
(I kind of just must made this up... so there might be a better way to do it from home... but this worked well enough for me ¯\_(ツ)_/¯ )
Music: Wūsh - late nights with you / for her
Follow me and watch the art process:
Instagram: https://www.instagram.com/shmoxd/
Twitter: https://twitter.com/shmoxd
Spotify: https://open.spotify.com/user/12149338898
Subscribe: https://www.youtube.com/channel/shmoxd?sub_confirmation=1
Like. Comment. Share.. or what ever..
Видео how to make enamel pins at home канала Shmoxd
Показать
Комментарии отсутствуют
Информация о видео
Другие видео канала
 Solve All Your Problems about Hard Enamel Pins Making!
 How I Make My Pins!
 How To Make Your Own Stickers
 I Made DIY Plastic Pins...it's a good time
 How i make real metal enamel pins at home
 How To Hand Make a Patch
 How Its Made - 245 Lapel Pins
 How to Make Jewelry
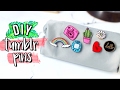 DIY Tumblr Pins Using Things You ALREADY Have | JENerationDIY
 How To Weave
 Shrink Plastic for Beginners: Coloring, Cutting, Shrinking, and Sealing
 How I make Enamel Pins from my Art
 How To Make a Patch With a Punch Needle
 DIY BT21 Plastic Charms!
 How to Make 3D Antique Lapel Pins?
 How To Make a Pinback Button
 starting my own business (making stickers and prints + selling on etsy)
 DIY Iron-On Transfer
 How to Make Enamel Pins From Your Artwork | Holly Pixels
 Enamel Pins to make in a Budget | In Hindi | Friendship Day Special