Rose Canes | Polymer Clay Cane Tutorial
Polymer Clay Rose Cane Tutorial | Beginner Cane Tutorials
Jennifoo's List of Recommended Tools:
MARCATO Atlas 150 Pasta Machine (this is the machine I use!):
https://amzn.to/3MXd7Pd
Sculpey Clay Blades 3 Set Pack (for general cutting):
https://amzn.to/37wqyW1
Tissue Blades (dedicated thin & sharp blade for cane slicing)
https://amzn.to/3u7odbI
Sculpey Satin Glaze (for sealing surface treatments):
https://amzn.to/3wb2nH2
Acrylic Roller and Tiny Hole Cutter Set:
https://amzn.to/3KMTyqY
Large Circle Cutters:
https://amzn.to/3qeCsu9
Cute Earring Clay Cutters:
https://amzn.to/3u4LyuH
* If you use the Amazon affiliate links above to make a purchase I will receive a small commission. I greatly appreciate your support!
STEP 1: CREATE SKINNER BLEND
You will need 20 grams of red, 12 grams of yellow-orange, and 10 grams of dark red. I'm using Sculpey Souffle as my clay. Create a skinner blend, with the colors offset about 1/4" of an inch from each other. Roll it through the pasta machine until well blended. Take your completed skinner blend, and fold it in half. Run it through the pasta multiple times until you get it real thin at the 5th setting.
STEP 2: CREATE GRADIENT LOAF & CONVERT TO LOG
Next you want to create a gradient loaf, by making 1 inch accordion folds until you get to the very end (put gradient loaf video in the cards). Next, compress and reduce the gradient loaf until you get it to more of a square shape. After that, round off each corner of the square so it's more of a plug shape. After that, gently roll each rounded corner against a hard clay safe surface, to further round it. Then roll it across the surface to transform it into a cylindric shape.
STEP 3: CANE REDUCTION & SLICING
Then reduce the cane until you get to 10 inches long. Then cut off 5 logs each at 1.25inches in length. They should each be roughly 13mm in diameter. Set those off to the side. After that, take the rest of the cane and continue reducing it until the diameter is about 10mm. Then cut off 5 logs at about 1.25 inches in length. Set those off to the side. After that, continuously reduce your cane until you get to 8mm in diameter, then cut off 1 log at about 1.25 inches in length. Set it off to the side. Then reduce your cane again to get the diameter to about 6mm in diameter, then cut off 3 logs at 1.25inches in length. Now you should have about 5 large logs, 4 medium logs, 1 small log, and 3 itty bitty logs.
STEP 4: TRANSFORM TO PETAL SHAPES
Next, we are going to shape the logs into petals shapes. Starting with the biggest since it's the easiest to work on at the start. You want to have the darkest color facing towards you. And pinching the sides where the red clay meets between your fingertips. Keep pinching until it's more of a elongated diamond shape. You want to taper the ends. And also, sort of bend it a little into a slight umbrella shape. Then do this for all the remaining logs of all sizes. For the itty bitty logs, you can first squish it into an oval shape first which gives you a bit more surface area to pinch into a diamond shape to make it easier.
STEP 5: CANE ASSEMBLY
We are going to build the core of the rose first and then keep adding overlapping petals. So take your 3 tiniest pieces, and turn them into c shapes. One with the lighter color color on the inside, and one with lighter color on the outside. Then interlock these two. Then take the remaining tiny piece and add it to the bundle. After that, take your small piece, which should be a bit longer than the 3 tiny ones, and add it to the bundle and you want it to overlap the previous piece added. Then continue by adding the 4 medium petals. You may want to adjust the shapes of the petals as you see fit while compiling the cane which gives you some artistic freedom to make the design your own. And just keep adding more petals, with the newest piece overlapping the edge of the previous petal. After you've added all 4 of the medium petals. Then start adding on the 5 largest ones. Here you have the option of maintaining more of a rose shape if you'd like, you can watch my cane packing video on how to do that. But here, I just made it more of a circular shape as a personal preference. Cut off a slice of the end and Viola, here is the finished crimson rose cane design. These would be an eye-catching component to any veneers you might make. Please give this video a thumbs up if you enjoyed this tutorial, and have fun making your own rose cane designs :-)
Contents of this video
0:00 - Introduction
0:17 - #1: Create Skinner Blend
0:56 - #2: Create Gradient Loaf and Convert to Log
1:36 - #3: Cane Reduction & Slicing
2:44 - #4: Transform to Petal Shapes
3:34 - #5: Cane Assembly
Music:
Music: [uplifting ballad] by Alexander Nakarada (www.serpentsoundstudios.com)
Licensed under Creative Commons BY Attribution 4.0 License
https://creativecommons.org/licenses/by/4.0/
#polymerclay #polymerclaytutorials #ovenbakeclay
Видео Rose Canes | Polymer Clay Cane Tutorial канала Jennifoo
Показать
Комментарии отсутствуют
Информация о видео
Другие видео канала
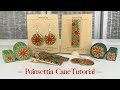 Poinsettia Clay Earrings and Hair Barrettes | Flower Cane Tutorial | Poinsettia Cane Tutorial
 DIY Christmas Gifts 2020
 What is Polymer Clay | What is Polymer Clay Made of | What is Polymer Clay Used For
 Christmas Clay Earrings Tutorial | Polymer Clay Earrings | Handmade Earrings | DIY Clay Earrings
 Connect Polymer Clay Sheets | Enlarge Polymer Clay Sheets
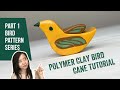 Simple Bird Cane | Easy Polymer Clay Canes | Polymer Clay Tutorial
 Striped Jelly Roll Canes | Polymer Clay Cane Tutorial
 Butterfly Canes | Polymer Clay Tutorials
 Leaf Canes | Polymer Clay Cane Tutorial for Beginners
 Liquid Sculpey | Fimo Liquid | Kato Liquid Polyclay | Sculpey Bake and Bond
 Leaf Clusters | Polymer Clay Cane Tutorial
 Gold Gradient Cane (Sneak Preview Part 3 Poinsettia Cane) | Polymer Flower Clay Tutorial #shorts
 Feather Canes | Polymer Clay Tutorials for Beginners
 Transform Canes Into Cool Patterns | Polymer Clay Cane Tutorial
 Polymer Clay Work Surfaces | Work Area | Work Space
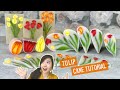 Tulip Flower Canes | Polymer Clay Cane Tutorial
 Polymer Clay Canes for Beginners | Gradient Canes
 How to Make Custom Kaleidoscope Canes | Polymer Clay Cane Tutorial
 Skinner Blend vs Simmon's Skinner Blend | Make Better Gradients with Polymer Clay
 Retro Funk Canes | Polymer Clay Cane Tutorial for Beginners
 Kaleidoscope Cane | Polymer Clay Canes