Curbless Shower Installation Wood Subfloor | Part 2
We will pick up where we left off after part 1. The recessed area is ready for the pan to be installed, but for the height to be correct we must install the Ditra first. Installing the Ditra is fast and easy so I went ahead and left it as part of the video.
Once the Ditra is installed we placed the shower pan where it goes upside down. We placed it upside down so that it was a flat work surface. The tiles weren’t cut yet and I had some concern the slope might make it more difficult to layout properly.
Once the pattern of the tile was established we set out to trace the drain and slope lines. The tray slopes from the four corners of the drain to the corners of the pan. Once we knew where the drain was to be located we simply used a straight edge to draw our slope lines.
The video ends with the tile dry laid on the installed shower pan. The next video will show how we installed and waterproofed the pan as well as installing the bathroom floor tile as well.
Be sure to subscribe to our channel and click the bell icon to keep updated with our latest videos. We serve all of Mid-Missouri, call (573) 289-1045 to schedule your consultation today.
Видео Curbless Shower Installation Wood Subfloor | Part 2 канала EJ Flooring & Custom Tile Installation
Показать
Комментарии отсутствуют
Информация о видео
21 апреля 2019 г. 18:41:04
00:18:08
Другие видео канала
 Curbless Shower Installation Wood Subfloor | Part 3
 Large tile on shower floor. Tile Relief Cuts. Shower Floor Tile. Shower tile.
 WHAT is this, and WHY do you want it under your floors?
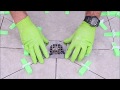 Modern Design for a Shower Pan
 Curbless Shower Installation Wood Subfloor | Part 1
 Wet room tiling shower tray
 How to Recess a Floor for a Curbless Shower with the Schluter®-Shower System
 Cutting Down Floor Joists for Curbless Entry Shower in Upstairs Bathroom
 Curbless Shower prep.
 How to pre slope a shower pan on slab - Bathroom Remodel Day 13
 Bonding Flange Drain Comparison --- Schluter, Laticrete, and FLO-FX for Tiled Shower Pans
 The easiest way to build a curbless shower I Plan-Learn-Build
 ADA Shower curbless shower
 HOW TO INSTALL WETROOM SHOWER - FULL JOB - Impey Aqua Dec
 Curbless Shower Pan Installation: Schluter Curbless Shower (Part 3)
 OTL Linear drain installation video
 How to Install Schluter®-KERDI-LINE linear drain
 Schluter Shower System Tips (With Sal DiBlasi!!!)
 WORST TILE JOB I'VE SEEN - Can We Save It?
 One Day Shower Prep!!! MUD PAN with Kerdi and Ardex 8+9 : TileCoach episode 28