How to build a bay window seat with storage part 2
Once again my music didn't show up on the edit for some reason. My apologies.
Hi guys! Thanks for visiting my channel and checking out part two of the bay window seat with storage build! This video encompasses several days of the build where I returned to Tony's house to finish and some shop time!
Day 2 began with me routing a round over edge on a piece of 1" x 3" poplar to be used for the front edge which was placed on the unit with a 1" hangover. I nailed it down using the 18 gauge nails.
Then I took out some brown craft paper and constructed a complete template to be used to trace onto the top piece of 3/4" plywood.
When I transferred the paper template to the whole sheet of plywood, the template was too large, so I just started to rip the plywood by resting it on Tony's 5 gallon buckets. Oops. I cut through three buckets. Oh well.
Next was measuring for the opening where the door would be. I did this by placing the middle piece of plywood over the existing opening and marking the cut locations.
I then sanded down the entire front of the build to 220 grit. It was then time to cut 3" pieces of 1/4" plywood for trim. One piece would be placed directly over the center of the two sheets of plywood making it appear to be one full piece. I used liquid nails and 18 gauge brad nails to attach the trim.
That night I cut some 1/2" maple plywood for the final piece of trim to be located behind the baseboard.
The I cut the pop up door with my router and a straight cut bit. I did not have a factory edge piece of plywood to use, and my jig saw needed blades to this was the solution for me. Next time I will joint an edge of plywood and square it up on the table saw.
I then installed the last piece of trim and nailed down the top center section. I made more templates to make the corner pieces. The corner pieces would not fit as one piece due to the window molding and the already nailed down center piece.
I then cut the baseboard as one long piece. 147". I don't like a seam in the middle. Then in the shop that night I put the finger hole in the pop up door using my drill press and a forstner bit. After the hole was drilled I applied the edge banding.
The edge banding was simple to use. Cut it long, apply it with an iron, let it cool, and then trim it!
I then installed the base shoe molding and caulked the entire build. After the caulk dried, approximately 30 minutes, I primed the build and returned the next day to sand it down to 220. I then brushed and rolled on the top coat of paint. It turned out really nice.
I had to bring the door back home to trim it after installing the piano hinge. The screws on the hinge made the door about 1/8" too big.
I cut off an 1/8" on the table saw then reattached the piano hinge.
Back at Tony's I installed the door and it was finished. When the door was seated, it raised up about an 1/8" due to the hinge. Tony is going to install a small magnet under the door which will keep it closed. They are also going to have a custom cushion made to place on top.
I wish I had taken more pictures of the finished build.
The tools used in this build were as follows;
Ryobi orbital sander. https://www.homedepot.com/p/RYOBI-2-6-Amp-Corded-5-in-Random-Orbital-Sander-RS290G/205105594
2000 Delta 10" miter saw. No link
Craftsman 18 gauge nailer.http://www.searshometownstores.com/product/Craftsman-51112-18GA-2-Inch-Combination-Brad-NailerStapler
Craftsman air compressor.http://www.searshometownstores.com/product/Craftsman-8213376SRS501-6-Gallon-11-HP-OilFree-Pancake-Compressor-w-Hose-Accessory-Kit
Laguna Fusion F2 tablesaw. https://www.rockler.com/laguna-f2-fusion-tablesaw-36-rip-capacity
Kreg K4 jig. https://www.homedepot.com/p/Kreg-K4-Pocket-Hole-System-K4H/202074960
Porter Cable forstner bits. https://www.amazon.com/PORTER-CABLE-PC1014-Forstner-Bit-14-Piece/dp/B004TSZEB4/ref=sr_1_1_sspa?hvadid=256397996390&hvdev=c&hvlocphy=9021509&hvnetw=g&hvpos=1t1&hvqmt=e&hvrand=4131429409505380110&hvtargid=aud-647846986281%3Akwd-300660600220&keywords=porter-cable+forstner+bit+set&qid=1554298610&s=gateway&sr=8-1-spons&psc=1
Edge banding.https://www.homedepot.com/p/13-16-in-x-250-ft-White-Birch-Real-Wood-Veneer-Edgebanding-with-Hot-Melt-Adhesive-01pgbirch/204217130
Edge banding trimmer. https://www.lowes.com/pd/Kobalt-Double-Sided-Edge-Trimmer/3030694
Ryobi 12" sliding miter saw.https://www.homedepot.com/p/RYOBI-15-Amp-Corded-12-in-Sliding-Miter-Saw-with-Laser-TSS120L/205673791
The video was shot on my Samsung Galaxy S8 plus, a GoPro 2, a GoPro 3, and a GoPro 4. Edited with my Macbook pro and iMovie software.
Thanks! Be safe.
Видео How to build a bay window seat with storage part 2 канала Marrazzo Woodworking & DIY
Показать
Комментарии отсутствуют
Информация о видео
3 апреля 2019 г. 18:42:48
00:09:09
Другие видео канала
 How to build a bay window seat with storage part 1
![My DIY Window Seat Storage Hack [Full Project]](https://i.ytimg.com/vi/l6z1Jl12dDA/default.jpg) My DIY Window Seat Storage Hack [Full Project]
My DIY Window Seat Storage Hack [Full Project]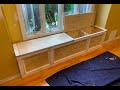 window seat (with storage)
 Bay window seat construction - day 2 fixing down the base, sides & divisions
 5 Amazing Woodworking Tools Hacks | Tips & Tricks
 Bay window seat construction- day 1 Base layer n lots of thinking,
 $125 Window Bench Build - Full Project
 Bay Window Seat & Storage Time lapse
 How to Build a floating seat for Bay window w/ Build cost | The Nomad Studio
 Home Made Bay Window Seat
 D.I.Y. Window Bench with Storage Compartment
 Shoe Storage Bench // Built In Bench
 Bay window seat construction - day 4 Bull nose front, skirting & start of doors
 DIY - You can build this sliding closet door set. With the step by step instructions in this video.
 DIY Garage Shelves / Shelf / Workbench / Storage / industrial
 Window Bench Seat with Large Built-In Storage
 Breakfast Nook with Under-Seat Storage - How I Built It
 Building a Window Seat with Drawers
 Building a Corner TV Stand Built-in | Plans Available!
 Woodworking : Kitchen Banquette Bench W/ Storage