How to Make a Book Cover in PowerPoint
You’ve got your book written, you have your illustrations, but you can’t afford to pay someone to make your cover. Don’t sweat it. I’m going to show you how to create a book cover in Powerpoint…So stick around!
Hey everybody, Keith Wheeler here and if you want to continue to get all of the hints tips and tricks on how to make self-publishing a little bit easier to navigate, then be sure to subscribe to the channel and hit the bell icon so you get alerted each and every time I put out new content.
Now, in previous videos I showed you how to create a children’s picture book with and without bleed in PowerPoint and I’ll includes links to them in the cards.
Look, sometimes, as indie authors, we’re cash strapped and can’t afford to spend the money to get a good cover made. Have no fear, there is a way to do it yourself. I’m going to show you how, in Powerpoint.
Here’s what you need to do your cover.
1. Know the final dimensions of your book.
2. Know the number of pages your book is
3. Have an illustration you want for your cover.
Now that we have that, let’s get started.
Since I’m publishing mine on CreateSpace, I’m going to go to createspace.com and search for cover template. Click on Book Cover Templates. Fill out the info and export the files. Now if you’re not publishing yours on createspace, that’s fine. I’ll show you make your own guides.
Next, I’m going to open up Powerpoint and click on a blank presentation. First we need to set our dimensions. Go to Design Slide size – Custom Slide Size.
My book’s final dimensions will be 8 x 10.
When calculating the width, it will be the width of your book x 2 +
spine size + bleed.
Spine size = # of pages X the width of the paper.
You can go to your platforms website and search for “Cover Guidelines” and you should be able to find the thickness. If you can’t, just email their support.
Since my book has a color interior, I will use the .002347 thickness in my calculations.(according to Createspace)
So .002347 x my 26 pages = .061.
So, my width will be 8” back cover + .061” spine + 8” front cover. Finally, I need to add a .125 bleed on both sides. Therefore, my final width will be:
.125” bleed + 8” back + .061” spine + 8” front + .125 bleed = 16.31”
My height will be easier to calculate. It’s just the height of the book 10” + .125 top bleed and .125 bottom bleed. Total height = 10.25.
Now that I have the dimensions I can layout my book. First, I will clear out everything so I have a clean slate. Next, I'll draw a box for my bleed. First I’ll do the top, so I will go insert – shape and grab a rectangle. I will right-click inside and choose size and position. The height will be .125 and the width will be the entire width of my book, 16.31”. You may notice that it rounds the .125 up to .13. That’s fine, it will just give us an extra safety barrier.
I will drag that up to the top. Now, ctrl + c to copy and ctrl + v to paste and bring that down to the bottom. Next, I need to set the bleeds for the sides. So once again, I’ll go insert – shapes. Draw a box. Right click – size/position. This time the width will be .125 and the height will be the entire height of my book, 10.25. I’ll drag that in place. Ctrl C, Ctrl V and drag that over. And there we have it. Those are my bleeds.
Now I just need to create one more box, to act as my spine. The width will be the .061 and the height will be the height of my book, 10.25. Now, I’ll just drag this to the middle and there we go. Our guidelines are set.
Now, if you’re publishing on Createspace there’s an easier way to do this. Remember those templates we downloaded? Well I’ve taken the png file from that zip file and saved it to my desktop. So instead of doing all of those guidelines, I just go to insert – pictures. Navigate to that file, double click and…There you go. All of the guidelines are set up for you.
In either way, once you have the guidelines set up, all you have to do is insert the cover image you want. Drag it to the correct spot. Make sure that none of your text is in the bleed section.
Now for the back. If you don’t have an image that you want for the back, you can simply create another box. Right click – select fill – eyedropper – and find a color from the front that you’d like to use.
Next if you want to type a back cover blurb, you just click insert – text box. Make the box and then start typing. You can change the font type, size, positioning, etc.
If you want to include an author photo, just insert - photo.
Just, remember if you’re going to type anything you want to stay clear of the bar code area.
Be sure to save regularly.
When you’re all done and ready to export this, the last thing you’ll do is right-click on the images, select Send to Back and that will leave your guidelines left. Click on them and delete them. And then Export the file.
Видео How to Make a Book Cover in PowerPoint канала Keith Wheeler Books
Показать
Комментарии отсутствуют
Информация о видео
Другие видео канала
 How To Make A Children's Book in Powerpoint
 Creating a KDP Book Cover with Powerpoint
 How To Write A Children’s Book From Scratch | Day 6
 How to make Realistic Book Design in PowerPoint
 How To Create Lined Notebook Interiors In PowerPoint
 Removing Color From Images In Powerpoint | Create KDP Low Content Books In PowerPoint
 How To Upload Low Content KDP Books to Amazon and Start Your KDP Publishing Business
 How to Make a Professional Book Cover In MS Word ✔ | Cover Page Designing
 How To Create Animated Videos With PowerPoint | Beginners Guide
 How to Make Your Own Book Cover Using MS Word
 How to Create a Children's Picture Book With Bleed in PowerPoint
 How to Self-Publish Your First Book: Step-by-step tutorial for beginners
 วิธีสร้าง E-bookด้วยตนเองแบบง่ายๆด้วย Microsoft PowerPointใครๆก็ทำได้ภายใน 5 นาที
 Sell More Books | How To Fill Your Keyword Slots
 HOW TO FORMAT A BOOK IN WORD 📚 basic novel formatting using microsoft word
 👍How to Make a Professional Book cover In🔥 | MS powerpoint 2016 100 % 👌👌| cover page Designing
 https://colormepositiveplr.com/shop Book Covers in Powerpoint
 Picture Books for Beginners | How to Make a Childrens Book
 How to Make a Quotes Coloring Page in PowerPoint - KDP Low Content Coloring Books
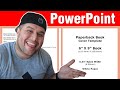 Creating A Kdp Book Cover With Powerpoint - Amazon KDP Paperback Publishing (Easy)