Adding a Backup Camera to a NIssan Frontier (2017) with a truck cap
I bought a 2017 Nissan Frontier SV 4 Cylinder... which is hard enough to find but this was one was not ordered with the backup camera. It wasn't really an issue until I put a truck cap on the truck for doing pest control. At that point I was blind when backing up. So in this video I go through the process of adding a backup camera. The factory stereo / head unit is capable of displaying video. The hardest part is running the wire and tapping into existing circuits.
Parts and Tools Used:
PixelMan Camera - https://amzn.to/41A0rnl
1/4 inch wire loom - https://amzn.to/3W305Vi
Soldering Iron - https://amzn.to/3M6ExT2
Rosin core solder - https://amzn.to/3W4ZthT
Electrical Tape - https://amzn.to/3I5UA2b
Marine Heat Shrink Tubing - https://amzn.to/41GN6JX
Heat Gun - https://amzn.to/3Mo8Tls
Note: I am an Amazon Associate and receive a small commission when you use the links above to purchase an item. You pay the same price, but your purchase helps support my channel and activities. I appreciate your support.
Видео Adding a Backup Camera to a NIssan Frontier (2017) with a truck cap канала Brian Greul
Показать
Комментарии отсутствуют
Информация о видео
Другие видео канала
 Workshop Build - Moving the Lathe again with the DIY Gantry Crane
 Jeep TJ Build - Jeep 75 - Draining the gas out of the gas tank
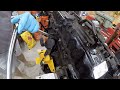 Jeep TJ Build - Jeep 59 - Spark Plugs, Oil Filter, and Air Filter
 Jeep TJ Build - Jeep 54 - Changing the water pump and thermostat
 Jeep TJ Build - Jeep 36: Re-attaching the track bar and dealing with the steering wheel alignment
 Jeep TJ Build - Jeep 35- Steering alignment
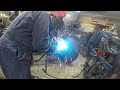 Jeep TJ Build - Jeep 34: Fishhook on the frame - OUCH!
 Jeep TJ Build - Jeep 33 - Securing the brakelines
 Jeep TJ Build - Jeep 32: Replacing the Front Upper Control Arm Bushings
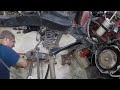 Jeep TJ Build - Jeep 31: Passenger side jounce bumper and spring rest
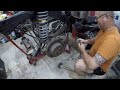 Jeep TJ Build - Jeep 30: Driver Side Axle Fun
 Jeep TJ Build - Jeep 29: Fun with the brake line
 Jeep TJ Build - Jeep 28: Painting the frame with anti-corrosive paint
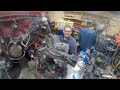 Jeep TJ Build - Jeep 27: Repair and reinforcement of the frame
 Adding lights to Truck Cap
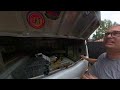 Changing BOLT lock cylinders on ARE DCU Truck Cap
 Installing a $99 ladder rack on my used ARE DCU Truck Topper
 Jeep TJ Build - Jeep 26: Track Bar and Shock Tower Work
 Jeep TJ Build - Jeep 25: It's BAAAACK (from the frame shop) and I'm taking it apart
 SmallRig W60 Wireless Microphone - Unboxing and Initial Review