Continuous Insulation Retrofit: Innie Window Detail
www.protradecraft.com | SUBSCRIBE, please!
https://www.youtube.com/channel/UC-w8-a4UPNynP8v8A4Jlz1w?sub_confirmation=1
I removed the clapboard siding to reveal 1x6 T&G sheathing. The windows had been replaced from the inside and the original 1957 brick molding was intact.
Removing it revealed a lucky break. 1x3 sub casing circumscribed the window and acted as the window stops for the tilt-in replacement windows installed recently.
They also provide a continuous surface for flashing tape to seal off that window opening.
I cut off the sill flush with the wall sheathing and sealed the sides and top with DuPont flashing tape.
At the bottom, I installed a wide strip of [Flexi flash] tight to the replacement window and leaving the release sheet on the outer section.
Now I installed Tyvek over the wall, cutting out at the windows.
Sealing the edges to the flashing tape that seals the 1x3s around the opening.
In this assembly, the Tyvek is really mostly for air control. The outer face of the Styrofoam will shed any water that gets behind the siding.
Now, the foam goes on.
And the sill flashing tape can be folded down and stuck to the fact of the styrofoam.
At the bottom of the wall is site-bent coil stock to keep the bugs out. The whole thing is covered with a rainscreen product called DrainVent.
Finally, I added new exterior trim and siding from TrueExterior.
Instagram: www.instagram.com/protradecraft
Facebook: https://www.facebook.com/protradecraft
Twitter: @TradeCraftsman | twitter.com/tradecraftsman
Pinterest: @ProTradeCraft | pinterest.com/ProTradeCraft
Subscribe to ProTradeCraft's YouTube channel for regular updates
Видео Continuous Insulation Retrofit: Innie Window Detail канала ProTradeCraft
Показать
Комментарии отсутствуют
Информация о видео
Другие видео канала
 Basic Deck Framing: Simple Ledger Installation
 Wall Framing Sequence and Sheathing Patterns
 2023 IBS PTC Live: Masonite's M-Pwr Smart Doors
 2023 IBS PTC Live: Tapco Tools Highlight Reel
 A GTFO IAQ Upgrade with New HVAC Mechanical Equipment: Mini Splits and Air Handler
 Basic Deck Framing: Joists, Blocks, and Posts
 How to Lay Out Floor Joists For Cantilevers and Openings
 Reel Remodeling: Basement Drainage Detail (#shorts)
 Basic Floor Framing Layout, Point Loads, and Making Plywood Fit
 Structural Curb for a Foundation with NO Footing (#shorts)
 Installing Bevel Siding Over an Arch Top Window
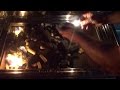 Cheetos and Charcoal
 Weaving Wooden Door Bucks Into Continuous Exterior Insulation (animation)
 Kickout Flashing: The Most-Forgotten Flashing in the World #shorts
 Live Construction Training, Skills Challenge—and Jobsite TIKTOK Dancing?
 IAQ GTFO Upgrade #shorts
 Masterclass: Notch Siding Like A Boss
 Stuff I Learned at Building Science Summer Camp: Flood Hardy Construction
 How to Install Common Rafters on a Gable Roof: Calculating Ridge Height
 Common Rafter Layout: How to Measure, Mark, and Cut Rafters for a Gable Roof