Weaving Wooden Door Bucks Into Continuous Exterior Insulation (animation)
www.protradecraft.com | SUBSCRIBE, please!
https://www.youtube.com/channel/UC-w8-a4UPNynP8v8A4Jlz1w?sub_confirmation=1
Before doing much to the outside of the wall, let’s make sure to seal between the sheathing and the foundation.
Now we can put up that coil stock that John bent for us earlier.
And Buck out the door with stock to match the thickness of the foam.
At the bottom, widen the stock and fasten it well because people are going to step on it.
Install foam on the outside of the wall.
Seal the coil stock to the foam to keep water out, and go ahead and tape all the seams in the foam.
Including the gap between bucks and foam.
Cover the styrofoam with Tyvek, cutting the classic 45-degree cuts at the top of the door.
And fold that flap up for now.
Apply a sill flashing at the bottom using flexi wrap to go up the jambs, down and out of the opening.
Continue sealing all of the layers with jamb flashing. Notice that the flashing extends from the Tyvek all the way back to the stud, sealing all of the layers,
Now we can install the door, plumb, level, and square, screwing into the door bucks and the jack studs.
All that’s left to do is integrate the door frame into the Tyvek WRB, which can be done with flashing tape.
The inside perimeter will be sealed with Great Stuff, but right now, we’re going to install some DrainVent and the door casing.
Instagram: www.instagram.com/protradecraft
Facebook: https://www.facebook.com/protradecraft
Twitter: @TradeCraftsman | twitter.com/tradecraftsman
Pinterest: @ProTradeCraft | pinterest.com/ProTradeCraft
Subscribe to ProTradeCraft's YouTube channel for regular updates
Видео Weaving Wooden Door Bucks Into Continuous Exterior Insulation (animation) канала ProTradeCraft
Показать
Комментарии отсутствуют
Информация о видео
Другие видео канала
 Basic Gable Roof Framing: Where to Set the Ridge and Rafters
 A GTFO IAQ Upgrade with New HVAC Mechanical Equipment: Mini Splits and Air Handler
 Basic Deck Framing: Joists, Blocks, and Posts
 How to Lay Out Floor Joists For Cantilevers and Openings
 Reel Remodeling: Basement Drainage Detail (#shorts)
 Basic Floor Framing Layout, Point Loads, and Making Plywood Fit
 Structural Curb for a Foundation with NO Footing (#shorts)
 Installing Bevel Siding Over an Arch Top Window
 Cheetos and Charcoal
 Continuous Insulation Retrofit: Innie Window Detail
 Kickout Flashing: The Most-Forgotten Flashing in the World #shorts
 Live Construction Training, Skills Challenge—and Jobsite TIKTOK Dancing?
 IAQ GTFO Upgrade #shorts
 Masterclass: Notch Siding Like A Boss
 Stuff I Learned at Building Science Summer Camp: Flood Hardy Construction
 How to Install Common Rafters on a Gable Roof: Calculating Ridge Height
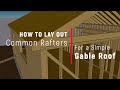 Common Rafter Layout: How to Measure, Mark, and Cut Rafters for a Gable Roof
 How to Pronounce Benjamin Obdyke For Dummies
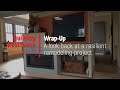 A Look Back at Resilient Remodeling and Design Strategies to Wrap up Season 2 of Building Resilience
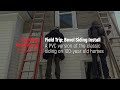 PVC Bevel Siding Installation: Building Resilience episode 10