DIY Trash Can Screen // Horizontal Privacy Screen
Learn to build a DIY Trash Can Screen / Horizontal Privacy Screen by following these 4 easy Steps:
1. Install the vertical 4”x4” mounting posts for your DIY Trash Can Screen.
2. Paint the vertical 4”x4” mounting posts (if desired)
3. Cut the horizontal privacy screen boards to length.
4. Screw the horizontal privacy screen boards to the Vertical 4”x4” posts
Each Step in the DIY Trash Can Screen // Horizontal Privacy Screen build is outlined in detail further down.
Check out ATImprovements.com for more content and projects!
This is Episode 5 in my BACKYARD TRANSFORMATION SERIES. Check out the other episodes below:
Episode 1: DIY Fence on a Budget
https://youtu.be/Nst-QWq5Cuc
Episode 2: How to Build a Fence Gate (DIY Fence Gate Ideas)
https://youtu.be/ogQ4TG3bYB0
Episode 3: How to Extend a Concrete Slab
https://youtu.be/URTGmSfBxeg
Episode 4: DIY Concrete Paver Patio
https://youtu.be/0NsJrLGZDwk
BELOW IS A DETAILED DESCRIPTION OF EACH STEP OF THE PROJECT
Step 1: Install the vertical 4”x4” mounting posts:
For my design, I chose to use 4”x4”x8’ pressure treated posts. In order to have a 6’ tall screen, I dug down about 26” in the areas where I was going to install my posts. I was able to excavate down pretty easily using a shovel and a post hole digger. The reason I excavated down 26” instead of 24” is because I put 2” of stone at the bottom of the hole so that the post would not be in direct contact with the soil.
Next, I mixed up some concrete and poured it in the holes around the posts. Make sure the posts are plumb and at the same height as all of the other posts.
Step 2: Paint the vertical 4”x4” mounting posts:
If you plan to paint your vertical posts, I highly recommend that you paint them before you install the horizontal privacy screen boards. For our project, we painted the vertical posts jet-black with a 100% acrylic exterior paint in order to give them a contrast from the natural wood color of the horizonal boards.
Step 3: Cut the horizontal 2”x6” boards to length:
With your vertical 4”x4” posts installed and painted, you can now begin cutting and installing the horizontal privacy screen boards. If you did a good job in Step 1, your 4”x4” posts should be plumb and uniform from top to bottom – meaning that the distance between the vertical posts should be the same over the full height of the board. Confirm this is true by taking a measurements between the posts at the bottom, in the middle, and at the top. If they are all the same, record your measurement and begin cutting the horizontal privacy screen boards to length.
Step 4: Mount the horizontal privacy screen boards to the vertical 4”x4” posts:
At this point, you will need to do a bit of planning. I recommend that you start installing the horizontal privacy screen boards at the bottom. This will allow you to stack the all of the boards you install on top of the one you already installed. In other words, gravity is on your side.
There are two ways I recommend installing the horizontal screen boards:
1. Pocket holes for a more clean look.
2. Directly screwing (at and angle) the horizontal boards into the vertical posts.
For Screws, I used 2.5” exterior rated deck screws, but you could likely get away with screw sizes ranging from 2” to 3.5”.
Make sure your first board is perfectly level, and then screw it in to the 4”x4” vertical post. Once the first board was installed, I used it to establish the level for first horizontal board on the adjacent wall. Now, with all of my bottom horizontal privacy screen boards in place (and PEFECTLY level, I might add), the rest was easy.
I used two pieces of my 5/8” fence picket spacers (one on each side of the horizontal board) to establish my spacing for the next board, and then I screwed it in. I continued stacking the boards in this manner until the job was complete!
Thank you guys SO MUCH for watching! If this video helped you out and you enjoy content like this, please consider dropping a "like" down below and SUBSCRIBING.
See you on the next one!
THANKS
#AndrewThronImprovements #DIY #HomeImprovement
Видео DIY Trash Can Screen // Horizontal Privacy Screen канала Andrew Thron Improvements
Показать
Комментарии отсутствуют
Информация о видео
18 июня 2021 г. 18:00:36
00:08:04
Другие видео канала
 Garage Makeover - Easy timber screen
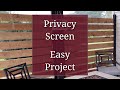 Privacy Screen - Easy Project
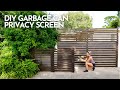 DIY Garbage Can Privacy Screen
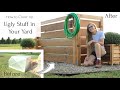 How to Hide Outdoor Eye Sores--No Digging Required!
 DIY TRASH CAN SCREEN // GARBAGE ENCLOSURE
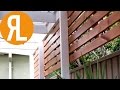 How To Make A Simple Outdoor Screen
 Garbage Can Fence
 Building an Outdoor Timber Privacy Screen - DIY Walkthrough
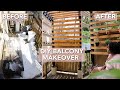 Extreme Balcony Makeover | Renter Friendly Patio Transformation
 Easy Privacy Screen
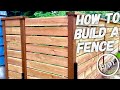 How To Build A Fence : DIY PRIVACY FENCE
 DIY Privacy Fence For Trash Cans and More (with plans!) | Easy How To
 How to Build a Trash Can Cover {EASILY From 1x4s and 2x4s!}
 Horizontal Railing Rebuild
 Hide your Trash! Double Trash can Blind
 DIY Cover for AC Unit and Utility Boxes ⎮ Hide Outdoor Eye Sores!
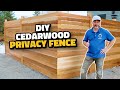 How to Build a Cedar Fence
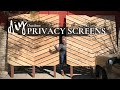 DIY Outdoor Privacy Screens
 DIY Privacy Fence with Planter Boxes | How to build Deck Wall | Privacy Screen