Plane & Simple Battery Charging Technique for your Homebuilt
When a homebuilt aircraft needs its battery jumped or recharged, the usual step is to remove the cowl or other structures to gain access to the battery. Often, the battery is difficult to reach or attaching the charging cables. In this Tip, we explore installing a universal charging port on the instrument panel so that charging the battery is as simple as plugging in a cigar lighter socket. Wiring this socket into the aircraft is discussed as well as the components needed are shown.
Past Tips in the Archive here: http://www.homebuilthelp.com/Tip_of_Week/tip_archive.html
Видео Plane & Simple Battery Charging Technique for your Homebuilt канала HomebuiltHELP
Past Tips in the Archive here: http://www.homebuilthelp.com/Tip_of_Week/tip_archive.html
Видео Plane & Simple Battery Charging Technique for your Homebuilt канала HomebuiltHELP
Показать
Комментарии отсутствуют
Информация о видео
Другие видео канала
 ULPower Engine 1st run - Zenith CH650
 William Wynne's Corvair College 17 March 2010 Orlando, Florida
 "One Week Wonder" Zenith CH750 CruZer Build Oshkosh 2014
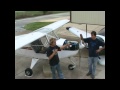 Two Viking Engine Aircraft on Display
 5 minutes of Sebring Light Sport Expo 2016
 Corvair College 17 Welcome Statement from William
 UL Power announces Engine installation video soon!
 HomebuiltHELP Tip of the week: Mark's Magnets
 Building the Affordaplane Part 33
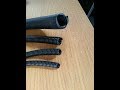 Protect Aircraft Wires with Cable Looms
 Making a Door a little better!
 Building the Affordaplane Part 10
 Scratch Building a Zenith Cruzer Fin - Chris Boultinghouse
 Building the Affordaplane Part 16
 Powder Coating for your Homebuilt Experimental Aircraft
 Taking your Engine's Temperature
 Interesting Tools for Experimental Aircraft Builders
 Free Resource for Experimental Aircraft Builders from the FAA
 Inexpensive AWOS Automated Weather for your Airport
 Step by Step Building the Zenith Super Duty Part 2
 New Zenith Nose Wheel Bungee Solution