Adobe Illustrator Tutorial: Sketch to Vector (1/3)
In this Adobe Illustrator Tutorial, we will be using the anchor point guide to assist while going through a simple workflow together. We will be going through a complete process of using our Build Tools, adding Line variation, simple coloring with Live Paint, Adding Values, and Effects. We will go nice and slow for brand new users of Adobe Illustrator so it is easy to follow along.
If you are New to the Channel or a Beginner in Adobe Illustrator, I recommend following along with our 100 Adobe Illustrator Tutorials Playlist: https://www.youtube.com/playlist?list=PLm3BN_BHMC-fPXRTYCu6xmcvjgR0RW8Qa
Download our Adobe Illustrator Brushes + Resources to follow our 100 Tutorials Playlist on YouTube or use them with your own vector artwork. Download our Updated Brush Libraries, Comic Halftones, and Texture Bundles:
-- DOWNLOAD BRUSHES + RESOURCES: https://jasonsecrest.com/illustrator-brushes/
-- DOWNLOAD ILLUSTRATOR RESOURCES: https://jasonsecrest.teachable.com/
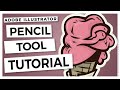
Pencil Tool is actually my preferred method of teaching a new user to Adobe Illustrator while using their Tablet. It is very user friendly since it has a two-step approach to adding variation with Brushes. I love workflows that start out with the direction “just trace it.” Marker Test: if I hand you a marker and said to trace your drawing in Illustrator?
PENCIL TOOL
The pencil tool is one of the easier tools to use and master with the tablet. It comes with a lot of other tools in the sub menu to help you out, but the main settings are enough with smoothing and keep selected on.
JOINING PATHS
We will be keep selected turned on so we can join paths that are next to each other, especially corners. Just note that you can still join paths in the same manner but you just have to select them first to get the join icon by your pencil.
KEEP SELECTED
The keep selected is great for joining and corners but it does come with its issues if you don’t want paths to join. So a little trouble shooting is zoom in enough to see the start and finish of each stroke. I also go long with strokes to avoid unnecessary joining and to allow for line variation later.
Here are some of the Pencil Tool Options that I recommend. I will go through some of them so you can modify them depending on your drawing style.
The first slide bar is the Fidelity or Smoothing setting. This one is great for those of you who want to go fast and hate hitting Control/Command + Z (undo) all the time in other programs. This will clean up the line as you draw and will remove unnecessary anchor points.
The main 2 Options that I want to cover is the Keep Selected and Edit Selected Paths down at the bottom. This is so we can edit and join as we go. The ability to join helps a lot and allows us to get back corners that the smoothing will potentially round out. Notice the bottom and the within 0 (zero) pixels. This will remove the rewrite or auto correct which is pretty frustrating if you don't want it.
Ice Cream Tutorial: https://jasonsecrest.com/drawing-for-illustrator-from-a-stock-image/
Copyright & Legal: All characters, artwork, and tutorial videos are copyrighted by Jason Secrest and jasonsecrest.com. Tutorials, characters, and artwork is for educational purposes only and should not be reproduced, sold, distributed, or made into products for commercial use without expressed written consent. This applies to any derivative work created from the tutorials and characters.
#jasonsecrest #adobeillustrator #illustratortutorials #stepbysteptutorials
Видео Adobe Illustrator Tutorial: Sketch to Vector (1/3) канала Jason Secrest
If you are New to the Channel or a Beginner in Adobe Illustrator, I recommend following along with our 100 Adobe Illustrator Tutorials Playlist: https://www.youtube.com/playlist?list=PLm3BN_BHMC-fPXRTYCu6xmcvjgR0RW8Qa
Download our Adobe Illustrator Brushes + Resources to follow our 100 Tutorials Playlist on YouTube or use them with your own vector artwork. Download our Updated Brush Libraries, Comic Halftones, and Texture Bundles:
-- DOWNLOAD BRUSHES + RESOURCES: https://jasonsecrest.com/illustrator-brushes/
-- DOWNLOAD ILLUSTRATOR RESOURCES: https://jasonsecrest.teachable.com/
Pencil Tool is actually my preferred method of teaching a new user to Adobe Illustrator while using their Tablet. It is very user friendly since it has a two-step approach to adding variation with Brushes. I love workflows that start out with the direction “just trace it.” Marker Test: if I hand you a marker and said to trace your drawing in Illustrator?
PENCIL TOOL
The pencil tool is one of the easier tools to use and master with the tablet. It comes with a lot of other tools in the sub menu to help you out, but the main settings are enough with smoothing and keep selected on.
JOINING PATHS
We will be keep selected turned on so we can join paths that are next to each other, especially corners. Just note that you can still join paths in the same manner but you just have to select them first to get the join icon by your pencil.
KEEP SELECTED
The keep selected is great for joining and corners but it does come with its issues if you don’t want paths to join. So a little trouble shooting is zoom in enough to see the start and finish of each stroke. I also go long with strokes to avoid unnecessary joining and to allow for line variation later.
Here are some of the Pencil Tool Options that I recommend. I will go through some of them so you can modify them depending on your drawing style.
The first slide bar is the Fidelity or Smoothing setting. This one is great for those of you who want to go fast and hate hitting Control/Command + Z (undo) all the time in other programs. This will clean up the line as you draw and will remove unnecessary anchor points.
The main 2 Options that I want to cover is the Keep Selected and Edit Selected Paths down at the bottom. This is so we can edit and join as we go. The ability to join helps a lot and allows us to get back corners that the smoothing will potentially round out. Notice the bottom and the within 0 (zero) pixels. This will remove the rewrite or auto correct which is pretty frustrating if you don't want it.
Ice Cream Tutorial: https://jasonsecrest.com/drawing-for-illustrator-from-a-stock-image/
Copyright & Legal: All characters, artwork, and tutorial videos are copyrighted by Jason Secrest and jasonsecrest.com. Tutorials, characters, and artwork is for educational purposes only and should not be reproduced, sold, distributed, or made into products for commercial use without expressed written consent. This applies to any derivative work created from the tutorials and characters.
#jasonsecrest #adobeillustrator #illustratortutorials #stepbysteptutorials
Видео Adobe Illustrator Tutorial: Sketch to Vector (1/3) канала Jason Secrest
Показать
Комментарии отсутствуют
Информация о видео
Другие видео канала
 Adobe Illustrator Tutorial: Sketch to Vector (2/3)
 Adobe Illustrator Tutorial using Wacom Tablet
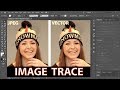 How to Convert a JPEG Image into a Vector Graphic Using the Image Trace Function - Adobe Illustrator
 Getting Started with Photoshop's Pen Tool with a Wacom Tablet
 STOP TRACING- DO THIS
 ULTIMATE GUIDE to MASKING in ILLUSTRATOR CC
 Adobe Illustrator Tutorial for Beginners: How to Use the Pen Tool
 Adobe Illustrator Tutorial: Create a Vector Hamburger from Sketch (HD)
 Adobe Illustrator Tutorial using Wacom Tablet
 Adobe Illustrator Tutorial with Wacom Tablet
 HOW TO USE THE PEN TOOL - Adobe Illustrator
 Adobe Illustrator CC Tutorial - Tracing with the Pen Tool
 Learn to Sketch & Ink Artwork in Illustrator CC!
 How To Cartoon Yourself !- Step By Step /RiceGum Tutorial ( ADOBE ILLUSTRATOR )
 Adobe Illustrator Tutorial: Sketch to Vector (3/3)
 Dota 2 Timelapse Vector Illustration
 Adobe Illustrator CC Tutorial for Beginners: How to Use the Pen Tool
 Adobe Illustrator CC Tutorial for Beginners using Pen Tool
 How To Cartoon Yourself !- Step By Step Full Video Tutorial ( ADOBE ILLUSTRATOR )