- Популярные видео
- Авто
- Видео-блоги
- ДТП, аварии
- Для маленьких
- Еда, напитки
- Животные
- Закон и право
- Знаменитости
- Игры
- Искусство
- Комедии
- Красота, мода
- Кулинария, рецепты
- Люди
- Мото
- Музыка
- Мультфильмы
- Наука, технологии
- Новости
- Образование
- Политика
- Праздники
- Приколы
- Природа
- Происшествия
- Путешествия
- Развлечения
- Ржач
- Семья
- Сериалы
- Спорт
- Стиль жизни
- ТВ передачи
- Танцы
- Технологии
- Товары
- Ужасы
- Фильмы
- Шоу-бизнес
- Юмор
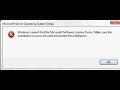
VMWARE WORKSTATION LOCK ERROR
If you encounter an "lck" error in VMware Workstation on a Windows 11 host, follow these steps to troubleshoot and resolve the issue:
Steps to Resolve VMware Workstation LCK Error
Step 1: Close VMware Workstation
Ensure that VMware Workstation is completely closed. Check the system tray to make sure no VMware processes are running in the background.
Step 2: Delete Lock Files
Navigate to VM Directory:
Go to the folder where your virtual machine files are stored. This is typically in your "Documents" under "Virtual Machines" or wherever you specified when creating the VM.
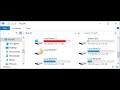
Locate Lock Files:
Look for any files with the .lck extension. These lock files can be located in the main VM folder or its subfolders (e.g., in the directory of the VM’s disk files).
Delete the Lock Files:
Select and delete all files ending with .lck. You might need administrative permissions to do this, so ensure you run File Explorer as an administrator if necessary.
Step 3: Restart Your Computer
After deleting the lock files, restart your computer to ensure that all processes are refreshed.
Step 4: Reopen VMware Workstation
Launch VMware Workstation again and attempt to power on your virtual machine.
Step 5: Check for Concurrent Access
Ensure that no other instance of VMware Workstation is trying to access the same virtual machine. This can also trigger lock issues.
@WindowsAdminWorld
Видео VMWARE WORKSTATION LOCK ERROR канала WindowsAdminWorld
Steps to Resolve VMware Workstation LCK Error
Step 1: Close VMware Workstation
Ensure that VMware Workstation is completely closed. Check the system tray to make sure no VMware processes are running in the background.
Step 2: Delete Lock Files
Navigate to VM Directory:
Go to the folder where your virtual machine files are stored. This is typically in your "Documents" under "Virtual Machines" or wherever you specified when creating the VM.
Locate Lock Files:
Look for any files with the .lck extension. These lock files can be located in the main VM folder or its subfolders (e.g., in the directory of the VM’s disk files).
Delete the Lock Files:
Select and delete all files ending with .lck. You might need administrative permissions to do this, so ensure you run File Explorer as an administrator if necessary.
Step 3: Restart Your Computer
After deleting the lock files, restart your computer to ensure that all processes are refreshed.
Step 4: Reopen VMware Workstation
Launch VMware Workstation again and attempt to power on your virtual machine.
Step 5: Check for Concurrent Access
Ensure that no other instance of VMware Workstation is trying to access the same virtual machine. This can also trigger lock issues.
@WindowsAdminWorld
Видео VMWARE WORKSTATION LOCK ERROR канала WindowsAdminWorld
Комментарии отсутствуют
Информация о видео
30 января 2024 г. 23:42:24
00:01:35
Другие видео канала