OpenAuto Pro Headunit - Adding 12V Delay Timer Relay to the Project
In this video, I attempt to use ABS mounts for the raspberry Pi and screen. I also remove the 5V relay (for cutting power to the pi), and replace it with a 12V delay timer relay.
Parts of this video were recorded over several months. Please excuse the discontinuity and rambling.
stl file for the screen mount - https://www.thingiverse.com/thing:4721086
stl file for the relay mount - https://www.thingiverse.com/thing:4749111
wiring diagram - https://imgur.com/a/cTfYGra
Parts used in this build:
Raspberry Pi 7" Official Touchscreen - https://www.amazon.com/dp/B0153R2A9I/
Raspberry Pi 4b 2gb - https://www.amazon.com/dp/B07TD42S27/
12V 4 channel relay - https://www.amazon.com/dp/B00LW2GM84/
12V Delay Timer Relay - https://www.ebay.com/itm/122552064797
12V - 5V 10amp buck converter - https://www.amazon.com/dp/B01M03288J/
USB sound card - https://www.amazon.com/dp/B016CU2PEU/
USB Bluetooth Dongle - https://www.amazon.com/dp/B07J5WFPXX/
I was running OpenAuto Pro 12 when this video was published. Available from: https://bluewavestudio.io/
Видео OpenAuto Pro Headunit - Adding 12V Delay Timer Relay to the Project канала BoringCooking
Показать
Комментарии отсутствуют
Информация о видео
Другие видео канала
 Wiring AndroidAuto & Raspberry Pi to your Car - Rear View Camera, Connection Diagrams, OpenAuto
 Raspberry Pi Headunit Replacement Update Part 1 - Open Auto Pro, Camera Script & Shutdown Script
 OpenAuto Pro / Android Auto Demo in Lexus is300 Nav Unit
 How I Automated All the Things - Raspberry Pi, Arduino, Fritzing - Everlanders Automate the World!
 Raspberry Pi dash first use
 Краткий курс "DSP для начинающих". ADAU1467+AD1938, ответы на вопросы, новые проекты.
![Raspberry Pi carpc [MAKER'S REPORT]](https://i.ytimg.com/vi/pS8wbvQx0h4/default.jpg) Raspberry Pi carpc [MAKER'S REPORT]
Raspberry Pi carpc [MAKER'S REPORT] Hardware Dive In & Companion App! | OpenAuto Pro
 how to: interface steering wheel controls with an arduino (stepped resistor)
 .Build - Bouw je eigen navigatiescherm - Op basis van een Pi en Android Auto
 Android Auto Raspberry Pi 3 Crankshaft OpenAuto
 OpenAuto Pro Headunit - Day/Night Illumination Backlight for 7" Raspberry Pi Touchscreen
 My OpenAuto Pro Dash Installation for my Crown Victoria (Android Auto w/ Raspberry Pi)
 Install a Touch Screen Into Your XJ
 DIY Android Auto Raspberry PI Head Unit, Rear View Camera, Navigation & Music
 Pi & Power Upgrades | OpenAuto Pro 12
 Open Auto Pro - Android Auto Test
 My raspberry pi based car stereo head unit
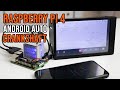 Raspberry Pi 4 Android Auto with CrankShaft Testing
 100% DIY Android Auto HU - replacing my OEM car radio w/ a raspberry pi