how to: interface steering wheel controls with an arduino (stepped resistor)
I show you how i interfaced my SWC(steering wheel controls) to crankshaft. A linux distribution for running android auto.
Components:
Car: 2005 Jaguar X-Type
Computer: Raspberry pi model 3B+
SWC Interface: Arduino Micro (with ATmega32U4 chip for usb support)
custom protoboards: voltage divider circuit, optocoupler circuit
Arduino micro listing:
https://www.amazon.com/Arduino-Micro-Headers-A000053-Controller/dp/B00AFY2S56
Documentation:
The steering wheel controls in this case is a stepped resistor. This required analog interpretation of multiple buttons over a single wire. If you have separate wires per button (probably not due to clock spring restrictions in a lot of steering wheels), then it is way easier. just hook up the gpio connectors through an optocoupler board.
Find out what the wiring in you car looks like. Just google for the wiring schematics and search for the infotainment part. For my car it showed up in google at the top (section 15.1 is relevant here): http://www.jagrepair.com/images/Electrical/XTypeElectrical/2005%20MY%20X-TYPE%20Electrical%20Guide.pdf
Test the wiring with a multimeter, set it to measure resistance. hook up the meter so it completes a circuit with the SWC.
Hook up the arduino with script + voltage divider.
script:
https://pastebin.com/3XwwJAgi
voltage divider:
https://www.khanacademy.org/science/electrical-engineering/ee-circuit-analysis-topic/ee-resistor-circuits/a/ee-voltage-divider
Connect the arduino to the RPI running crankshaft / another system and setup the software to read GPIO or accept keyboard commands
...
I know I could've bought a control unit that does all this for me, but where is the fun and learning in that :) Ofcourse im not responsible for your ability to think clearly and that you should not use this while driving, or basically doing anything fun ever. dont get distracted, dont run over people, blablabla disclaimer, dont judge me for stupid actions or breaking your car or parts of you car blablabla.
Видео how to: interface steering wheel controls with an arduino (stepped resistor) канала Rutger de Graaf
Показать
Комментарии отсутствуют
Информация о видео
Другие видео канала
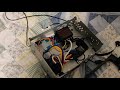 My raspberry pi based car stereo head unit
 How to install steering wheel controls-aswc1
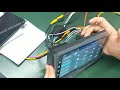 steering wheel control manuel
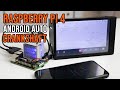 Raspberry Pi 4 Android Auto with CrankShaft Testing
 Valtteri Bottas Explains 2019 Mercedes F1 Steering Wheel
 DIY Android Auto Raspberry PI Head Unit, Rear View Camera, Navigation & Music
 100% DIY Android Auto HU - replacing my OEM car radio w/ a raspberry pi
 Wiring AndroidAuto & Raspberry Pi to your Car - Rear View Camera, Connection Diagrams, OpenAuto
 OpenAuto Pro Headunit - Adding 12V Delay Timer Relay to the Project
 How To Install A Leather Steering Wheel Cover - Simple!
 OpenAuto Pro Head Unit Assembly & Wiring (Android Auto w/ Raspberry Pi)
 How to hack your car | Part 1 - The basics of the CAN bus
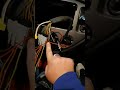 Making steering wheel controls work without adaptor.
![Raspberry Pi carpc [MAKER'S REPORT]](https://i.ytimg.com/vi/pS8wbvQx0h4/default.jpg) Raspberry Pi carpc [MAKER'S REPORT]
Raspberry Pi carpc [MAKER'S REPORT]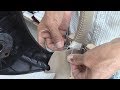 How to Cover a Two Spoke Car Steering-Wheel - Car upholstery
 Apple CarPlay running on Raspberry Pi 4
 android steering wheel control learn
 Android Auto Raspberry Pi 3 Crankshaft OpenAuto
 Android Auto - OpenAuto Pro - Car stat dashboard
 .Build - Bouw je eigen navigatiescherm - Op basis van een Pi en Android Auto