Cap Embroidery w/ 3D Puff Border & STITCH FILL | Appliqué Alternative | Free Design (EMB Hub Ep122)
It’s time for a new episode of Embroidery Hub and Willy’s back to show you how to digitize and embroider an applique-style design on your Richardson 112 cap using only stitches, rather than fabric to create the fill. By adding dimension to this design by incorporating 3d puff, you’ll learn techniques that will take your cap embroidery to the next level and make you even more profit! Check the link below to download this design.
Free design: https://hoopmade.com/designs/Embroidery%20Hub
Come meet us at DecoSummit: https://www.decosummit.com/
Learn how to master Richardson cap embroidery here: https://www.youtube.com/watch?v=V1M2_aLaNWc
Learn more about the machine we used in this video: https://ricoma.com/US/machine/mt-1501
Learn how to use our 270-degree cap rotation feature here: https://www.youtube.com/watch?v=hCjEfRBHsUI
Learn about Chroma digitizing here: https://ricoma.com/US/software/chroma
Facebook Embroidery & Custom Apparel Mastery Group: https://www.facebook.com/groups/embroiderymastery/
Join the Ricoma newsletter for educational blogs, videos, and live webinars: https://info.ricoma.com/newsletter
To learn more schedule a virtual demo today: https://ricoma.com/US/virtual-demo
Get our latest Ricoma embroidery youtube videos sent straight to your Facebook Messenger!: https://manychat.com/l2/RiCOMA.us
To learn more about our embroidery machines, visit our website: http://www.ricoma.com
Before we get started, remember that you can watch demos like this one live and in person at our educational conference, DecoSummit, in October! Click the DecoSummit link above to learn more and purchase your tickets.
This cap embroidery effect is a creative way to add visual interest and value to your caps. With the right digitizing, this multi-dimensional design is an easy way to gain more profit from each cap you embroider.
For this cap design we used:
A Richardson 112 cap
Standard 75/11 needles
1 piece of foam the same color as your outline thread
Snips/ scissors
Heat gun
Standard cap ring and driver
Let’s talk profit:
You can purchase a Richardson 112 cap for about $3 from any standard wholesaler. After you include the costs of your regular materials, the total cost of your cap is roughly $4.
Since this complex design requires digitizing for both the landscape fill image and 3D puff, you can charge upwards of $35 for a single cap. While you don’t have to create this exact design to mark up your cap prices, you'll want to find a design that matches the complexity and is relevant to your target audience in order to charge extra. This leaves you with a profit of about $30 a cap.
Let’s dive into digitizing:
First off, we’ve chosen a landscape to act as the fill for the design. This was made possible by utilizing the free hand digitizing tool in Chroma Lux. This tool acts like a trace outline which is later converted into a complex fill, or any other stitch style you choose.
Lower the density of your stitches! For the bigger complex fills like the water and sky we used 0.5 density and for the buildings we used 0.3.
In order to simplify the shapes but still retain as much detail as possible, we used a run stitch at a length of 1.5 for buildings with thinner windows and a satin stitch with a 0.3 density for buildings with thicker windows.
Usually for caps we would digitize the design to start from the bottom up and center out to avoid issues like puckering. But since this design has shapes in the center that had to be embroidered first because of the way the design was layered, we compromised and started in the center.
Lastly, for the 3D puff, we deleted our underlay and set the density as high as possible.
It’s time to embroider!
Once you’ve hooped and inserted your cap into the machine, we need to center the design on the cap. To do this, switch over to needle number one and use it as a guide to center the design along the center seam of the cap using the arrow keys on our machine panel.
Remember, the trick to placing the design low on the cap is to keep using your arrow keys and your trace function until you get the design as low as possible on the cap without having the presser foot hit the cap ring.
Finally, make sure to select the frame out function this way, after your machine is done doing the standard embroidery so that you can insert the foam for the 3D puff.
Since we’ll be running this machine at 1000 spm and the design is about 39,000 stitches, the embroidery should take us 45 minutes.
When the machine finishes the flat fill embroidery, it will automatically stop and the cap driver will move forward so that you can place the foam on the cap.
Once your cap is complete, clean up your design using your heat gun to shrink the foam a little so that it fits neatly inside your threads!
Make sure to tag us in your recreations of this project on social media!
Видео Cap Embroidery w/ 3D Puff Border & STITCH FILL | Appliqué Alternative | Free Design (EMB Hub Ep122) канала Ricoma Embroidery Machines
Показать
Комментарии отсутствуют
Информация о видео
18 июля 2020 г. 2:27:49
00:12:34
Другие видео канала
 RICHARDSON CAPS 3D Puff Embroidery Challenge at 1000 SPM - Mission Impossible?
 Ricoma Reviews: Port Town Success Story | Ricoma TC - 1501 Embroidery Machine
 Embroidering Small Letters On Caps | Best Threads & Needles | FREE Embroidery Design (EMB Hub Ep120)
 Embroidered IRON-ON PATCH Tutorial | Make Uniforms Fast | FREE Embroidery Design (EMB Hub Ep115)
 Huge Ricoma News + Q&A with CEO Henry Ma
 Start Your Printing Business With Heat Transfer | 3 Reasons Why | Apparel Academy (Ep53)
 EMBROIDERY On Car Mat | Thickest & Hardest Material | FREE Design Download (EMB Hub Ep121)
 Embroidery Hub Ep. 48: Logo Placement on shirts
 Working On ETSY Orders! Melco EMT16x Maintanence! Embroidery Business Motivation!
 Mass Production Face Mask Tutorial / DIY Double Layer Fabric Face Mask Embroidery (EMB Hub Ep113)
 Richardson Cap Embroidery | Richardson 112 (Embroidery Hub Ep99)
 Front and Side CAP EMBROIDERY - 3 DESIGNS in one RUN | FREE Embroidery Design (EMB Hub Ep116)
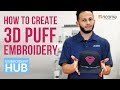 Embroidery Hub Ep. 10: 3D Embroidery | How To Do Puff Embroidery On Hats Tutorial
 Yoga Mat EMBROIDERY | MIGHTY HOOPS For Thick Material | Free Design (EMB Hub Ep123)
 Embroidery Hub Ep. 35: 3D Puff Embroidery Beanie | How to Embroider Beanies with 3D Puff
 Using Embroidery Vinyl on Melco EMT16X! Using Design Shop & Simple Interface! Shirt Start to Finish!
 The Ultimate Machine Embroidery Guide for Beginners (Embroidery Hub Ep102)
 Embroidery Hub Ep. 40: Custom Embroidered Patches | Bitcoin Custom Iron on Patch Embroidery
 EMBROIDERY On Handkerchief & Shirt Cuff | 8-in-1 Device | HUGE Profit Potential (EMB Hub Ep118)
 CAP BOOTCAMP! 🧢| Cap embroidery on the EM 1010: STEP-BY-STEP! (Embroidery Hub Ep 87)