Pita bread / Homemade pita bread, simple and easy.
Pita Bread Recipe(complete written recipe with useful tips) : https://merryboosters.com/pita-bread-recipe/
How to Bake Pita bread in oven:Baking temperature and method:https://merryboosters.com/pita-bread-recipe/
Homemade Hummus Video Recipe :https://youtu.be/Ouz6aHya8eo
Pita bread/Homemade pita bread
Homemade pita breads are so easy to make .They are so soft and tender and are so tasty.
Lets see how to make these wonderful pita bread at home.
Ingredients
1 cup warm water (not hot or boiling)
1/2 teaspoons active dry yeast
2 cups all-purpose flour
3/4 cup of whole wheat flour
1 teaspoon salt
1 tablespoon Sugar
1-2 teaspoons olive oil (optional)
Instructions
1. Form the Pita Dough: Mix the water ,sugar and yeast together, and let sit for about five minutes until the yeast get activated. Add 2 3/4 cups of the flour , salt, and olive oil . Stir until a shaggy dough is formed.
2. Knead the Dough: Sprinkle a little of the extra flour onto your clean work surface and turn out the dough. Knead the dough for about 6-8 minutes, until the dough is smooth and elastic. Add more flour as needed to keep the dough from sticking to your hands or the work surface, but try to be sparing. It's better to use too little flour than too much. If you get tired, stop and let the dough rest for a few minutes before finishing kneading.
3. Let the Dough Rise: Clean the bowl you used to mix the dough and film it with a little olive oil. Set the dough in the bowl and turn it until it's coated with oil. Cover with a clean dishcloth or plastic wrap and let the dough rise until it's doubled in bulk, 1-2 hours.
At this point, you can refrigerate the pita dough until it is needed. You can also bake one or two pitas at a time, saving the rest of the dough in the fridge. The dough will keep refrigerated for about a week.
4. Divide the Pitas: Gently deflate the dough and turn it out onto a lightly floured work surface. Divide the dough into equal pieces and gently flatten each piece into a thick disk. Sprinkle the pieces with a little more flour and then cover them with a kitchen towel or plastic wrap wrap until you're ready to bake them.
5. Shape the Pitas: Using a floured rolling pin, roll one of the pieces into a circle 6 inches wide and about a quarter inch thick. Lift and turn the dough frequently as you roll to make sure the dough isn't sticking to your counter. Sprinkle with a little extra flour if its starting to stick. If the dough starts to spring back, set it aside to rest for a few minutes, then continue rolling. Repeat with the other pieces of dough.
Let the final shaped dough(dough disks) rest for 20-30 minutes or until they rise and puff slightly and gain their shape.
6. To Bake Pitas in the Oven: While shaping the pitas, heat the oven to 450°. If you have a baking stone, put it in the oven to heat. If you don't have a baking stone, place a large baking sheet on the middle rack to heat.
Place the rolled-out pitas directly on the baking stone or baking sheets (as many as will fit), and bake for about 3 minutes. I've found it easiest to carry the pita flat on the palm of my hand and then flip it over onto the baking stone. The pita will start to puff up after a minute or two and is done when it has fully ballooned. Cover baked pitas with a clean dishtowel while cooking any remaining pitas.
7. To Bake Pitas on the Stovetop: Warm a cast iron skillet over medium-high heat until a few bead of water sizzle immediately on contact. Drizzle a little oil in the pan and wipe off the excess.
Lay a rolled-out pita on the skillet and bake for 30 seconds, until you see bubbles starting to form. Flip and cook for 1-2 minutes on the other side, until large toasted spots appear on the underside. Flip again and cook another 1-2 minutes to toast the other side. The pita should start to puff up during this time; if it doesn't or if only small pockets form, try pressing the surface of the pita gently . Keep cooked pitas covered with a clean dishtowel while cooking any remaining pitas.
So now home made pita bread is ready:)
8. Storing the Pitas: Pitas are best when eaten immediately after cooking. Leftover pitas will keep in an airtight bag for several days and can be eaten as they are or warmed in a toaster oven. Baked pitas can also be frozen with wax paper between the layers for up to three months.
Additional Notes:
• Storing the Dough: Once it has risen, the pita dough can be kept refrigerated until it is needed. You can also bake one or two pitas at a time, saving the rest of the dough in the fridge. The dough will keep refrigerated for about a week.
• Pitas That Won't Puff: Sometimes you get pitas that won't puff. The problem is usually that the oven or the skillet aren't hot enough. Make sure both are thoroughly pre-heated before cooking. Even pitas that don't puff are still delicious and can be used wraps or torn into pieces for dipping in hummus.
Enjoy making pita bread at home :)
Видео Pita bread / Homemade pita bread, simple and easy. канала Bincy Chris
Показать
Комментарии отсутствуют
Информация о видео
Другие видео канала
 Easy Homemade Hummus Recipe from Scratch
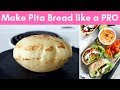 How to make Pita Bread at home like a PRO (without oven)
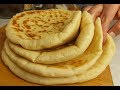 Bazlama - Turkish flatbread - Eng sub
![No Oven)프라이팬 슈크림빵 クリームパンレシピHow to make Cream Bun [스윗더미 . Sweet The MI]](https://i.ytimg.com/vi/RQUSBE9ziyM/default.jpg) No Oven)프라이팬 슈크림빵 クリームパンレシピHow to make Cream Bun [스윗더미 . Sweet The MI]
No Oven)프라이팬 슈크림빵 クリームパンレシピHow to make Cream Bun [스윗더미 . Sweet The MI] Turkish bread: the most delicious and easy bread you will ever make!
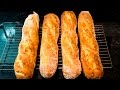 How to make French Baguettes at home
 Professional Baker Teaches You How to Make Croissants!
 Quick Dinner Rolls Recipe / Soft and Fluffy Dinner Rolls in 4 simple steps
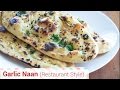 Garlic Naan Restaurant Style - No Tandoor, No Oven, No Yeast.
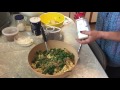 Making Falafel
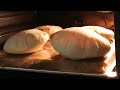 Perfect Arabic Israeli Pita bread 🇮🇱🇵🇸 Easy and clear recipe by Max Malkiel خبز عربي פיתות
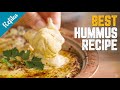 The Best Hummus Recipe You Will Surely Use Your Whole Life!
 Quick and Easy Homemade Cinnamon Rolls Recipe / Soft and fluffy Cinnamon rolls in 4 simple steps
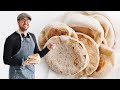 Homemade Pita Bread Recipe
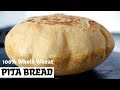 100% Whole Wheat Pita Bread | Hummus | Falafel | Balela Salad | Tzatziki sauce | Instant Pot
 Easy Cheese Garlic Bread Recipe | How to make garlic bread from scratch/Homemade garlic bread recipe
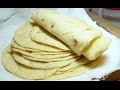 How to make Soft Flour Tortillas | Como Hacer Tortillas de Harina
 Bread in Cooker Recipe - No Oven Homemade White Bread - CookingShooking
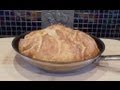 Easy No-Knead Bread Baked in a Skillet (No Dutch Oven... No Problem)
 How To Make Falafel And Hummus | Middle Eastern Delicacy | The Bombay Chef – Varun Inamdar