Espresso Fundamentals | Tamping & Brew
WOLFF WEEKLY VLOGG 041 | Kelsey Carr with Espresso Fundamentals | Tamping & Brew
Hey guys and welcome back to the Wolff Weekly Vlogg. Today we’re going to be continuing our series on espresso fundamentals. Today we’re going to be doing the methodology for pulling shots, Part A. So really focussing on dosing and distribution.
When we’re on bar there are three things that we really want to achieve. The first is quality, also consistency and speed. We’ve found that this methodology is the most efficient way of achieving those things. It is all about muscle memory, so the first few times you try this process you may feel a little bit awkward, but after a while it just flows and you don’t even notice you’re doing it.
So the first thing we’re going to do is take out our handle. Then immediately purge, while you’re here. So purging immediately after you’ve removed the portafilter, as opposed to before you put it in. Next, quickly wipe down your drip tray so you don’t get any espresso on the base of your cups. After that, we’re going to give the basket a good clean and dry and it should be absolutely spotless, with no old coffee or moisture.
Next, we’re going to dose into the basket. Now if you’ve got a particularly high mound of coffee, which can happen with grinders like the Mythos (where it’s a fluffy cloud of joy), just one controlled tap, to settle it. That’ll make dosing and tamping a little bit easier.
Now you’ll notice that some grinders will distribute more coffee on one side of the basket than the other. What would happen if we were to tamp straight down, would be that we’d have an area of greater density and an area of lesser density. The water, coming down at pressure, is going to try and find the path of least resistance. It will channel through here, and drip through here. So you’re over extracting parts of the coffee bed and under extracting others. It’s what we call channeling and it presents as coffee dripping out of one side before the other.
To avoid this, what we do is called distribution. There are a few different methods, choose whatever you feel comfortable doing and whatever is most efficient for you. Personally, I groom. So I take my finger, and I move it around. There are other methods, for example, tapping is quite effective. Just a tap and a tap and that settles it very nicely.
Alrighty, so what we’re going to do next week is look at tamping and the remainder of the shot, I’ll see you then!
Видео Espresso Fundamentals | Tamping & Brew канала Wolff Coffee Roasters
Показать
Комментарии отсутствуют
Информация о видео
Другие видео канала
 The Best Milk Texturing Technique , Silky steamed Milk by JIBBI LITTLE (ENGLISH) PART1
 Espresso machine - Service and rebuild an E61 coffee group
 Tamping Coffee: Does it really make a difference?
 Espresso Fundamentals | Brew Ratios
 Espresso Fundamentals | Dosing & Distribution
 The basics of Milk Pouring
 Latte Arts' three main Designs
 Milk Texture Troubleshooting
 Making a Flat White and Café Latte
 Espresso Fundamentals | Grind & Extraction
 Distributors, Levelers & Tampers: How to get the Perfect Puck
 Espresso Pucks: What Matters & What Doesn't
 Tamping and Distribution Techniques for Espresso | La Marzocco Linea Mini
 How To Dial In Grind Size for Espresso
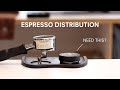 Espresso Distribution: Which Tool or Technique works best?
 Understanding Coffee Extraction Defects from an Espresso Machine
 World Barista Championship 2018 - Final Round - Agnieszka Rojewska (Champion)
 Steam Wand & Jug position for texturing Milk
 Extract Everything 003: Espresso Tamping Tutorial