Three Dramatic Black and White Processing Techniques
Jim Welninski's Black and White Artistry Course: http://f64.co/bwa
Artistic Black and White Processing
I have been producing Black and White images for as long as I can remember. Actually, like many photographers, I started out shooting only for Black and White. With nearly 20 years of Black and White processing, you'd think I couldn't learn much more right?
Wrong!
There is always an opportunity to learn new things if you open your mind to them. My great friend (and fellow educator) Jim Welninski has taught me so much about architecture and black and white photography. I remember the first time I saw him instruct, I was jealous, the epitome of jealous. "Why didn't I think of that?" I thought to myself.
But then it occurred to me; there is no room for that jealousy. If you focus on that, you will never focus on all that you can learn from a real artist like Jim. I embraced the education I received from him, and from it, I have been a much better Black and White artist since.
Three Techniques for better Black and White Images
Jim has a new course out called, "Black and White Artistry" and it is incredible! After watching it and talking to Jim, I asked him if it would be okay to share some of the things I learned and he happily consented! You can read about them below, or watch the full-length video tutorial below.
1. The Best Black and White Conversion
Jim and I firmly believe that the Gradient Map is the best conversion method for Black and White photographs. It applies the proper tonal value to the hue of the colors in your image. So your dark blues become a dark shade while colors like yellow become close to white. This technique is few and far between when compared to the HSL desaturation method that simply desaturates your purest colors.
2. Adding Local Contrast
Jim has this awesome trick where he makes two copies of the original photo. One is an overexposed image; the second is an underexposed image. He fills these copies with a Black Mask. Then he selectively paints back areas that he wants lighter and darker with a white brush on the mask. This tip might sound like dodging and burning, but it is much more effective, especially when done on curves adjustment layers.
3. Punching Holes in the Darkness
Jim taught me this incredible trick for instantly adding drama to your black and white images. It is a solid black fill layer set to normal at about 75% Opacity. It covers your image in a dark veil that is almost spooky and eery. The real fun comes when you "punch holes" in the mask to reveal all the work from steps 1 and 2. This technique will add what appears to be a custom vignette but is much more fun to produce.
Видео Three Dramatic Black and White Processing Techniques канала f64 Academy
Показать
Комментарии отсутствуют
Информация о видео
Другие видео канала
 Sharpen Photos like a Pro!
 You are Dodging and Burning all Wrong! TRY THIS!
 Photographing New York architecture and photoshop processing tutorial
 Black and White Landscape Power Editing Tutorial - Lightroom 2018
 What's new in Adobe Camera Raw 14.0 - HUGE Masking update!
 3 QUICK Tips for BETTER Fall Color
 Why no White Balance in Photoshop? - Color Balance!
 BEAUTIFUL Color Toning in Photoshop with Gradient Maps
 Luminosity Masks Are Child's Play Compared to This!
 What your photography REALLY needs in 2022
 Fix Highlight Blowouts in Seconds in Photoshop!
 FINE ART ARCHITECTURE PHOTOGRAPHY - Editing Tutorial - 7 Step Workflow for Black and White Mastery!
 *PRECISION* Masking in Lightroom & Adobe Camera Raw 14
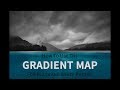 How To Use The Gradient Map for Black and White Photographs
 The SECRET to BLACK and WHITE photography success
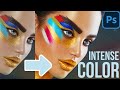 Get a Natural Intense Color Boost in Photoshop
 BETTER than an Orton Effect!
 How to Cheat at Dodging and Burning in Photoshop
 Fine Art Architectural Photography and Photoshop tutorial
 RAW Masks vs Photoshop Masks - Are they REALLY that great?