FINE ART ARCHITECTURE PHOTOGRAPHY - Editing Tutorial - 7 Step Workflow for Black and White Mastery!
This photo editing tutorial delves into fine art black and white editing. Specifically for architectural photography. I've broken the workflow down into 7 steps.
If you like the look of the software I used to add the finishing look to the image you can get yourself a copy here: https://skylum.evyy.net/KDoBv and save $10 with the discount code ATSKY10
You can follow my instagram accounts here: @nz_architectural_photography or @anthony_turnham_photography
My studio set up:
🎤 Rode NT-USB: https://amzn.to/331DAGw
📷 Nikon D850: https://amzn.to/3j3fQan
📷 Lens: https://amzn.to/2RZzV5M
🖥️ Monitor: https://amzn.to/346A64E
------------------
🚥 Coloured Lights: https://amzn.to/2RXBuRA
🚥 Hub to control the lights: https://amzn.to/367y0nF
💡 Salt Lamp: https://amzn.to/364xiHQ
My Camera Equipment:
📷 Camera: https://amzn.to/3j3fQan
📷 My Wide Angle Lens: https://amzn.to/3j9I1Vb
📷 Nifty fifty: https://amzn.to/3ifmY2t
📷 Mid-range zoom: https://amzn.to/33Xltkc
📷 Telephoto Lens: https://amzn.to/3cBAyMo
📷 Tripod Head for architecture: https://amzn.to/30cbJBq
These are affiliate links to the equipment I use - they are not sponsored by the manufacturer in any way. If you use these links it costs you no more than normal, but the small commission I get helps me to be able to keep providing free content for you guys. Thank you 🙏
The Concept
The concept is to sculpt the architecture using brightness values. Enhance areas of highlight and shadow to control your vision for the photo. I prefer a low key photo with minimal areas of highlights that demand the viewers attention.
The basic Editing Process
Create a good base layer that contains a full dynamic range from white through to black and has no clipping. This should be created from a RAW photo. Before converting to black and white, select the various facades of the building that you wish to change. After converting to black and white we then use curves to control the brightness of the different regions. We then make global adjustments to contrast including vignetting if need be. Utilise a creative tool such as Luminar to push your creative vision to the next level.
Below is an overview of the steps we follow in the fine art editing workflow:
1. Create a base layer with a good dynamic range
This can be done in Lightroom by boosting the shadows and controlling the highlights. The black and white points should meet the end of the histogram but they shouldn’t clip off the edge. A raw file should be used at this stage for the best results
2. Create selections of the different areas of the building
Utilise selection tools to isolate the building. The pen tool is great for this
3. Convert the image to black and white
There are so many black and white conversion methods. Most aren’t great but there are a few that stand out. The more flexibility the better. For this example, we’re going to use the Black and White adjustment layer
4. Use the premade selection to brighten and darken. Enhance the 3D feel and add emphasis based on your aesthetic preference. Use a curve adjustment pulled downwards to darken and use a curve pushed up to increase brightness. Also, consider giving areas of your building more visual interest by adding contrast with an S curve.
5. Make global adjustments to contrast by adding an overall Curve adjustment Layer with an S Curve.
6. Let your creativity loose by loading the image into a tool such as Luminar for the finishing touches.
7. Consider adding a vignette to control the highlights that are at the edge of the frame. Do this by again adding a curves adjustment layer and this time bring the right-hand point that controls the highlights downwards. Then create a radial gradient mask to control where the effect is applied. Refine this with a brush if necessary.
8. Post to Instagram and look like a photo ninja!
Видео FINE ART ARCHITECTURE PHOTOGRAPHY - Editing Tutorial - 7 Step Workflow for Black and White Mastery! канала Anthony Turnham
Показать
Комментарии отсутствуют
Информация о видео
Другие видео канала
 Fine Art Architectural Photography - EDITING TUTORIAL
 10 Step RAW Editing / One Image from Start to Finish / Capture One
 Minimalist Photography with Judy Hancock Holland
 PHOTO EDITING WITH LUMINAR AI FOR BEGINNERS - Simple tools, powerful results.
 Fine Art Landscape Photography - Photograph what you want to see!
 The ULTIMATE black & white conversion for a DRAMATIC look
 FAST manual selections TUTORIAL for Fine Art Photography
 ADD A LOGO, SIGNATURE, OR WATERMARK IN LUMINAR AI... and How to Easily Get a Custom Logo!
 FINE ART PHOTOGRAPHY - Long Exposures! (2020)
 IS LUMINAR AI's NEW REFLECTION TOOL ANY GOOD? & CAN WE FINALLY ADD A WATERMARK IN UPDATE 1.2?
 Fine Art Architecture Photography in New York: The Shoot and Photoshop tutorial
 Make Kick-Ass Black and White Conversions Using Calculations in Photoshop
 Fine Art Photography ON A BUDGET
 Taking your Flower Photographs from Ordinary to Extraordinary by Rosie Lalonde
 BLACK AND WHITE PHOTO EDITING WITH LIGHTROOM - My Process How To Create Great Black and White Edits
 Best Exposure Blending & Photo Finishing for Architectural / Real Estate Photographers
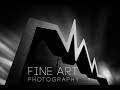 GLASGOW FINE ART ARCHITECTURAL PHOTOGRAPHY - PART 1
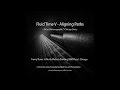 Black and White Fine Art Tutorial - Vision Composition Processing - Trump Tower - Chicago
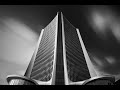 How I photographed and processed an architectural image in Photoshop