DIY Black Cat Plush and Halloween Hairband Tutorial
♥ Subscribe to my second DIY channel! ♥ http://www.youtube.com/cutelifehacks
THE BEST CAT PLUSH TUTORIAL ON YOUTUBE! Please watch the videos below for extra instructions:
♥ Sock Plush Sewing Techniques ♥ http://tinyurl.com/psdfxnu ♥ Bunny Plush Tutorial ♥ http://tinyurl.com/n5hd3r2
This project is based on the sock bunny tutorial so please watch the other videos below which explains some steps in more detail. The original idea is from Taiwanese crafting channel Life http://tinyurl.com/pr45q2h. I've translated everything from Chinese into English and added some extra tips I encountered along the way.
The final piece looks extremely professional and adorable because it uses the natural shape of the sock to create 3D volume. I ran out of plushy stuffing so I decided to use normal cotton wool and it worked great. You can combine the hairband with sweet-deco accessories to create a "Cat Cafe" Halloween costume!
Thanks to AMERICANAPEANUT who suggested that this could also be used for a Kiki's Delivery Service costume! Just find a red ribbon, black dress and carry a broomstick :D. Thanks to Jen Wong for suggesting that you can sew a half-moon on the cat and use it as a Luna/Sailormoon costume!
Difficulty: MEDIUM
Socks* - http://tinyurl.com/qdxf7yw
Polyester stuffing - http://amzn.to/1Ke62Wy
White craft glue - http://amzn.to/1Ke5Vdr
*I bought my socks from H&M. They're often sold out online but if you go into any real H&M shop, they should almost definitely have these socks in the women's section near the checkout tills.
♥ Etsy Shop ♥ http://www.etsy.com/uk/shop/Maqaroon
♥ Facebook ♥ http://www.facebook.com/maqaroon
♥ Twitter ♥ http://twitter.com/Maqaroon
♥ Instagram ♥ http://instagram.com/maqaroon
♥ Tumblr ♥ http://maqaroon.tumblr.com/
WHAT I USE TO FILM & EDIT MY VIDEOS:
Camera - Sony A6000 - http://amzn.to/1RdFFCA
Tripod - Joby Gorillapod - http://amzn.to/1RdFMOD
Light - 65W Ring Light - http://amzn.to/21m1cNS
Software: iMovie 10.0.1
Please remember that plushie sewing isn't the easiest type of crafting so don't worry if your first attempt doesn't turn out right. Just get another pair of socks and practise :). I've listed a few other issues that I came across so you know what to watch out for:
1) Face shape looks wrong after stuffing
This is usually caused by drawing the ears too far away from the heel of the sock. When stuffed, the heel area needs to form the face of the cat. If the ears are too high up then the head loses its kawaii proportions. Another tip is to use a sock that is all one colour, or has minimal contrasting patterns. If a sock has really obvious heel and toe patches then the lines can also distort the face shape.
2) Body shape doesn't look right
The stuffing technique is key to getting the best results. I realised I had to use a lot more wool than I imagined...you'd be amazed at how much can fit inside one sock! Also, each part (legs, body, ears, head) needs to be stuffed in one go. If you try to add more wool afterwards then it will only end up lumpy.
3) Eyes are lopsided or too close together
It's important to sew both eyes at the same time so they stay even. I skipped some steps in this video so please watch the Bunny tutorial for more info: http://tinyurl.com/n5hd3r2. If the toy might be given to babies or small children, it's particularly important that the eyes are attached very firmly. And because the eyes get pulled together a bit, you should draw them 1-2 cm further apart when marking out the positions with pen.
4) Stitches are visible
I used white so you can see it better on camera, but you should use a thread that is the same colour as the sock. You can enter and exit from the neck area which gets covered up later with ribbon. I had a tiny bit of pink embroidery thread visible behind the eye so I simply coloured it in with black marker.
5) The parts I found most tricky
I had most problems sewing the eyes on because the needle had to be pushed from one side to the other. Using a longer needle would have made this part easier. The tail was quite fiddly to stuff and I ended up with a few lumps, but luckily it's so small it's not that noticeable!
Music: Courtesy of Audio Network
*Contains affiliate links
Видео DIY Black Cat Plush and Halloween Hairband Tutorial канала Maqaroon
Показать
Комментарии отсутствуют
Информация о видео
Другие видео канала
 COLOR-CHANGING Unicorn Plush!! How to Make Cutest DIY Unicorn Crafts!
 GÖZLERİNİZE İNANAMAYACAKSINIZ 🧦😲💯✅
 Manualidades: GATITO de PELUCHE hecho con calcetines - Innova Manualidades
 DIY Pusheen Cat Plush - Make Adorable Budget Plushies Using SOCKS!!
 ÇORAPTAN ERKEK BEBEK YAPIMI -TEK BİR ÇORAPLA🧦-BABY MALE BABY MAKING🧦
 3 CUTE DIYs That Help Against Anxiety & Back To School Stress!! DIY Room Decor, Needlefelt, Resin
 DIYs To Make With Stuff You Have at Home! #BoredintheHouse
 ตุ๊กตาถุงเท้าEp.25 how to make sock doll
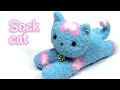 DIY crafts: SOCK CAT - Innova Crafts
 Kawaii plush cat 🐱. Easy tutorial - cute cat!
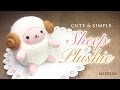 DIY Perfect Sheep Plush Tutorial - Budget Crafting with Amazing Results!
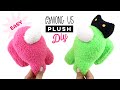 DIY $1 Among Us Crewmate Plushie! Best Budget Gift Idea 2020
 DIY TOTORO PLUSHIE | sew&tell
 MORE DIYs Using Everyday Items! Face Mask Hacks, Homemade Paint etc
 New EASIER Reversible Plushie Method! How to Make a Koala & Cat Plush using Socks
 Quokka DIY Sock Plush - Adorable Money-Saving Craft Project
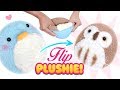 DIY VIRAL REVERSIBLE PLUSHIE!!! Owl & Penguin Sock Plush - Cute Budget Xmas Gift Ideas
 Çoraptan Oyuncak KÖPEK Yapılışı DIY
 How to Make Among Us Plushie HATS! Flower/Leaf/Fried Egg/Cherry/Halo DIY
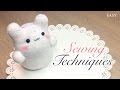 Sock Plush Sewing Tips - 6 Techniques on How To Sew Cute Toys