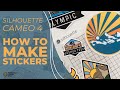
Silhouette Cameo 4 Stickers: Print Then Cut
Learn how to make Print Then Cut stickers with the Silhouette Cameo 4!
——— S U P P L I E S ———
The links below are compensated affiliate links. This means if you make a purchase using one of these links, I receive a small commission that adds no cost to you. This helps me run this blog and YouTube channel. I truly appreciate your support!
- Watercolor Arctic Animals PNG Images Used for the Stickers --- https://www.creativefabrica.com/product/watercolor-arctic-animals-clipart/ref/431333/
• Silhouette White Cameo 4 on Sale | 12" Wide | Swing Design
——— https://ldli.co/e/k6d534 [ swingdesign.com ]
• PACKZON Shipping Labels Full Sheet with Self Adhesive, Square...
——— https://amzn.to/3pylqnI [ Amazon US ]
• Silhouette Cutting Mat for Cameo - 12" x 12" | Swing Design
——— https://ldli.co/e/n4ke3p [ swingdesign.com ]
Product list made with LinkDeli - https://linkdeli.com/e/m9ey7d
TIMECODES & VIDEO HIGHLIGHTS
00:00 Intro
00:06 Print Then Cut page setup in Silhouette Studio
03:18 Bring images for stickers into Silhouette Studio
05:12 Trace image to create outline in Silhouette Studio
07:22 Add an offset (aka border) to sticker images in Silhouette Studio
08:37 Fix awkward areas in offset layers in Silhouette Studio
09:57 Resize, align and center image & offset layer in Silhouette Studio
11:44 How to place images on mat for print then cut in Silhouette Studio
13:04 Tips for successful sticker cuts in Silhouette Studio
15:00 Printer settings for print then cut stickers
16:06 Which mat and check final settings. Cut the stickers. Yay!
17:47 Check the cut and weed the stickers
18:09 The completed print then cut stickers
18:44 Sticker closeup and other videos
Making print then cut stickers with your Silhouette Cameo can seem intimidating and difficult. But actually, it is pretty easy once you get the hang of the tools you need to use in Silhouette Studio for success. This tutorial will take the mystery out of it by walking you step-by-step through the steps in Silhouette Studio and then show you how to cut them with your Silhouette Cameo 4.
STEPS TO MAKE PRINT THEN CUT STICKERS:
1. Open a new project in Silhouette Studio and change the Page Set Up parameters including turning on the Registration Marks for print then cut projects.
2. Merge the images to use for stickers on to the mat.
3. Trace the images to create an outline of each image.
4. Add an offset to each image and fix any awkward areas (like holes) in the offset layers.
5. If necessary, resize, align and group the images with their offset layers.
6. Place the images correctly around the mat and duplicate images as needed.
7. Change printer settings to print high quality stickers and print them.
8. Load the mat with printed stickers into the Silhouette Cameo 4.
9. Check the cut settings on the Send tab and change to Cut Edge or weld images as needed for proper cutting.
10. Change the material selection, force and autoblade settings on the Send tab and then click the Send button.
11. The Cameo 4 cuts the stickers.
12. Unload the mat and weed the stickers.
13. Enjoy!
Please refer to the video tutorial for more detailed explanations of the above steps. Thanks for watching!
Let’s Get Social!
Blog: https://www.blacksheep303.com
Instagram: https://www.instagram.com/blacksheep303/
Pinterest: https://www.pinterest.com/blacksheep303crafts/
Видео Silhouette Cameo 4 Stickers: Print Then Cut канала Black Sheep 303
Показать
Комментарии отсутствуют
Информация о видео
Другие видео канала
 How to Make Stickers with Silhouette Cameo 4 | Etsy Sticker Tutorial | DIY Stickers | Print & Cut
 How to Make Print and Cut Stickers with Silhouette Cameo
 Silhouette Love: Cutting paper with the Cameo
 3 things I HATE about my CAMEO 4 (Silhouette Cameo 4)
 How To Design Stickers in Silhouette Studio | Make Sticker Shop Stickers on Cameo 4: EASY & FAST!
 Getting Started with Print and Cut
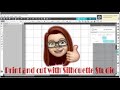 How to | Print and Cut with Silhouette Studio
 3 Common Silhouette Print and Cut Problems: Solved
 How To Make Planner Stickers in Silhouette Studio :: Etsy Sticker Shop
 How to Print and Cut Stickers with a Silhouette Cameo machine - by Tara Reed
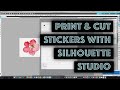 Silhouette Cameo 4 tutorial on creating stickers with print and cut function
 Doing your first cut on the silhouette Cameo 4
 How to Print and Cut | Silhouette Cameo | Start to Finish
 HOW TO MAKE THANK YOU STICKERS, PLANNER STICKERS & CHRISTMAS STICKERS CRICUT PRINT THEN CUT STICKERS
 Cricut Joy Stickers: How To Make Your Own
 Auto blade doesn't cut Silhouette cameo 4 solution on cutting
 How To Print and Cut with Silhouette Cameo | Make Full Color Waterproof Stickers at Home
 Step by Step Silhouette Print and Cut for Total Newbies!
 Silhouette Print & Cut Tutorial - How to Make Kiss Cut Sticker Sheets
 How to Make Planner Stickers with Your Silhouette Cameo