KL3TRG and KL3TIER Pulpit Assembly Instructions
Here is a link to the pulpit cover:
https://www.kingdom.com/heavy-duty-vinyl-lectern-covers-3-sizes.html
Website; http://kingdom.com
Facebook-https://www.facebook.com/kingdomchurchtech/
Thank you for your purchase of the elegant Kingdom Three-tier Smoky Acrylic Lectern. This video has been created to help you to assemble this beautiful lectern with ease. Just follow the simple steps that you see on the screen.
All you will need is a flat head screwdriver or a power drill with a large flat head driver bit. It would also be helpful to have a small razor knife or a pair of scissors to open the boxes and unwrap the packaging material. If you are using a power drill to speed the assembly process please be careful not to allow the drill to screw too tightly as this may crack the acrylic. A variable speed drill is recommended.
The Kingdom Three-tier Smoky Acrylic Lectern comes in three boxes.
One box has the base and top of the lectern as well as the braces that hold up the top of the shelf section. There you will find a bag of screws that you will need to use to assemble the lectern.
The second box contains the 6 pillars that fit to the base and hold up the shelf section.
The Third box contains the shelf section.
Layout the parts with the base in front of you with the flat surface facing up showing the brass sockets that are imbedded in the acrylic. Take a pillar and place it on the base, lining up the holes with the brass sockets. Note that each pillar will have 4 brass sockets at the top end and 4 holes in the bottom. Take 4 screws and put a screw through each hole at the bottom of the pillar and screw it to the base. Do this for all 6 pillars around the base.
Now take the shelf section and place it on the top of the 6 pillars. As you install the screws you will need to line up the holes in the bottom of the shelf section with the brass sockets for each of the pillars. In order to help line up the holes you may need to loosen the screws in the base to allow for some movement of the pillar. Be sure and retighten those screws once you have successfully screwed the pillar to the bottom of the shelf section.
Once you have completed this stage you can now take the two braces and screw them to the top of the shelf section. Note when the braces are mounted on both sides they must tilt with the higher end towards the front of the lectern.
Now that the braces are in place you can finish the assembly by screwing the top into place ensuring that the screw holes are lined up.
Congratulations, you have completed the assembly of your Kingdom Three-tier Smoky Acrylic Lectern and are ready to have many years of enjoyment.
Видео KL3TRG and KL3TIER Pulpit Assembly Instructions канала Kingdom Tech Audio Video and Supplies
Показать
Комментарии отсутствуют
Информация о видео
4 ноября 2022 г. 1:43:11
00:07:13
Другие видео канала
 Big Brand Flagship Mics vs The Kingdom V5 Wireless Mic System
 How to Choose a Pulpit? - Top 5 Questions
 Get the BEST website!
 Faceted Column Style Acrylic Lectern - KLSQP
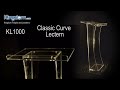 KL1000
 Are Wireless Microphones Good or Bad?
 What Are The Advantages of Wireless Microphones?
 Where to Buy Prefilled Communion
 Pre-Filled Communion
 Kingdom Classic Curve Lectern - KL1000 Assembly Video
 Large Acrylic Pulpit, Podium, Lectern - KLBF
 Double Column Acrylic Lectern, Podium, Pulpit - KLDBC
 Smoky Gray Acrylic Water or Plant Stand WSTAND4
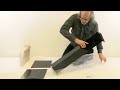 WSTAND4 Water Stand Assembly Video
 Grand Three-Tier Smoky Acrylic Pulpit KL3TRG
 Affordable 200 Channel Wireless Mics
 Beginner's Guide Kingdom 1000 Channel Mic System SYSV52, SYSV53, SYSV54, SYSV55, SYSV56, SYSV57
 AVTronics 200 Channel Wireless Mic Systems Easy Set Up - Beginner's Guide SYSQ4H SYSQ3H1L SYSQ2H2L
 Where to buy Church Websites
 Where to buy Pulpits, Lecterns and Podiums