
- Популярные видео
- Авто
- Видео-блоги
- ДТП, аварии
- Для маленьких
- Еда, напитки
- Животные
- Закон и право
- Знаменитости
- Игры
- Искусство
- Комедии
- Красота, мода
- Кулинария, рецепты
- Люди
- Мото
- Музыка
- Мультфильмы
- Наука, технологии
- Новости
- Образование
- Политика
- Праздники
- Приколы
- Природа
- Происшествия
- Путешествия
- Развлечения
- Ржач
- Семья
- Сериалы
- Спорт
- Стиль жизни
- ТВ передачи
- Танцы
- Технологии
- Товары
- Ужасы
- Фильмы
- Шоу-бизнес
- Юмор
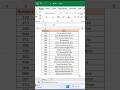
Data entry form in excel | #shorts #exceltips #dataentry
How to Create a Data Entry Form in Excel | Step-by-Step Tutorial
Welcome to our complete guide on creating a Data Entry Form in Microsoft Excel! In this video, we walk you through the full process of building a simple, user-friendly form that can help you streamline your data entry tasks, save time, and avoid mistakes. Whether you're a beginner in Excel or looking to enhance your productivity, this tutorial will help you master the basics and beyond.
🔥 What You Will Learn:
How to enable the Form tool in Excel
How to set up your spreadsheet for form creation
How to use the form to add, edit, search, and delete records
Tips to customize your form experience
Best practices for clean and efficient data management
🌟 Why Use a Data Entry Form in Excel?
Using a data entry form in Excel is a smart choice when you have a lot of information to input and want to ensure accuracy. Instead of scrolling horizontally across a huge spreadsheet, a form lets you focus on one record at a time, making your work faster and more organized.
With just a few clicks, you can:
Add new records without manually scrolling
Search for existing records
Edit or update entries easily
Delete incorrect records
Reduce typing mistakes and duplicated data
If you work with customer lists, inventory records, employee databases, or any kind of structured information, this technique will be a game-changer for you.
🛠️ Step-by-Step: How to Create a Data Entry Form in Excel
1️⃣ Set Up Your Excel Sheet
First, create a clean table where each column header represents a field you want to collect data for.
Example: | Name | Age | Department | Email | Join Date |
Make sure to format it properly:
Use clear, short column names
Avoid merged cells in your table area
Keep your data range simple and consistent
2️⃣ Convert Your Range to a Table
Highlight your headers and the empty area below where your data will go, then press:
Ctrl + T
OR go to the Insert tab and click Table.
Make sure "My table has headers" is checked. Converting your range into a Table is crucial because the Form tool works only with Tables.
3️⃣ Add the "Form" Button
The Form tool isn’t on the Ribbon by default, so here’s how to add it:
Click the small dropdown arrow at the top left of Excel (Quick Access Toolbar).
Select More Commands.
In the dialog box:
Choose Commands Not in the Ribbon.
Find and select Form.
Click Add and then OK.
Now, you will see a Form button added to your toolbar.
4️⃣ Use the Data Entry Form
Click anywhere inside your table, then click the Form button. Boom! Your data entry form pops up.
Here’s what you can do in the form:
Click New to add a record.
Use Find Prev and Find Next to browse through records.
Click Criteria to search for a specific entry.
Click Delete to remove a record.
Click Restore to undo changes before saving.
Every time you add a record using the form, Excel automatically inserts it into your table.
Data entry form in excel | #shorts #exceltips #dataentry #excel #spreadsheetmagic #dataanlysis #excelinterview #exceltutorial #exceltricks
next video link
https://youtube.com/shorts/9Zu2dcCv-NA?si=0oxk1DWdataentry
Видео Data entry form in excel | #shorts #exceltips #dataentry канала EXCEL MAGIC
Welcome to our complete guide on creating a Data Entry Form in Microsoft Excel! In this video, we walk you through the full process of building a simple, user-friendly form that can help you streamline your data entry tasks, save time, and avoid mistakes. Whether you're a beginner in Excel or looking to enhance your productivity, this tutorial will help you master the basics and beyond.
🔥 What You Will Learn:
How to enable the Form tool in Excel
How to set up your spreadsheet for form creation
How to use the form to add, edit, search, and delete records
Tips to customize your form experience
Best practices for clean and efficient data management
🌟 Why Use a Data Entry Form in Excel?
Using a data entry form in Excel is a smart choice when you have a lot of information to input and want to ensure accuracy. Instead of scrolling horizontally across a huge spreadsheet, a form lets you focus on one record at a time, making your work faster and more organized.
With just a few clicks, you can:
Add new records without manually scrolling
Search for existing records
Edit or update entries easily
Delete incorrect records
Reduce typing mistakes and duplicated data
If you work with customer lists, inventory records, employee databases, or any kind of structured information, this technique will be a game-changer for you.
🛠️ Step-by-Step: How to Create a Data Entry Form in Excel
1️⃣ Set Up Your Excel Sheet
First, create a clean table where each column header represents a field you want to collect data for.
Example: | Name | Age | Department | Email | Join Date |
Make sure to format it properly:
Use clear, short column names
Avoid merged cells in your table area
Keep your data range simple and consistent
2️⃣ Convert Your Range to a Table
Highlight your headers and the empty area below where your data will go, then press:
Ctrl + T
OR go to the Insert tab and click Table.
Make sure "My table has headers" is checked. Converting your range into a Table is crucial because the Form tool works only with Tables.
3️⃣ Add the "Form" Button
The Form tool isn’t on the Ribbon by default, so here’s how to add it:
Click the small dropdown arrow at the top left of Excel (Quick Access Toolbar).
Select More Commands.
In the dialog box:
Choose Commands Not in the Ribbon.
Find and select Form.
Click Add and then OK.
Now, you will see a Form button added to your toolbar.
4️⃣ Use the Data Entry Form
Click anywhere inside your table, then click the Form button. Boom! Your data entry form pops up.
Here’s what you can do in the form:
Click New to add a record.
Use Find Prev and Find Next to browse through records.
Click Criteria to search for a specific entry.
Click Delete to remove a record.
Click Restore to undo changes before saving.
Every time you add a record using the form, Excel automatically inserts it into your table.
Data entry form in excel | #shorts #exceltips #dataentry #excel #spreadsheetmagic #dataanlysis #excelinterview #exceltutorial #exceltricks
next video link
https://youtube.com/shorts/9Zu2dcCv-NA?si=0oxk1DWdataentry
Видео Data entry form in excel | #shorts #exceltips #dataentry канала EXCEL MAGIC
Data cleaning automated data entry form in excel automation tools data entry data entry form data entry form excel data entry form in excel data entry in excel data input forms data validation data validation tips data validation tricks excel excel automation excel data validation excel form excel forms excel productivity excel tips excel tricks excel vba form creation microsoft 365 microsoft excel microsoft forms productivity hacks shorts
Комментарии отсутствуют
Информация о видео
27 апреля 2025 г. 11:38:52
00:00:39
Другие видео канала
 MS Excel Time saving tips and tricks for date typing | excel | #exceltips #exceltricks #shorts
 Flash Fill full name in ms excel #excel#ctrl+e
 Stander data formating in excel | magic tricks | excel | #shorts #exceltips #excel
 Automatic sum function in excel |excel series magic tricks | excel sum function | excel tips#sum
 Text and ctrl+1 function to day month and year calculated in excel #excel #exceltricks
 Excel interview question | Excel interview questions and answers | Excel | #shorts #interview
 Excel interview question | ms excel interview question and answer | excel |#shorts #exceltricks
 Excel magic tricks | excel | #shorts #exceltips #excel
 Serial number typing best 5 formula | Serial number typing formula | excel | #shorts #serialnumber
 Automatically border in excel |excel series magic tricks#short#excel
 Top 2 Excel Shortcuts | Flash Fill & Quick Analysis Tool | Excel Tips & Tricks #ExcelTips
 Vlookup in excel | Vlookup | excel | #exceltips #vlookup #shorts
 Seqence function to create a serial number | excel series magic tricks#Excel Basic#seqence
 Excel if function magic | If funciton in excel | excel | #shorts #excel #iffunction
 Excel Text to Columns | Split Full Name, First Name, Last Name & Age Easily #Excel
 Excel interview questions | excel | excel interview question and answers |#excel #shorts #interview
 Stop Manually Highlighting in Excel! Use This Smart Trick Instead 💡| #exceltips #excel
 Employee attendance sheet in excel | #shorts #Exceltips
 "Convert Numbers to Words in Excel with VBA – Quick & Easy!" #Excelvba
 Rank in Excel | #shorts #excel #rank
