Making curved beams
A video of making curved beams.
First I started by making a simple draft and transferring it to an old and used up formwork plywood. I cut leftover beam parts from previous projects into blocks and attached them onto plywood boards along the line using four screws by block. Spacing between blocks is approximately 10 cm. Everything is sprayed with anti stick solution to prevent gluing to the mold.
Wood used in this project is spruce, planed to 9 mm which is required thickness for this radius of curve. After cutting to length, two component melamine glue is applied on each layer. Whole bundle is then clamped and left to dry over night. after removing from the mold, beams are planed to remove excess glue and to achieve desired thickness. Edges are rounded using a router with a roundover bit. Everything is sanded using first a belt sander with 120 grit sandpaper followed by orbital sander with 180 and 240 grit sandpaper.
Finally, wood is protected with three coats of stain.
Thank you for watching! If you liked the video, leave a like, comment and subscribe to see more projects in the future!
Music: Vexento - polen
https://www.youtube.com/watch?v=e8yu_k-JBvE
Видео Making curved beams канала lignum
Показать
Комментарии отсутствуют
Информация о видео
Другие видео канала
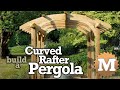 Build a Curved Rafter Cedar Pergola - Sawn Arches
 DIY LOUNGE CHAIR | Шезлонг - Мебель Своими Руками
 Glulam Structure Pt.1 - Making varying geometry beams
 Bent Wood Table // Bent Lamination // How to Bend Wood
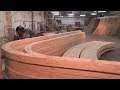 Jagram-Pro S.A. Manufacturer of bend & glued elements
 Making a Bent Lamination Wall Light
 How to Make a Curved Railing (No Steam Required)
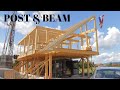 Post and Beam House Build
 Making siding segments- bent lamination
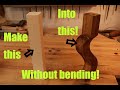 How to make curved legs from straight wood with no waste!!!
 Curved stairs
 5 KERF BENDING TIPS AND TRICKS! (For Beginners--Guide To Kerf Bending Wood)
 Production Process of Curved Beams.
 Steam Bending 2 1/4" Heavy Wagon Felloes for Heavy Wheels | Engels Coach
 Crazy Wood Bending Machines you didn’t know Exist
 how to cut a 4x6 decorative rafter tail for Pavilion
 Making a Rope Lounger Chair - Bent Lamination
 Making of wooden roof structure
 How to Cut Decorative Ends on Pergola Joists
 Steam curved bench