How to Use Page Setup & How to Print | Microsoft Excel
Watch more How to Use Microsoft Excel videos: http://www.howcast.com/videos/487207-How-to-Use-Page-Setup-and-How-to-Print-Microsoft-Excel
Learn page setup and printing in this Howcast Excel tutorial with expert Shir Moscovitz.
Hi, my name is Shir and I'm the founder and CEO of shirconsulting.com where we focus on converting the existing data from your business into massive savings and extraordinary profits. Today we're going to learn the basics of Excel. Let's get started.
So now that you have your EXCEL SPREADSHEET filled with data, let's try printing it out. Here are some basic tips to follow. First thing we're going to want to do is go to the View Tab on the RIBBON if we have 2010 or 2007 version of EXCEL. Here, we have a bunch of different choices - this is version 2010 - so instead of doing the Normal layout, let's go to Page Layout. That gives us a little preview of what it looks like on the page. We can scroll down and see the edges of the page. What's nice to have here is the Ruler which you can uncheck this way just to see in terms of the measurements of the page in inches in this case. The gridlines which of course are the EXCEL CELLS, the borders themselves. And the different Headers and the Formula Bar whether you want to see it or not.
So here we're going to have all this visible so we can add a Header just by clicking on it and saying - "Title of our Data" - and that will appear on the Header of every page. Or we could do the same thing with a Footer. We can do a page number for example.
So another place we need, want to go is the Page Layout tab which has a bunch of useful commands right here. So the main ones we're going to focus on are Margins to basically quickly decide how much space we want in between the content of our page and the edge. In this case it's Normal so it gives you the breakdown of .75" to the top, to the left, bottom and right. Here's the breakdown. You can choose Wide or Narrow. I'm going to choose Narrow so we get as much space as possible. We can change the Orientation so that it's Landscape or Portrait. If you want to make it all fit on one page, it's usually a good idea to hit Landscape in this case.
We're also going to want to go here and take a look at the Scale to Fit option. If you have a lot of stuff on your SPREADSHEET and you want it to fit without having to re-size or change the COLUMNS, you can simply say - "I want it to all fit on one page of Width." So I don't care how many pages it goes vertically as long as it's one page Wide. That's all I want. And that limits it to that, scales it in order to make it fit. So it literally shrinks down everything so that it fits into that criteria. I am going to Automatic so it doesn't really do anything. You can also say - "I don't care how Wide it is, I just don't want it to be any more than one page high." And then you can limit it that way. The other option is to simply take the Scale: Percentage and say "I want to take whatever I have now and make it 50%" and hit ENTER and now everything is smaller when we print it out. So I am going to hit CTRL+Z to undo that.
Another way to get to all these options is to hit CTRL+P or PRINT or we can also do the File and Print over here. Right, so if I did it with the keyboard it would be CTRL+P - brings us to what's called Backstage View and we have a bunch of these options here as well. We have the - Do we want to print this Active Sheet, the Entire WORKBOOK or just a Selection of CELLS. We're going to choose the same Portrait/Landscape option here, Narrow Margins. And we can also get more options with Page Setup. Now we have these tabs. Same things that now look familiar.The portrait or Landscape. Adjust to what percentage of the Normal size. So you'll start to become familiar with all these options. The Margins - you can customize it exactly to what you want by increasing or decreasing with the mouse or you can type in .3 and hit ENTER and then it takes effect. So you really have full control over how that works. You can also choose a Header and a Footer and there's more options now so that you can say in the Footer - I want to choose Page 1 of whatever, whatever the, how many total you have. You can even choose a different odd and even page and a different first page. These are very useful when you want to have the title page not have a number and you want every other page to do that. And that's how you can customize those options. As soon as you're done, choose your printer and then PRINT and you're all set. And those are some of the basic tips for Page Setup and Printing in EXCEL.
Видео How to Use Page Setup & How to Print | Microsoft Excel канала HowcastTechGadgets
Показать
Комментарии отсутствуют
Информация о видео
Другие видео канала
 How to create Data Entry Form in Excel - Ms Office?
 Print & Page setup Excel 2016 in Hindi
 003 - Excel '07: Printing oversized spreadsheets
 Advanced Excel - Creating Pivot Tables in Excel
 Slaying Excel Dragons Book #9: Excel Page Setup For Reports Large or Small
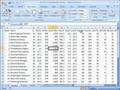 Scale a spreadsheet to fit in one printed page in Excel
 Your Excel Printing Problems, Solved!
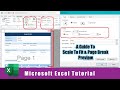 Page Break Preview & Scale To Fit | Microsoft Excel 2016 Tutorial | The Teacher
 Excel Magic Trick #188: Page Setup Across Multiple Sheets
 Tutorial - Excel 2010 - 10 Things you must know
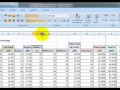 Example: Fitting your Excel spreadsheet on one page
 In Excel: Add the date, time, filename, and page numbers to a header or footer in Excel 2010
 How to build Interactive Excel Dashboards
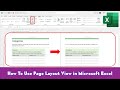 How to Use Page Layout View in Microsoft Excel 2016 Tutorial | The Teacher
 Fit All Excel Columns on One Printed Page
 How to Print Preview and Taking Print in MS Excel 2007 in Hindi Part 13
 Excel 2007: Printing
 Excel 2013: Page Layout
 How to Print an Excel Spreadsheet on One Page
 How to Create and Format a Blank Form Using Microsoft Excel Spreadsheet