RV Roof Repair: Installing Roof Trim
For a detailed writeup in regards to how to install a new roof on a camper or RV, just out this guide: https://www.remodelyourrv.com/how-to-install-an-epdm-roof-on-a-camper/
Here is the rubber roofing kit I purchased for this project: https://amzn.to/2F4KIbk
The rubber (EPDM) roof is finally on and now it's time to reattach the trim around the sides and the termination bars. We also get to work on the molding/insert that fits into the trim to cover up the heads of the screws.
This isn't a complicated process, it just takes a little effort and an extra set of hands is a big help.
Be sure to apply a nice even layer of butyl tape the entire length of each piece. When securing the trim, pull down the EPDM membrane to create a tight, but not stretched, fit.
Once the butyl tape is installed, reattach the trim using your cordless drill and the proper screws. Start from the middle of each trim piece and work your way around the entire RV completing this process. Now it’s time to seal up all the trim by using sealant on the front and rear termination bars.
Cut excess roofing material from underneath the trim to create a nice, finished look.
Видео RV Roof Repair: Installing Roof Trim канала Remodel Your RV
Показать
Комментарии отсутствуют
Информация о видео
Другие видео канала
 How to Remodel an RV: Laying Peel and Stick Tile in an RV
 RV Remodel: Interior Wood Staining (countertops, tabletops, and side tables.)
 How to Remodel an RV: Priming and Painting
 RV Water Damage: Rebuilding the Bedroom Floors, Bed, and Storage
 RV Water Damage: Removing Bed and Replacing Flooring
 How to Remove Valances & Blinds in an RV
 RV Water Damage: Storage Flooring Repair
 RV Remodel: Repairing Bathroom Walls and Ceiling
 RV Remodel: Rebuilding the Frame and Walls From Water Damage
 How to Repair and Replace an RV Roof: Start to Finish
 RV Water Damage: Replacing and Rebuilding the Frame
 RV Remodel: Kitchen Stove and Cabinet Removal
 RV Remodel: Removing and Rebuilding RV Slide Out
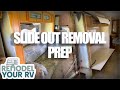 RV Water Damage: Prepping to Remove our RV Slide Out
 Predator 3500 Watt Generator - Unboxing, Prep, & Startup
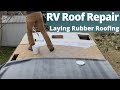 RV Roof Repair: Installing a Rubber Roof on a Camper
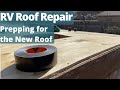 RV Roof Repair: Prepping to Install a New Roof
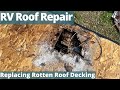 RV Roof Repair: Removing and Replacing Rotten Roof Decking
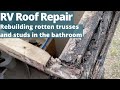 RV Roof Repair: Rebuilding Studs and Trusses in Bath
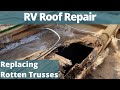 RV Roof Repair: Rebuilding Rotten Trusses